
A Comprehensive Guide to Installing Tile On Floors for Beginners and Home Owners
Anyone can learn how to install tile but not everyone will invest the time to ensure that their installation will last the ages. If you are interested in learning some proper techniques and professional tricks for your upcoming tile project, you’ve come to the right place.
This guide is by no means a comprehensive tutorial that will cover every single thing about tiling – that’d require a library of textbooks – not one small webpage.
However, after reading this entire guide, you’ll have a healthy understanding of how to install tiles, what tools are required and the various steps involved in installing porcelain, stone or ceramic tiles. From floor prep to grouting and sealing, you’ll learn it all.
At various points of this guide, there will be links to other resources for you to dig further into a certain tiling topic. For example, at the grout sealer stage, there will be links to a comprehensive guide to sealing grout and a product round up of the best sealers available. Look for the highlighted text in red.
Get your reading glasses on, it’s time to start.
Required Materials & Tools
Not every tile job is the same, but here are the basic tools and materials you can expect to use during your installation.
Substrate Preparation & Planning
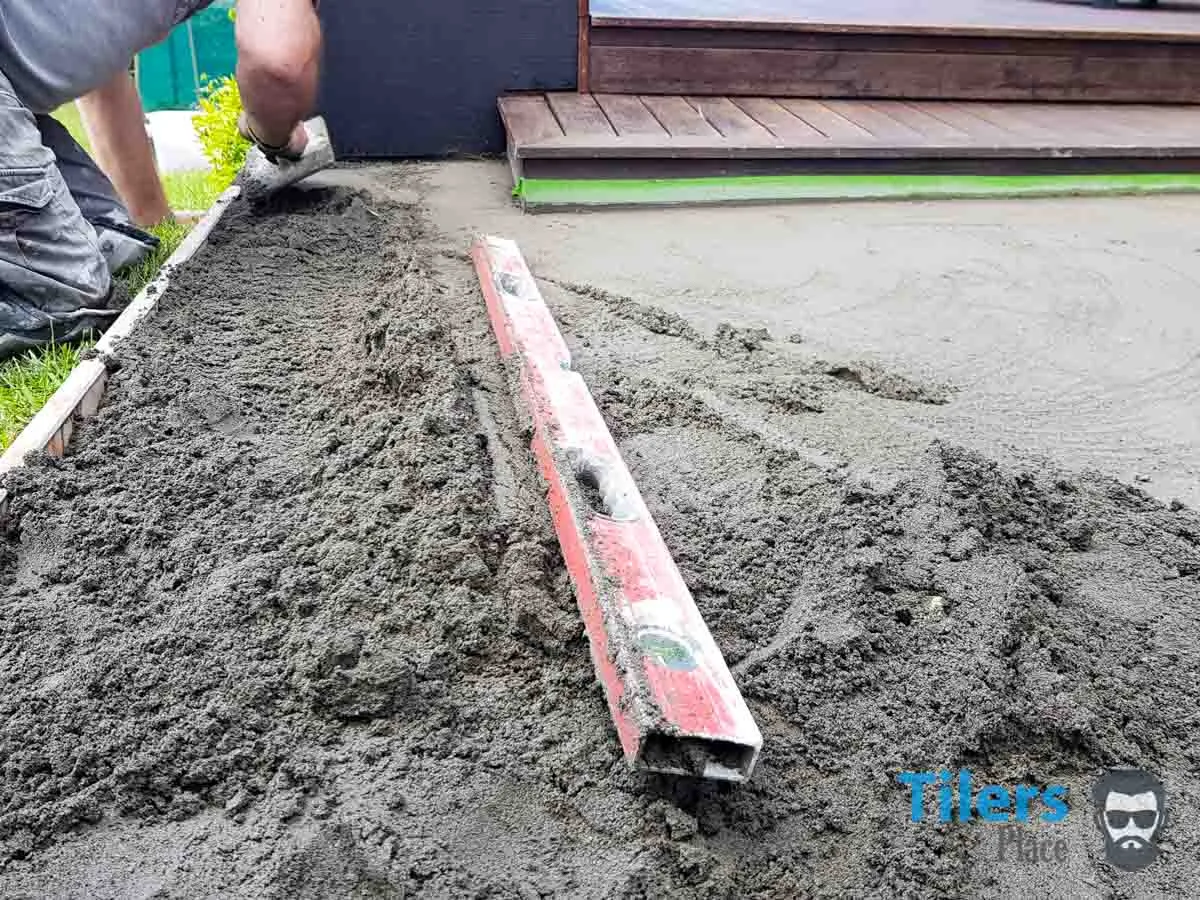
Before any tiles are down, you need to make sure your surface is ready to accept tile. Find out what type of subfloor you have first and use that to decide what kind of underlayment you require. Run a spirit level over it to dectect any trouble spots that may require SLU.
Once your underlayment is in place, you need to ensure the surface is clean and free of any oil and debris. If you are tiling straight over concrete, it’s a good idea to run a diamond cup wheel fitted to a grinder over it. This will remove any scum, high spots and provide a grippy layer for your thinset.
Lastly, apply the necessary Tile primer over the surface. These steps are required before you apply an underlayment like SLU and after as well. (Applying primer.)
Finding A Tile Layout
The last thing anyone needs is finding they need a sliver cut when half the room is already tiled. It pays to plan out your tiles before starting. Take as much time as you need until you are sure your happy with the outcome.
Remember that an odd tile layout can make a room look off or out of balance. If you have an eye for detail, this will drive you crazy on a daily basis.
To begin, find the center of the room or area you’ll be tiling. Simply measure the length of the wall and divide it by half, mark the point with a carpenters pencil. Repeat this process on the opposite wall and make another mark.
Now you can setup your laser level to follow those two points. Alternatively, a chalk line works ideally for this. Snap a line across the two points you’ve marked out.
Repeat this on the other two walls and you should have two lines that cross over each other in the area. These will be your reference points and lines to follow with your tiles.
Next, you can dry lay tiles starting from one of the grid lines and continue until you reach the wall. Be sure to use spacers. This process will show you if you have any sliver cuts at the ends of the room. A general rule of thumb is to avoid cuts of 10% of the tile size or smaller. Ideally, you want cuts bigger than half a tile.
If you do, repeat the process but start by placing the middle of the tile on one of the grid lines.
Once you have that figured out, change direction to ensure the other end of the wall doesn’t have a sliver cut either.
Another way of laying out is going with the center of a feature in the room. If you want the tiles to look symmetrical in front of a large fireplace for example, measure the center of the fireplace and continue from there. In some cases, it actually looks better in the long run to center from a feature than from the wall.
There is no right or wrong in this regard and is generally at the home owners (yours) discretion as to what they prefer.
If you are using border tile and field tile, this is the time to cut them to size and figure out their layout as well. Generally laying the border tile first and filling it in with field tile is easier rather than setting both at the same time.
Installing Floor Tiles
With the preparation work done and required materials gathered, you are ready to start tiling. Pretty soon you will understand and appreciate all the preparation work that you have just completed.
Every little action beforehand pays off when you’re in the thick of it, laying tile and trying to make them level.
Before mixing thinset, setup a mixing and cutting station somewhere outside. Cover the ground with a large tarpaulin or drop sheet to avoid staining your driveway with globs of thinset and copious amounts of dust.
Prepare one bucket of clean potable water and another that will hold your adhesive. It’s important you read the instructions on the packaging and follow the manufacturers guidelines, failure to mix the product to the correct ratio may result in your adhesive failing in a months time.
Note down the open times and required curing times. You don’t want your thinset “skinning over” whilst you are tiling. This makes it too dry and will either fail to grip the tiles or the substrate. This is a common cause of tile failures.
Bucket life of the product greatly depends on the type of thinset (whether it’s quick-set or not) and the ambient humidity and temperature. On average, you have anywhere from 25-40 minutes of open time before skinning becomes a problem.
You can visually inspect the thinset to see if it’s drying out as some areas will be lighter colored than others, alternatively you can insert your finger into the mix. If it comes out dry you’ll need to dispose of it and make a new batch. It may seem wasteful but its cheaper than lifting up all the tiles in two months time and retiling.
Lastly, cure time refers to how long the thinset takes to dry before traffic can walk on it. Mostly its about 24 hours depending on humidity and temperature. In colder months, it can be 48.
If you are tiling a kitchen and will be rolling a heavy refrigerator back into position, wait at least a week before dragging it across your new tiles. Trust me, it’ll save a lot of heartache when your grout starts cracking in a couple weeks time. This will ensure your thinset is thoroughly dry and can handle weight being dragged across it.
Spreading Thinset
You’d be surprised how many tilers (both new and old) get this one wrong. Spreading thinset is not simply slopping some product on the floor spreading it around and dumping a tile into it. Its a science and crucial step like everything else in tiling. If you want your installation to survive daily life, you want to do this right.
Thinset is the butter for the sandwich in the tile world. It does the hard work of grabbing those tiles and not letting go. No matter how hard pressure and water tries to make it let go. Don’t forget it also has to adhere properly to the substrate as well. If it fails to hold either of those two things, the tiles fail and either they’ll crack, fall off. The first signs of this is the grout beginning to crack.
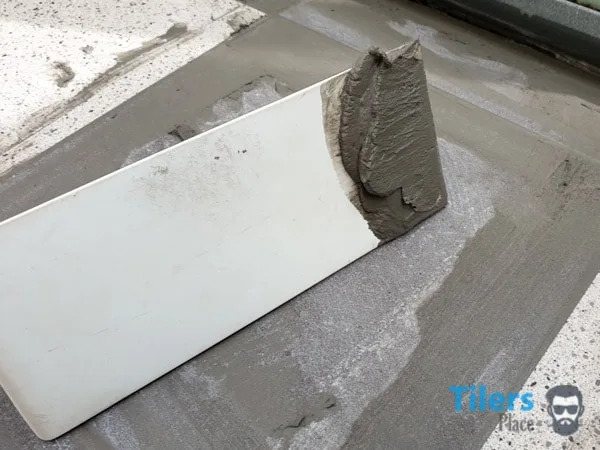
Apply your thinset to the underlayment/substrate with your notched trowel. You want to make sure you have straight lines running in one direction only. Use a 45-Degree Angle to ensure you have a thick enough layer. Spread out enough to cover a few tiles, you don’t want it skinning over before you have laid the tile in it.
If working with large format tiles, you need to back butter the backs of each tile as well. This ensures you have proper coverage and a proper bond.
Laying The Tiles
Are you still with me? Good, because its finally time to do the exciting bit.
Gently place a tile down into the thinset and then press it down with even pressure across the surface. Wriggling it will allow the thinset ridges to collapse and fill in most of the voids created by the notched trowel.
Large format tiles usually require a tile vibrator to proper bed the tile into place. A rubber mallet can also be used.
Be careful not to press one side down too much as it won’t be level with the following tile.
Add a spacer and tile leveling wedge (if using a tile leveling system) to all sides of the tile and press another tile into the adhesive.
If you want to check for proper coverage, lift one of your tiles up and inspect the underside. You want atleast 80-90% coverage of thinset on the tile to guarantee a proper bond. If you are lacking, you may be using too small of a trowel or have a trouble spot in the floor. Add adhesive as needed and continue.
Use your wet sponge and clean up any excess adhesive that gets on the tiles or between the gaps. The cleaner you work now will cut down on the cleanup when it comes to grout. Its easier to sponge away adhesive then cut it away later.
A cleaner job also looks more impressive to the client as well (your spouse).
Whenever you get to a tricky cut or anything that will make you pause from laying tile, be sure to scrape up any spread out adhesive and return it to your bucket.
Continue laying tiles and ensure you are sticking to your guidelines. Throw a level over the tile surface from time to time to check if your surface is flat. Remember that most homes are never 100% level. Your tiles likely won’t be dead flat but you want to ensure that the whole tiled surface is following the contours of the substrate and not going off on a completely random angle.
A common mistake is not pressing the tiles in deep enough and with every row, your tiles get slightly higher and higher. After a few feet, you’ll be adding more and more adhesive to follow that level without realising the problem!
Cutting or shaping your tile can be done with a tile saw, hand held tile saw/grinder with a diamond blade or tile nippers.
Lastly, at the end of the day, scrub up your tools properly with a scrubbing brush. Dry thinset will ruin your tools and make the next job that much harder and annoying. Do the same with your thinset bucket.
Avoid dumping the waste water down the drain as it will harden in the pipes and provide you with a hefty repair bill when it clogs up.
The Grouting Process
After all that work preparing and installing your tiles, it’s time for the final step in the tiling process. Alongside providing aesthetic value to your installation, grout also does important work by strengthening your installation.
Preparing Your Tiles For Grouting
The first step is to remove any excess thinset that got into your grout joints during installation. My favorite tool for this is a utility knife with a sharp blade. Simply cut out the thinset. It usually crumbles away quickly. Older installations will require more muscle power as the thinset had time to harden.
Surface contamination can be removed with a damp sponge but most of it should have been wiped away whilst you were tiling.
Check your spacers are deep below the grout line otherwise remove them with your knife. Be careful to remove them gently as some tiles will chip if a spacer is forcefully removed. The last thing you want to do is replace the tile.
Once you are done, vacuum or sweep away all the debris. Ensure your lines are clean and free or any loose particles as they’ll effect the overall grout strength.
If you are working with porous or handmade tile, this is the ideal time to apply a grout release formula. Allow it to dry before continuing. (Check my guide for my details.)
Now it’s time for the fun part!
Assemble your grouting materials and read the manufacturer’s recommendations on mixing your grout. If your grout is premixed you can skip this step.
I mix my grout by hand using a trowel but large batches can also be mixed with a small paddle mixer and an electric drill set to it’s slowest setting.
Add clean drinking water to your water bucket first and then pour in a small amount of powder. Mix what you have and check for peanut butter consistency. If it’s off, add more powder or water as needed.
You want to mix the grout thoroughly to allow all colored pigments to dissolve and mix into the overall mixture. Failure to do so may result in random colors appearing in your grout or it being discolored.
Remember to allow the grout to slake and remix it before continuing. Some grouts may require a touch of water to get them soft and workable again.
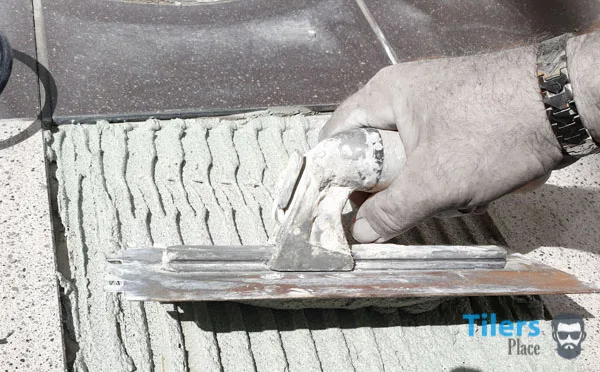
Grab some grout from your bucket using a rubber float and apply it to the surface. You want to hold it at a 45° angle and forcefully push the grout into the gap. Long strokes are good to establish the base, you can then use the shorter edge of the float and push the grout in properly.
Use this edge to form and shape the grout line and remove any excess using the longer edge.
It may seem difficult at first but with a little practise, you’ll get the hang of it in no time. Removing any loose bits of grout from your rubber grout float and getting fresh grout also helps in application.
It’s easier to work within arms reach of where you are kneeling or standing. So once you’ve applied grout within your reach, switch to washing..
Clean out your grout sponge in clean water and squeeze it until it’s slightly wet. Clean off the excess grout with circular motions and take care to smoothen and shape your groutlines. These will likely be the final result so make sure they are uniform. Two or three wipes should be enough to clean up most tiles.
Don’t go wiping the grout endlessly to remove every imperfection as this will introduce too much water to the grout and wash away the pigments. This is an easy way to get grout discoloration.
When the grout has time to settle and dry, you will notice a grout haze has formed on the tiles. This is perfectly normal and is the final step of grouting. Use a clean microfibre or cotton towel to remove this haze. It should come off easily but some matte finish tiles will require a bit of effort.
A grout haze remover applied previously will greatly aid in this process as some tiles retain the haze and are very hard to scrub free. Every professional has a few horror stories of stubborn tiles like this.
Be careful when wiping around the groutlines as you may damage the grout.
Optional Final Steps
3 Comments
What goes here? – February 27, 2022
Hi Carl,
You mention to gently place the tile on the mortar; is it not the function of the indentations made by the trowel to create a suction that helps hold the tile in place? In order to create this suction, the tile should be dropped or quickly placed onto the thin set. Appreciate your input on this concept.
Carl Anders – March 9, 2022
Hi Who,
My word use may have not been the best there. You want to place the tile into the mortar and press it in with some pressure but not so much as to mash the tile in deeply and create an uneven surface that will be hard to match with the next tile placed. Obviously you can’t just place the tile on top of the mortar without pressing but pushing too much will also be detrimental to the process.
Maybe the word use should be “place the tile in the mortar and apply moderate pressure to seat the tile and create a suction bond.”
I’ll pass it onto my editor (my wife) to see if she can fix that up for us.
John smith – December 5, 2023
Hello! a question about laying-I’ve seen a lot of videos on YouTube where they make a semi-dry floor screed and immediately glue the tile without waiting for the screed to dry. And won’t the tile fall off in this case?NT
Frank Leone – April 12, 2024
I want to tile my Lanai. I’ve seen where tile was installed without using spacers or grout. Any thoughts on this application?
Carl Anders – April 15, 2024
Not using spacers or grout goes against the very fundamentals of tiling and I would never endorse it – under any circumstances.


Leave a Comment
Your email address will not be published. Required fields are marked *
Comments are currently closed for new submissions.