Tilers Place is reader-supported. When you buy through links on this page, I may earn an affiliate commission on qualifying purchases.
If tile backsplashes aren’t your thing or you want to add a modern touch to your kitchen or bathroom – a solid glass backsplash is your best choice!
It’s easy to install, cost-effective and the colors available can match up with your cabinets or other painted surfaces.
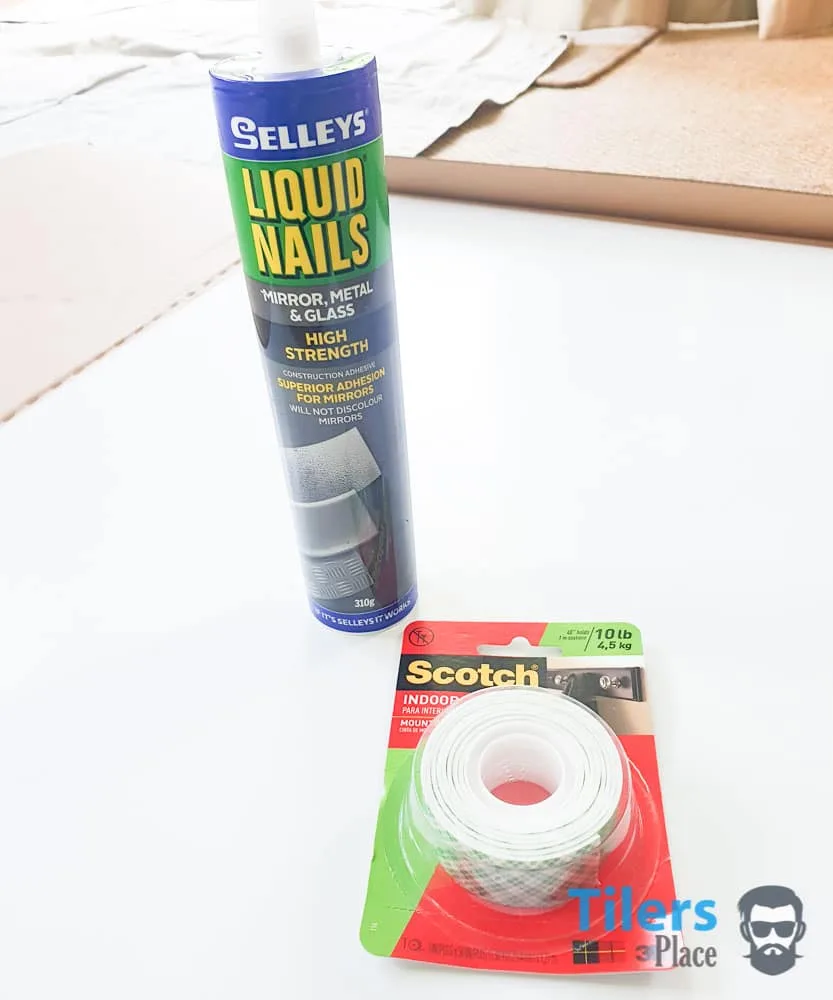
Tools Required
How To Install Glass Splashback Part 1 – Surface Prep
You want to have a nice, clean surface before mounting your solid sheet of glass. Wall surfaces in the kitchen are especially prone to getting grease and dirt splashed on them from cooking on the stove.
Grab some sugar soap or prepacked surface prepare wipes and thoroughly clean the area you will be installing the glass. Give the surface plenty of time to dry before mounting the glass.
Please note:
- If the surface you’ll be mounting the sheet glass to is bare, plaster, concrete or brick – be sure to prime the surface first with paint to ensure the surfaces don’t damage the back of the glass.
- If the surfaces have been freshly painted, wait up to 3 weeks for the paint to cure properly. This is to ensure no solvents or other products come in contact with the silicone adhesive you’ll be using.
How To Install Glass Splashback Part 2 – Prepping The Glass Backsplash
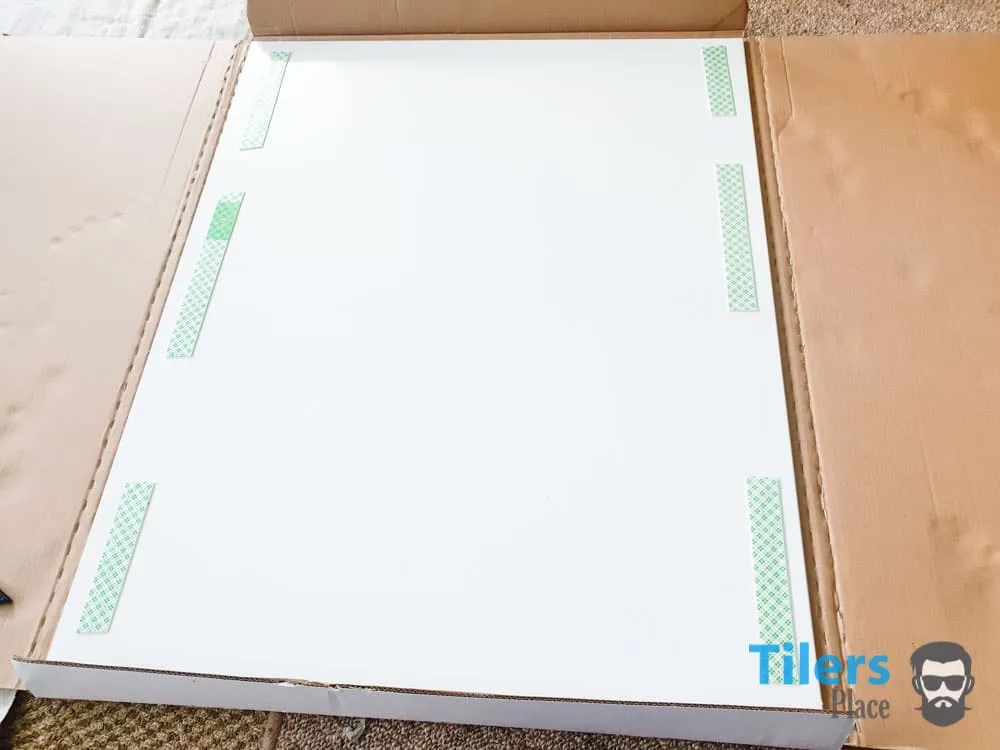
Lay your piece of glass flat onto a cardboard surface. A worktable or floor should provide plenty of room to work.
Next, lay strips of double sided tape at least 2 inches (5 cm) away from the edges of the glass.
The double sided tape helps hold the solid glass backsplash in place while the silicone adhesive cures.
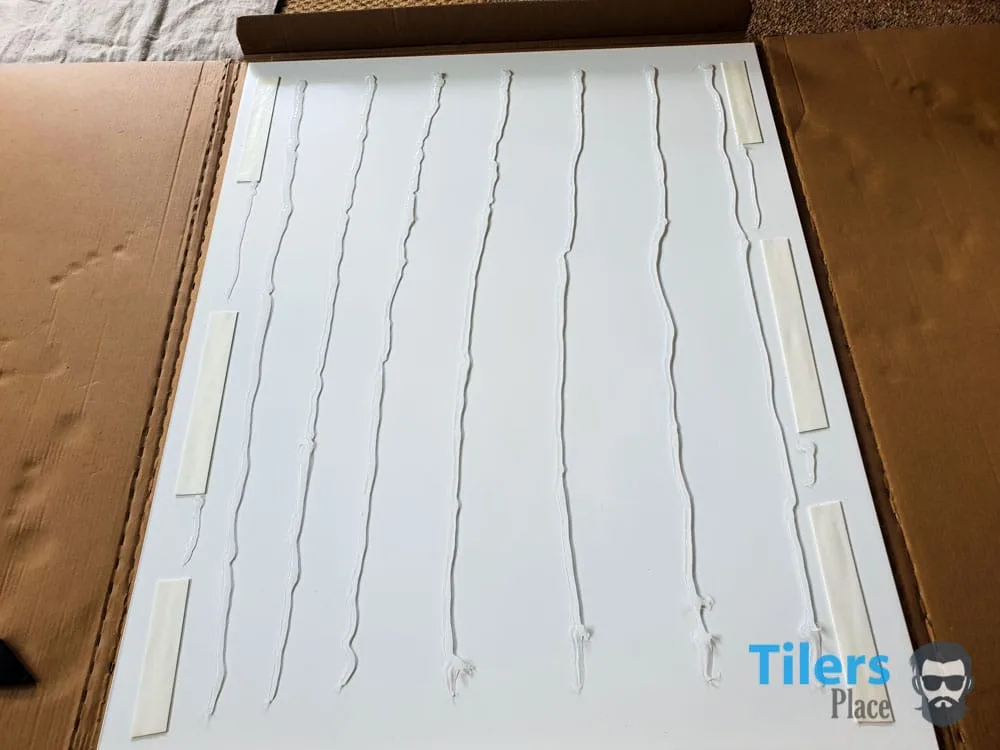
Once you have completed that, get your caulking gun with the silicone adhesive and lay parallel beads of silicone all the way down the glass. Ensure you leave a 2 inch gap at the top and bottom of the glass.
Continue to apply the silicone in 3 inch gaps across the entirety of the glass.
Be sure to make the silicone beads thicker than the strips of double sided tape. This is so the silicone contacts the surface properly.
Once you have completed that, you can remove the outer strip of the double sided tape and get ready to install the glass backsplash.
How To Install Glass Splashback Part 3 – Prepping The Glass Backsplash
This next step is easier with 2 people.
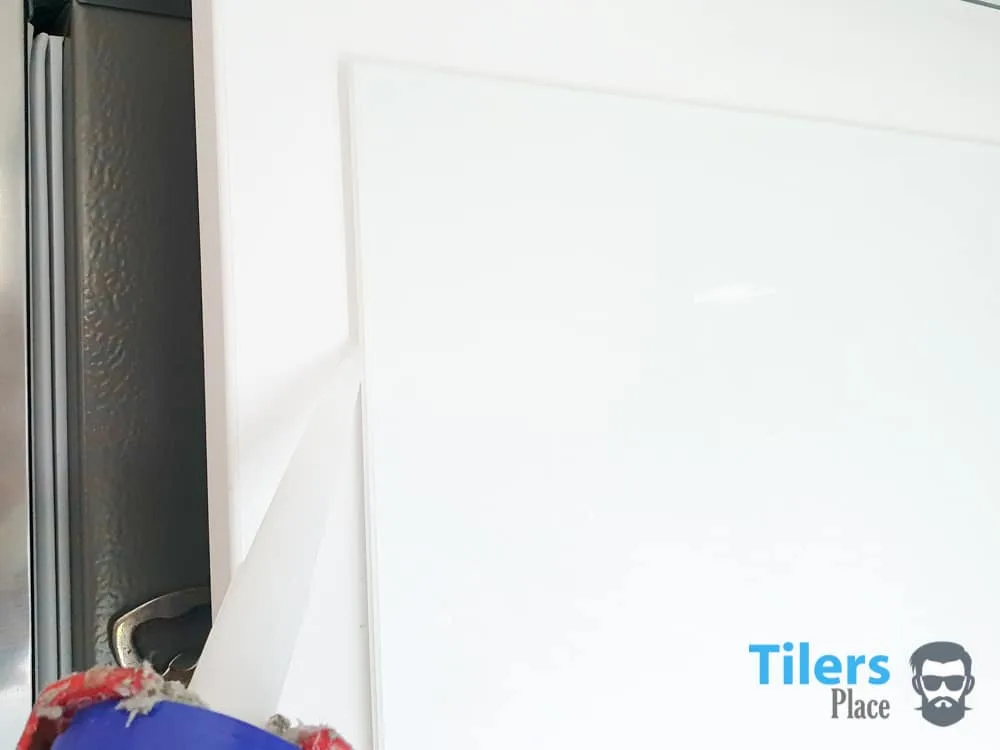
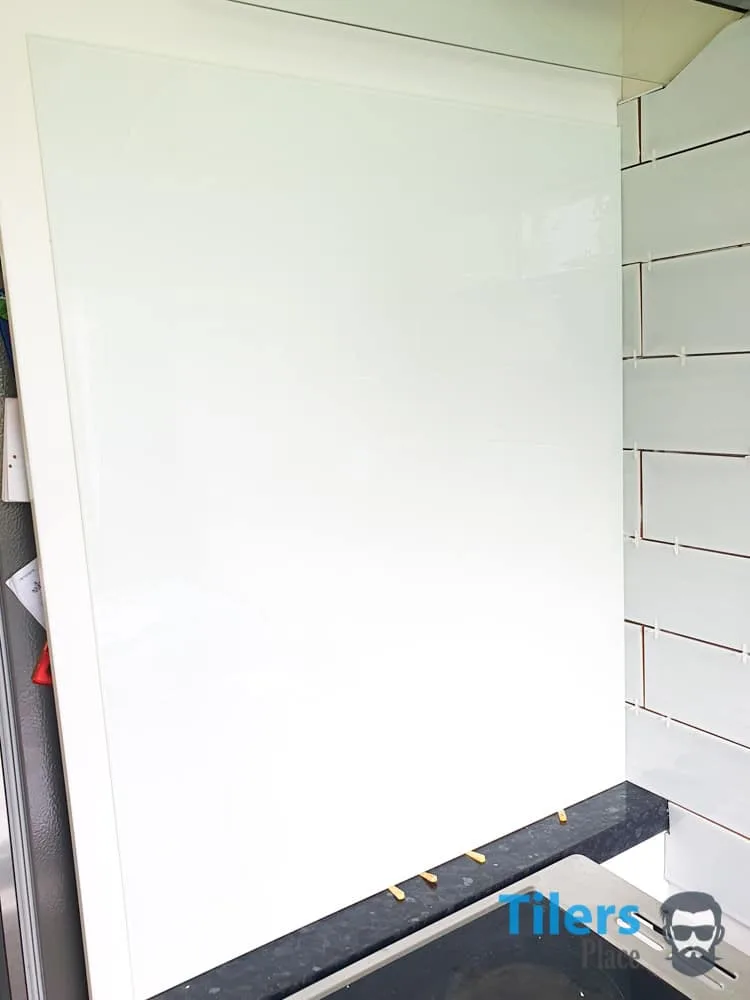
One person can align the piece of glass where you want to install it, whilst the other places the 2mm packers against the wall. Once they are in place, the first person can gently place the glass onto the packers and being sure the glass is aligned how you want it – press the glass against the wall.
You can use a small spirit level to ensure the glass is perfectly straight, if it isn’t – you can use the backers to adjust the height of the glass. Wedge tile spacers are great for this as they are sloped and allow for easy height adjustment.

With the glass in place, press the glass all over it’s surface to ensure the silicone adhesive spreads out and creates a good bond with the surface.
Wait at least 72 hours for the silicone adhesive to cure properly. Then, remove the packers for the final step.
Fill in the edges of the glass with the silicone adhesive to seal off the glass and add further strength to the installed glass. This will also prevent any dirt or debris from entering behind the glass.
You can add masking tape around the edges of the glass and wall to prevent silicone going where you don’t want it to. You can smooth the silicone with a wet finger or a round tool dipped in glass cleaner.
That’s it!
You now have a beautiful solid glass splashback in your kitchen or bathroom. Enjoy an easier life with no grout lines to maintain and a surface that can be easily wiped off and restored to original condition with simple household products.

Leave a Comment
Your email address will not be published. Required fields are marked *
Comments are currently closed for new submissions.