Tilers Place is reader-supported. When you buy through links on this page, I may earn an affiliate commission on qualifying purchases.
Want to learn how to save time in your grout haze clean up and ensure you avoid any costly mistakes? This article is for you!
Grout haze is the silent killer that can ruin any beautiful tile surface. Striking on any tile from porcelains to natural stones, it can destroy the look of your new surface and cause hours of scrubbing and frustration.
Today you will learn the simple steps to prevent grout haze and ensure your new tile finish looks it’s very best, without an ugly fog of grout haze.
It’s time to stop grout haze in it’s tracks, once and for all.
How To Prevent Grout Haze – Quick Answer
Need to know how to prevent grout haze immediately?
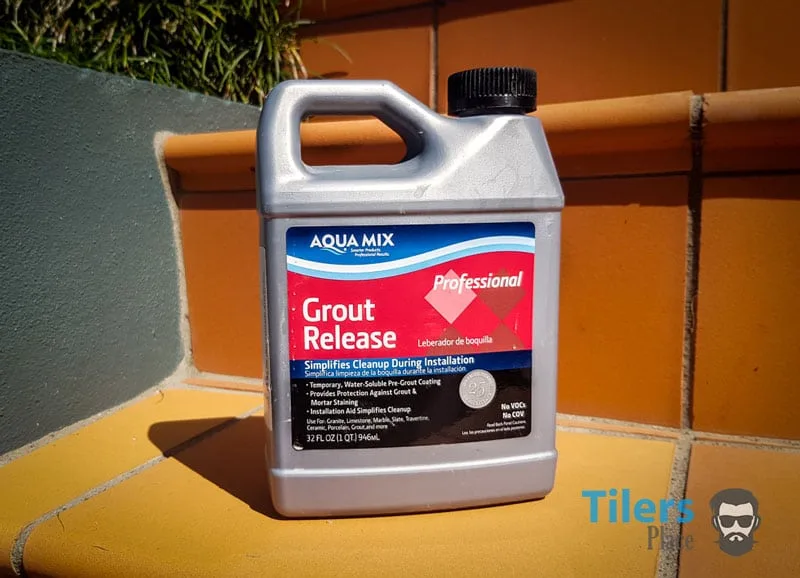
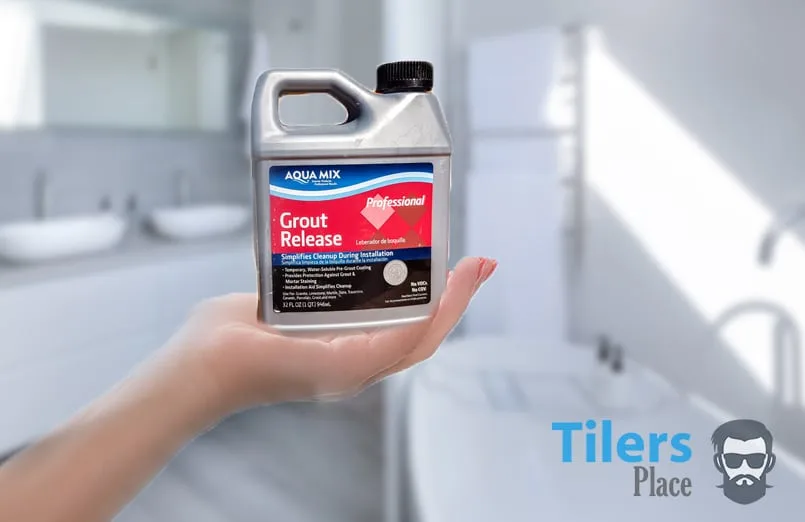
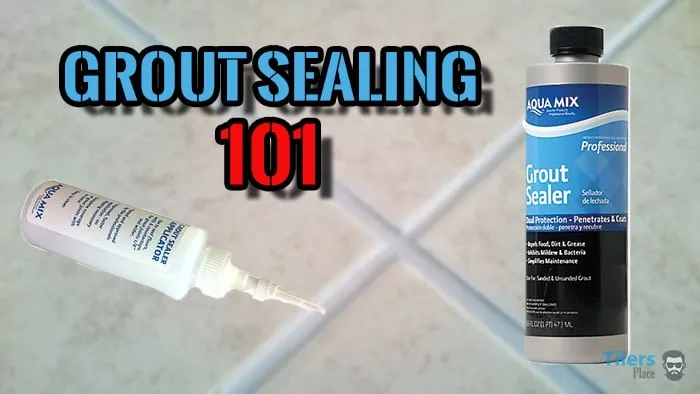
Then the answer is this special solution called Aquamix Grout Release.
Apply it half an hour before grouting with a small paint roller and your good to go. It will apply a protective film over your tiled surface and prevent grout haze from adhering to your tile.
It prevents grout haze from any type of grout, sanded, un-sanded and even epoxy grout! If you are nervous about epoxy grout haze, then this is your best protection against it.
The grout release washes off alongside the grout haze during the washing process of grouting and leaves you with the original tile finish.
Here are the two products you need to buy, I tracked down the cheapest prices so all you need to do is add to cart ✓
1: Aqua Mix Grout Release
Aqua Mix Grout Release is designed to use on:
-
Textured, porous stone
-
Masonry surfaces such as brick, slate, slumpstone, concrete block.
-
Natural Stone
-
Unpolished, porous or textured Porcelain and Ceramic tiles.
Check Price – Aqua Mix Grout Release Gallon
2. Mini Paint Roller Set.
The easiest way to apply grout release is with a mini paint roller!
You can grab a total set with more than enough rollers to cover ANY size of tiling job for your grout haze prevention.
Here is a quick and easy set you can throw into your cart along with the Aquamix Grout Release.
I personally use this set to apply Aqua Mix grout release on all my jobs and it works great.
Easy to apply the right amount of grout release formula and you get full coverage of the tile.


Check Price – Mini Paint Roller 11 Piece 30013A
Those two products should set you well on your way to prevent grout haze.
Read the instructions on the bottle and go for gold!
Do you know the best part?
You have already done the hard part by finding my grout haze prevention guide and buying the products.
The easy part is ahead of you now, congratulations!
You have just prevented grout haze build-up on your new tiles.
Do you want to know more about grout haze prevention and learn some cool stuff?
Great!
Let’s get into the meat of this guide and really dig deep into this grout haze mumbo-jumbo and talk about why we get grout haze and how we can prevent it appearing on our beautiful and expensive tile.
Why You Need To Prevent Grout Haze
So you just spent a couple weekends tediously picking out your new tile.
You went all over town checking out different stores, tosing up designs, consulting experts and color charts and finally made the decision.
You love the tile you chose, the pattern and color you feel is unique and will work great with your home.
Now, what if I told you that tile you love so much WILL NOT look like that after it’s grouted?
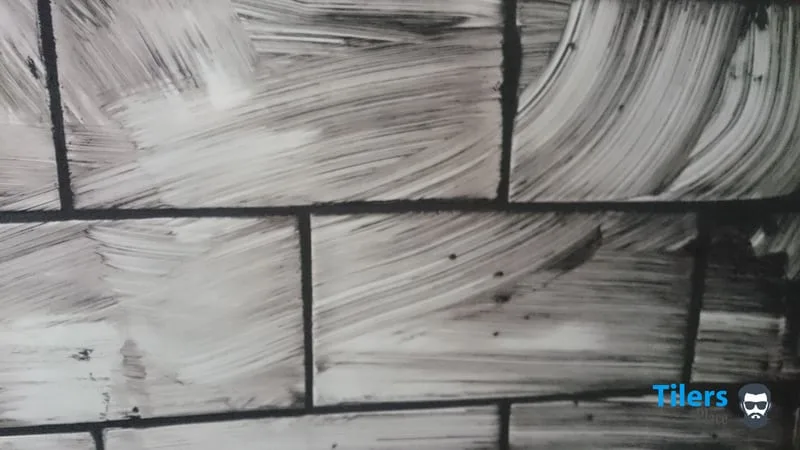
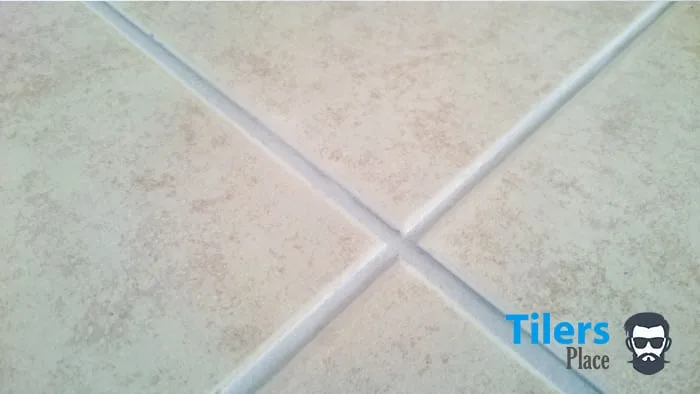
Instead of nice polished look, you will have a patchy grey fog over your tiles that dulls the look and every swirl mark from the sponge during the grouting process is visible?
How about your grout turning out patchy, some areas more washed out than others and dark grout turning a chalky white?
You won’t be so happy then will you?
The expensive home improvement job suddenly looks like a big mistake and a total waste of money.
Grout haze can cause this.
Trust me, I have been tiling for over 25 years and have seen it happen time and time again.
Without proper grout haze prevention techniques, your tiles could end up looking like an embarrassment and the grout finish will end up like a patch quilt of multiple shades of grey and white.
That’s why need to prevent grout haze.
I am not exaggerating the effects of grout haze to scare you into buying something or to stop you getting tiling done in your home.
I am trying to prepare you for what could happen if you do not take the proper steps to prevent grout haze and teach you everything you need to know to avoid these things.
How Can Grout Haze Ruin My Tiles?
To understand why grout haze is a problem, you first need to understand what grout is.
Grout is, in it’s simplest explanation, a pliable cementitious compound.
Modified with polymers, mould inhibitors and coloring oxides to create a product that not only is easy to work with when wet, but also tough and resistant to external influences to retain it’s color and flexible enough to withstand traffic.
One of the key components of grout is cement.
It’s this cement that dries off on the surface and texture of your tiles and creates that dreaded grout haze we all know about.
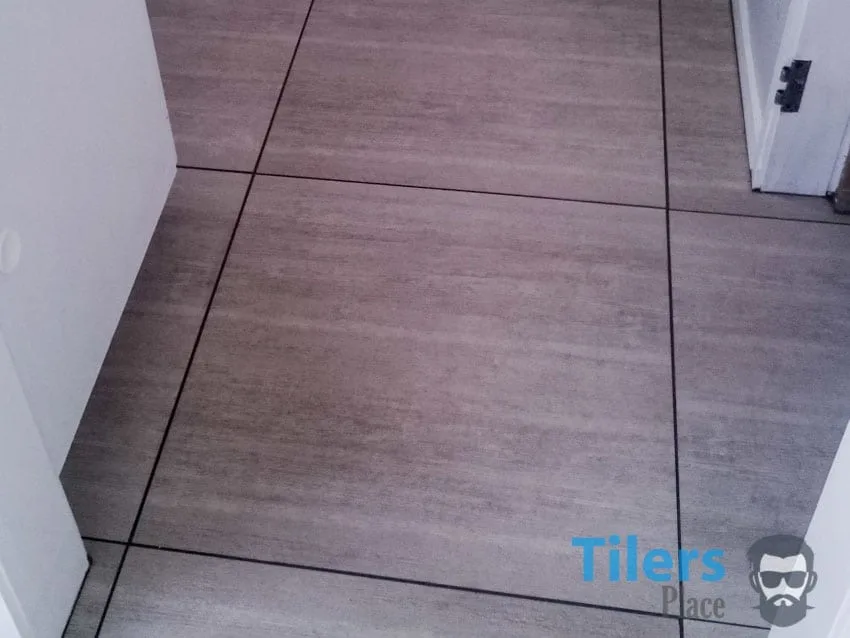
Grout haze is usually not a problem on polished and smooth ceramic and porcelain tiles.
It dries off and you can easily buff it off with a soft cotton rag or similar and that’s the end of it.
It is when you use more creative and unique tiles like porous natural stone or tiles, pavers, unsealed porcelains and especially non-skid outdoor tiles that grout haze becomes a problem.
Do you know what all of these types of tiles have in common?
Their finish.
The finished surface of these tiles or stones are all porous or textured.
This surfaces provides major differences over a smooth and polished conventional tile.
The pours and grit of the surface allow the cement in the grout to embed itself deeply into all the holes and crevices.
Since your sponge or cotton rag cannot access those holes as easily as the cement can, you will miss them during clean up and find it hard to wipe them away.
No amount of buffing or wiping with water will fully remove them as your sponge or cloth is going on the top of the tile while the cementitious grout haze is in the deeper crevices.
Of course, one way to remove grout haze is with thoroughly washing it off with water. So you go and wash your tiled surface again with clean water in hopes of washing away the grout haze.
This works – but brings up another big problem.
While washing the tile surface, you are also washing the color out of the grout in the tile gaps.
Excess water use when washing up and tooling grout is a big contributor to patchy grout color and weakened grout.
So while you might be cleaning up some of that grout haze, you are also washing away the coloring agents in your grout and when the grout eventually hardens – it will be patchy in place and a dirty white crust will form on top of it.
This is hardly the look you’d like, is it?
So remember; it’s not just the grout haze on the tiles surface that can ruin your tiles, it’s also the grout itself that can come out horrendous if you try washing it off with conventional means.
Now, if you happen to find yourself in that situation, with grout haze ruining your tiled surface; stop reading this guide right now and head over to my grout haze removal guide.
Also, do not introduce any more water to your grout until it’s properly cured!
Scroll down to the section about grout haze, get the products I recommend and follow the detailed instructions.
You’ll be able to remove the grout haze quickly and get that tiled look you deserve.
Now that we know why we want to avoid grout haze and the damage it does to tiles and grout, let’s look at ways to prevent it from ever appearing!
How To Prevent Grout Haze?
You can prevent grout haze from forming on your tiles with a few extra steps introduced to your work-flow.
The main component of grout haze prevention is identifying which tiles are particularly susceptible to grout haze build-up and applying the right product to protect them during the grouting process.
While all tiles, from ceramics to porcelains and any kind of natural stone will form grout haze, the majority of them will release the grout haze with a simple buff with a clean cotton cloth.
Tiles like these commonly have a smooth, textureless finish that allows a cotton cloth to remove the grout haze without issue, however, there are tiles that make this simple step impossible.
Tiles that are susceptible to grout hazing:
-
Textured, porous stone.
-
Masonry surfaces such as brick, slate, slump stone, concrete block.
-
Natural Stone like travertine and marble.
-
Unpolished, porous or textured Porcelain and Ceramic tiles.
-
Textured “wooden plank” tiles.
-
Anti-slip or abrasive outdoor tiles. (One of the most susceptible tiles to grout hazing.)
**Grouting situations that can cause excessive grout hazing:
**
-
Grouting a light colored tile with a dark grout.
-
Using Epoxy Grout on any tile.
-
Unsealed natural stone or porcelain.

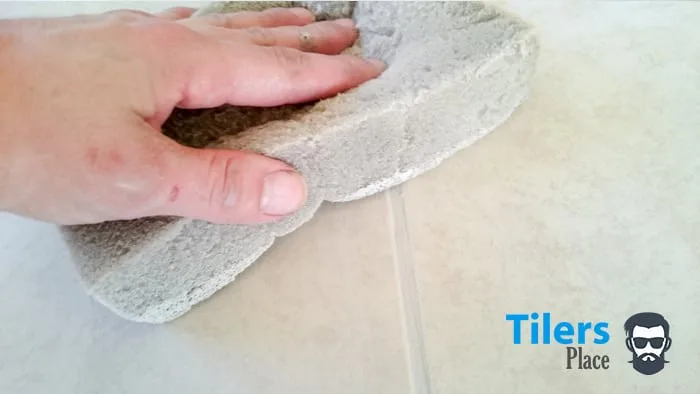
Generally, you can tell if a tile will require the use of Grout Release just by running your hand over it (if you visually can’t tell.)
If the tile feels gritty, rough or your hand doesn’t slide smoothly along it like on a polished surface, you might be looking at a grout haze problem during grouting.
The best scenario is to ask the store that you are buying the tiles from.
Ask whether they know if this is a problem tile, whether they have had feedback from previous clients that have purchased the tile or even if the manufacturer themselves issued a notice with their tiles.
If you have identified your tile as one to suffer from hard to remove grout haze, you can proceed to the next step in grout haze prevention.
Here you will learn how to apply a grout release agent onto your tiles and prevent grout haze from forming after the grouting process has been completed.
How To Prevent Grout Haze Tutorial
Okay, so you know your tiles will have a problem with excessive grout haze forming on them after grouting.
Here is a how-to tutorial on applying Aquamix Grout Release (or similar brand) to your tiles and stopping grout haze from forming all together.
Things You Will Need
This is the product that will protect your tiles from grout haze.
It is a water-soluble solution that forms a protective barrier over your tiles surface so any grout haze will stick to it and not your tiles.
During the washing up phase of grouting, it will clean right off along with the grout slurry.
It is a thick solution and cannot be diluted with water. It’s better to have some left over after your project anyway rather than running out halfway through.


Check Price – Aqua Mix Grout Release Gallon
Personal protection is always important, especially when working with various chemical compounds such as grout release.
To protect your hands from the chemicals and additives in the grout release it is important to wear chemical resistant gloves during application.
These thick nitrile gloves come in a variety of sizes and are ideal for this task.


A paint roller and tray set offers an easy and clean way to apply grout release.
The paint roller offers great product control and makes the task for beginners a breeze as there’s very little to go wrong.
Just pour some grout release into the tray and dip the paint roller in it akin to how you would during a painting job.
I found a great set of rollers and other useful items that can all be used to apply grout release in a variety of areas.
The foam brush is ideal for applying grout release on wall.


What You Need To Do
1 – Start off by reading the instructions on the bottle of Grout Release to thoroughly understand the requirements and limitations of the product.
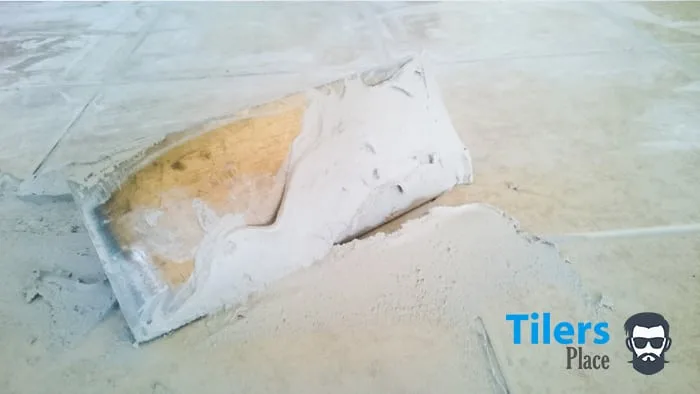
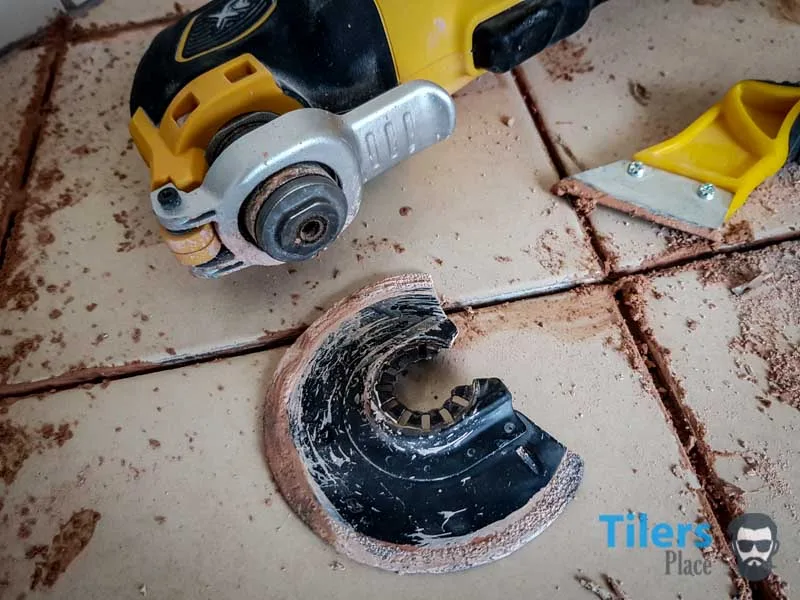
2- Clean out any mortar between the tile gaps, remove spacers and ensure there an no splashes of mortar on the surface of the tile.
A grout removal tool could be used to cut out any excess mortar between the tile gaps but generally, a craft knife should be more than adequate.
3 – Give the whole surface you will be applying the Grout Release a good vacuum to ensure no dirt or debris is left on the surface of the tile or the tile gaps.
Top Tip!
Do not apply any water to the surface of the tiles. The grout release does not need it and it will work better without prior wetting of the surface.
4 – With the surface prepared for the application of your Grout Release you can get your paint tray ready and pour the product into the deeper part of the tray.
The amount you pour in will depend on the size of the paint tray and the area you will be treating but usually, half the depth of the tray is generally advised.
5 – Dip your paint roller or brush into the product and make sure it is thoroughly coated all around. Then wipe off the excess on the sloped part of the tray.
6 – Starting from the furthest end of the area, apply the grout release product evenly over the tiled surface. You want to pay extra attention to not get a build up of it in the grout gaps as this may cause problems with your grout later on.
Work on one tile at a time and be sure to evenly coat the tile with a film of the grout release product.
7 – Once you have a coat on the whole entire area you can go wash your tools with clean water while the product dries.
The general waiting time is 30 minutes however I have had it dry off much quicker in warmer weather.
You can touch the surface to check if it is dry or not. Ensure all the tiles are dry before commencing your grouting.
8 – That’s it, you’re ready for grouting!
With the grout release nicely dried off, your tiles are ready for grouting and protected from a build-up of grout haze.
The specially designed grout release will wash away along with any grout haze and grout slurry that naturally occurs during grouting.
Once the grout has dried off you can remove what light coating of grout haze remains (if any), with a clean cotton rag and your tiled surface is completed!
If you would like a thorough tutorial on how to grout, you can ready my grouting guide here.
Video Tutorial On How To Apply Grout Release.
Grout Release FAQ

Question:
Do I need to apply Grout Release if I have already sealed the tiles?
Answer:
Yes.
Sealers do act as a grout release in a minor sense, however, their primary purpose is to prevent heavy staining of the tile (generally natural stone) during the grouting process.

Unsealed natural stone and porcelain tiles can be stained by absorbing the pigments of the grout so it is advised to seal them before grouting is commenced.
While the sealer prevents staining, it does not protect grout haze from sticking to a tile or building up in porous or textured tiles.
That is why it is prudent to apply a grout release product before grouting, even if the tile has already been sealed.
Once the grouting process has been completed, the grout release agent has been washed away with the grout while your sealer is still attached to the tile and will continue to protect them from staining and ensure a lasting lustre.
Buy Aquamix Grout Release Here
Conclusion
The threat of grout haze ruining our tiles has been drastically reduced with the invention of Grout Release by Aquamix.
By introducing an extra step to the grouting process we can reduce clean up time and increase perfect results with the application of a grout release agent.
The extra time it takes to apply is nothing in comparison to a day spent scrubbing and breaking our backs trying to get the grout haze off and out of our porous tiles.
The uniform color of our grout is also ensured since the amount of water required to wash off the grout slurry is not enough to cause patchy grout.
If you are worried about grout haze then it is highly recommended that you apply Grout Release on your next tiling project, it will be worth every penny when you achieve that beautiful finish you have always wanted.
The time to end grout haze is now, the power is in your hands – go and use it!
Buy Aquamix Grout Release At Amazon
Buy Aquamix Grout Release At Amazon

Leave a Comment
Your email address will not be published. Required fields are marked *
Comments are currently closed for new submissions.