Tilers Place is reader-supported. When you buy through links on this page, I may earn an affiliate commission on qualifying purchases.
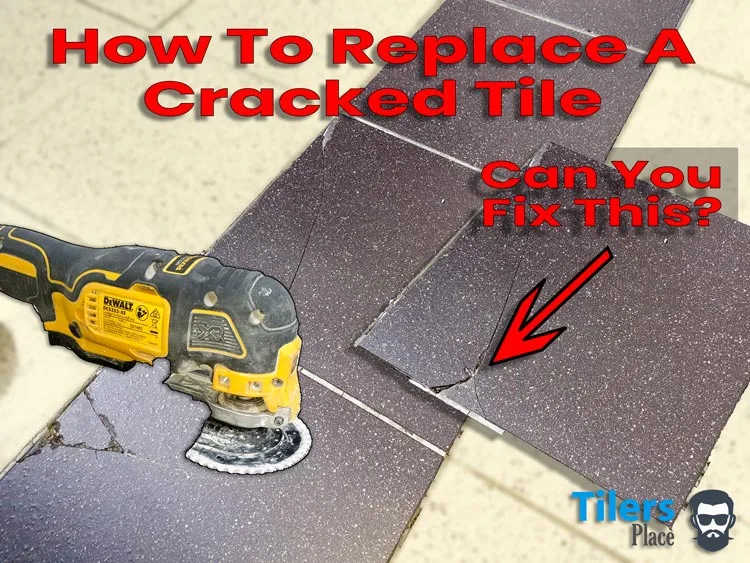
Learn how to replace cracked tile and install a new tile in your home like a professional tiler!
This tile replacement guide will make sure to teach you everything you need to know to successfully complete your home improvement task quickly and easily.
I have cut out the unnecessary steps seen on other broken tile replacement guides as they only add time, cost and excessive hassle to what really is an easy repair.
This guide will provide you the knowledge to achieve professional results without the price tag of hiring one, it can’t get any better than that!
Words and Photos © Tilersplace 2026 All Rights Reserved.
How To Repair Tile Guide Overview
This How-To Guide Will Cover:
- All Tiling Tools Needed To Repair Floor Tile
- Steps On How To Remove Floor Tile Safely
- Steps To Install & Grout New Replacement Tile
- Professional Tile Setter Tricks

Hello and welcome to another Tilersplace How-To Guide!
Today I’ll be taking you along with me on a floor tile replacement job that I completed recently. Get an exclusive over the shoulder look of how I repair tile and learn everything that I know on this crucial tiling task.
My name is Carl Anders and I’ve been tiling as a professional for just over 25 years. I’ve taken the hammer and replaced countless tiles over that time and want to pass on my knowledge onto you.
Tools Required To Repair Tile
This is the hardest part of repairing tile – finding all the necessary tools you’ll need – there’s more to it than just a hammer!
To make things easier for you, I’ve located them all in one place and broken the tools down into sections.
You’ll likely have some of these at home if you’re into home improvement, the rest are easy to shop for online or instore.
Find what tiling tools you have at home and go shopping for the rest.
I’ve included links to my favorite tools that I use for floor tile repair.
Anyone ready for a shopping spree?
Safety Equipment
Tiling Tools
- Thinset Notched Trowel
- Grout Float
- Tile Cutter (if replacement tile requires cutting)
- Margin Trowel
- 2x Buckets
- Putty knife
- Grout Sponge
- Microfiber Towel
Tools
- Hammer (A 16 oz hammer works well.)
- Cold Chisel
- Oscillating Multi-Tool (DeWalt Is My Preference)
- Mini Paint Roller
- Grout Removal Blade
- Vacuum Cleaner Or Brush And Dustpan
Tiling Supplies
- Thinset Mortar (Tile Adhesive) *avoid pre-mixed bucket type thinsets unless it’s wall tile in a dry area*
- Grout
- Tile Primer
- Replacement Tile
Those are the basic tools required to replace and fix a broken tile. Yes, there are quite a few but if you’ve worked with floor tile before, you’ll likely have some of these at home already.
How To Repair Cracked Tile – Quick Guide
If you are eager to get going and your skills can fill in the blanks, here are the basic 5 steps to repairing a broken tile.
1 – Use a tool for removing grout and remove the grout around the old tile you wish to replace.
2 – With the grout removed, use your hammer to break up the old floor tile. Hammer until you can insert your cold chisel and remove the rest of the tile. Wear safety glasses!
3 – Remove any old grout around the edge of the surrounding tiles and remove all the old thinset mortar on your substrate. (floor or wall.) Prime the surface with a suitable tile primer.
4 – Dry place your new tile to ensure it sits below the surface. If it doesn’t, use your cold chisel to remove more of the old thinset mortar. Remove the new tile and apply your thinset mortar adhesive with a notched trowel. Glue the new tile in place firmly and wait 24 hours. Make sure to remove any excess adhesive from around the tile.
5 – Grout around the replacement tile and buff it and the surrounding tiles with a microfiber cloth. – You’re Done!
How To Repair Cracked & Broken Tile – Full Guide
Regular readers of Tilers Place will know I get into obsessive detail in my Home Improvement Tile How-To guides, so if you want all the details, this section is for you! Let’s replace a tile!
Step 1 – Prepare Work Area & Remove The Grout
Before you embark on your latest home improvement journey and any tile repair/replace work begins, it’s a great idea to prepare your work area. This is to keep your work area clean and also prevent any damage to your surrounding tiles and furnishings.
Lay a drop cloth around the area you’ll be working and get your tools ready. Open a window and make sure to block off your work area if there are any children or pets around. Wall and floor tile repair causes many sharp bits of tile to go flying and we want to avoid any injury.
Now’s a good time to put on all your safety equipment and especially your safety glasses.
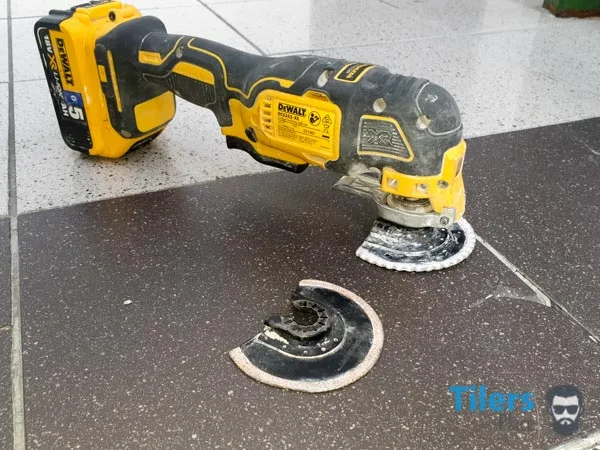
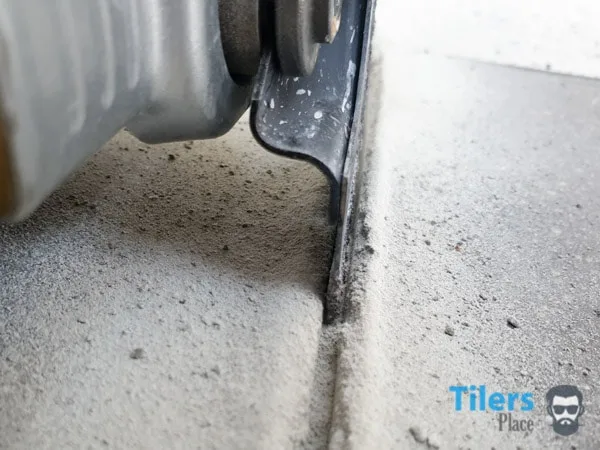
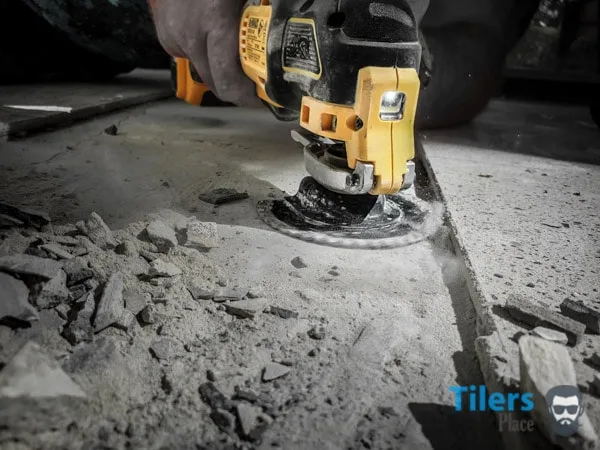
Remove The Grout
With your work area – and you – ready to begin, it’s time to remove the grout from around the broken tile.
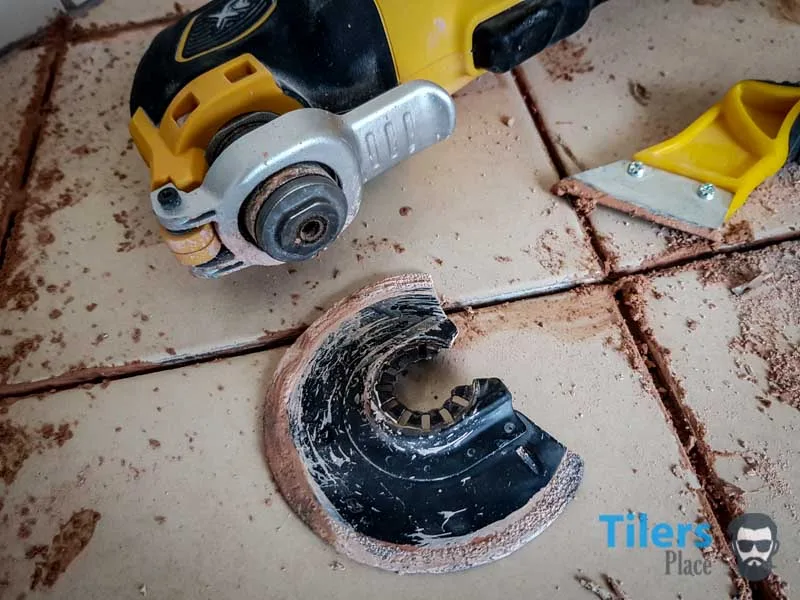
Insert a grout removal blade into your oscillating multi-tool. Start in the center of the grout line and allow the machine to do the work for you. You simply need to hold it in place, the tough carbide tipped blade will saw into the grout and turn it into dust!
I love the Dewalt DCS355 for this work as it’s trigger allows me to very carefully regulate the speed of the tool, making it easy to avoid making any costly mistakes. It’s also cordless, has a quick release function to replace blades quickly and a handy flashlight to illuminate even the darkest of areas.
Allow the multi-tool to remove the grout until you reach the thinset below the tile. You can usually tell that you have removed all the grout simply by feel. Alternatively, vacuum or sweep up the grout dust and inspect the grout visually. I like to make sure the area is fully removed before moving on.
Once you have removed the grout from one section, carry on and remove all the grout from around the cracked and broken tile.
Grout Saw – A grout saw can be handy to get into tricky spots like next to a baseboard with gently grinding away some grout that’s on the surface of the tile. Ceramic tile especially have quite weak glaze and benefit from gentle motions over faster mechanical vibrations.
Once you have successfully removed all the grout from your broken tile, vacuum up all the grout dust.
If you need more help with removing grout, check out my handy guide to removing grout with an oscillating multi-tool. It’ll teach you everything you need to know and more!
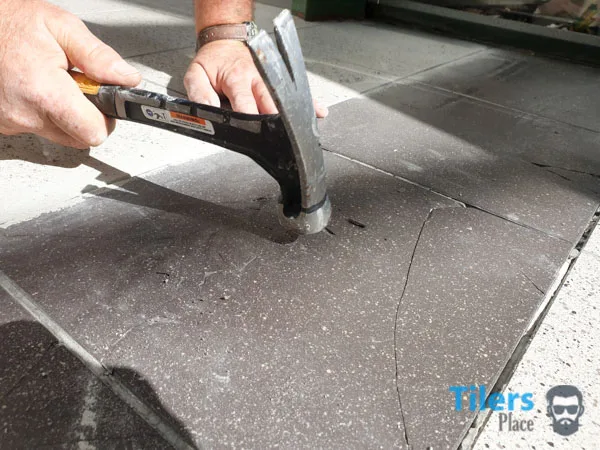
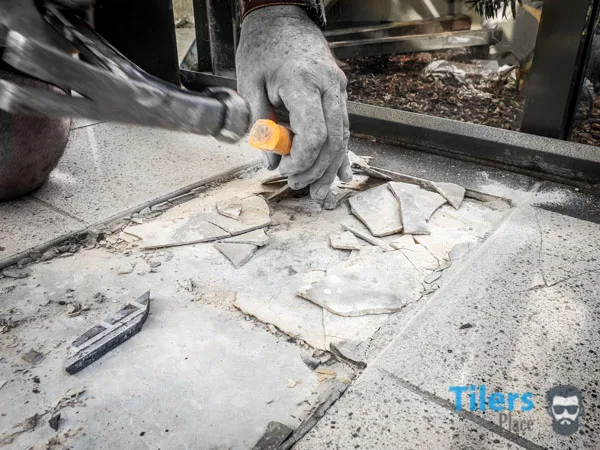
Step 2 – Remove The Damaged Tile
I bet you’ve been waiting for this! Now it’s time to go break stuff with a hammer and cold chisel. It can’t get any better than that!
Start by applying light to medium hammer hits all over the broken tile in place. Start from the center and bang around the tile. The idea is to start breaking the structure of the tile. You should be wearing work gloves for this, ignore me not wearing any – I’ve got elephant skin.
Mare sure you don’t go banging with all your might as the vibrations will travel around the substrate and can damage other tiles. Yes, even though you have removed the grout around the damaged tile.
So take it easy. It’s better to take this step nice and slow.
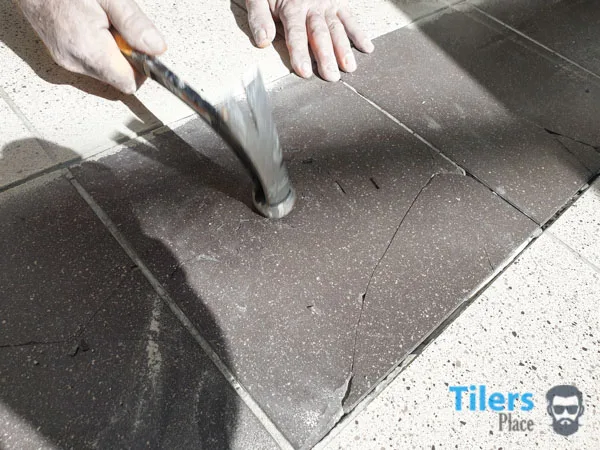
Once you’ve hit the tile enough, start concentrating your efforts in one spot. The goal is to loosen up a small piece of tile, that’ll give you an opening to insert your cold chisel.
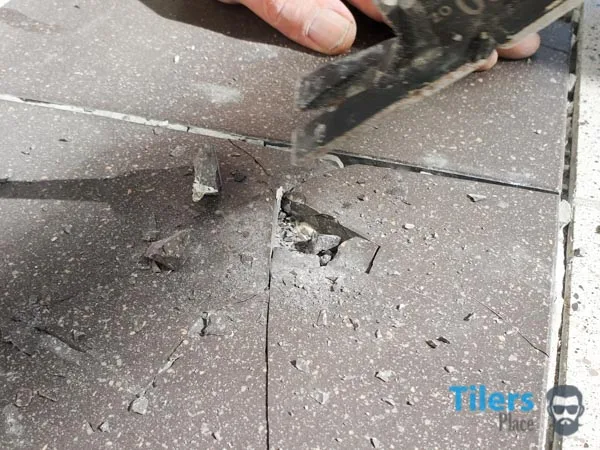
If your tile is as damaged as the one in my photos, concentrate on those broken pieces. They’ll come up the quickest with only a little work with your cold chisel.
Once you have an opening for your cold chisel, use that to start chipping away at the tile and removing it all.
Continue working slowly and patiently until you have removed all of the tile.
If you are removing tile from backer board, be careful not to remove chunks of it. If you remove too much of the cement board, you may need to replace it with a new piece.
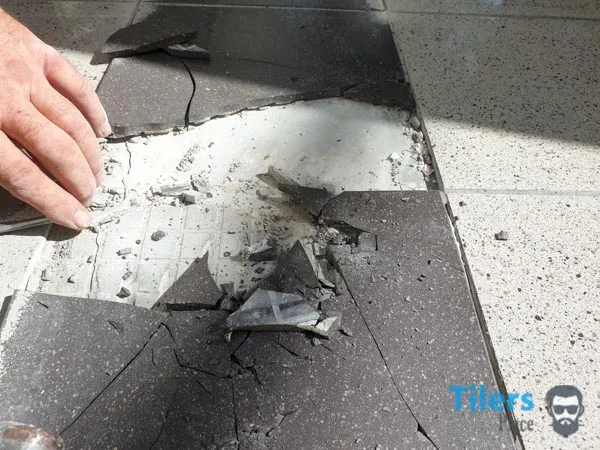
*Safety Reminder*
Please make sure to wear work gloves and knee pads!
Broken tile pieces are like glass and can be extremely sharp. Use your safety equipment and move the broken pieces of tiles very carefully. If you are disposing of the tile in your household rubbish, wrap it in newspaper and tape it with masking tape – keep your city waste management workers safe!
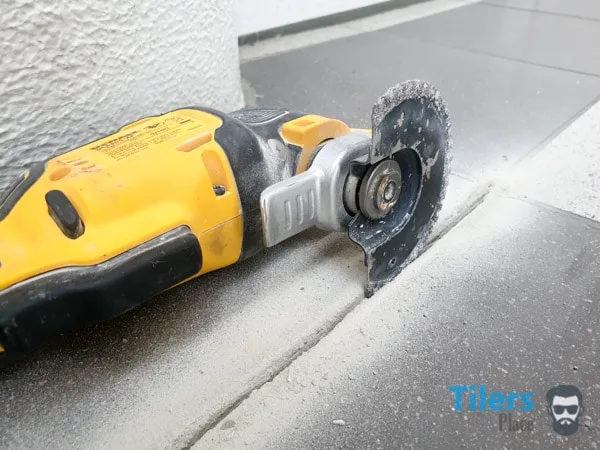
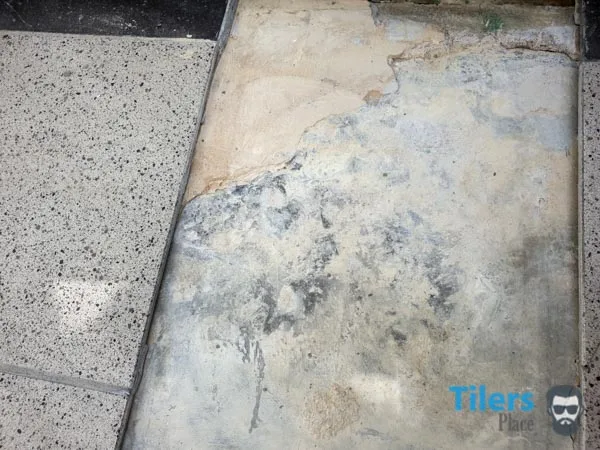
Step 3 – Prepare The Surface For A New Tile
Hooray! You have removed the ugly and complete eyesore of a tile that provoked you to embark on this journey in the first place.
Before you go and start mixing your thinset, it’s very important that you prepare your surface first.
Start off by removing any specs of old grout that may have remained during your tile removal. There is usually blobs of it on the substrate. If you grabbed the DeWalt grout removal blade, you can use the flat side of it to grind away the grout and even thinset! It’s absolutely fantastic and much safer than chipping grout off with a chisel.
You will likely have a lot of thinset stuck to the surface – you’ll need to remove ALL of this before proceeding.
Use your cold chisel, the claw side of your hammer and whatever you want to remove the thinset. The Dewalt hammer I linked in the tool section above works great for this. The claw is angled straight and chips through thinset very easily.
Once you have removed all of the old thinset and grout from your thinset, vacuum up all the dirt and debris.
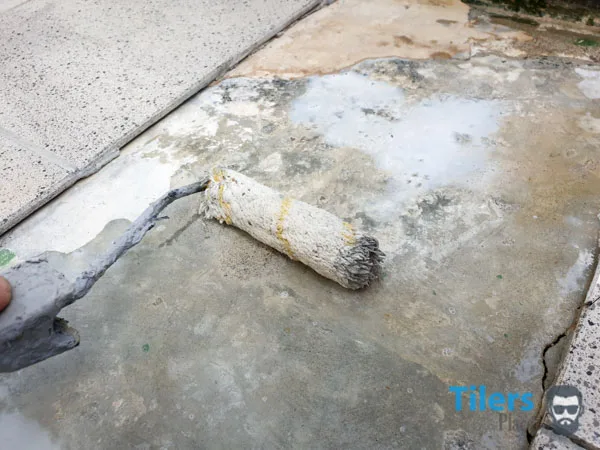
Next, you’ll want to prime your substrate to provide a nice and clean surface for your thinset to stick to. Your tile may have very likely have failed because the previous installer skipped this step. The tile primer will prevent the substrate from sucking up the water from your thinset and also kill the dust that is on the surface. This will give you excellent thinset bondage and strength which equals a lasting tile install. Primer works on all common surfaces like concrete and backer board.
Applying a tile primer is very easy. Simply pour some primer onto the substrate or into a container and distribute it around the surface with a mini painter roller or paintbrush. Give it about 10-30 minutes to fully dry.
Step 4 – Set Your New Tile
Now that your surface is nice and clean, dry place your tile to check that it sits below the surface of the neighboring tile.
If it doesn’t, you’ll have some old thin-set or grout that needs chipping off.
Mix up your thinset in a bucket using your trowel. It should be firm but soft enough to move slightly if you tip the bucket sideways.
Not sure which thinset to use? Get a modified thinset that offers the best adhesion to most substrates. It’ll ensure your new tile will last a long time.
Place some thinset onto the substrate and use your notched trowel to spread the thinset evenly across the surface. Make sure your thinset lines are diagonal in one direction and not random. This is so you push all the air out when placing your tile.
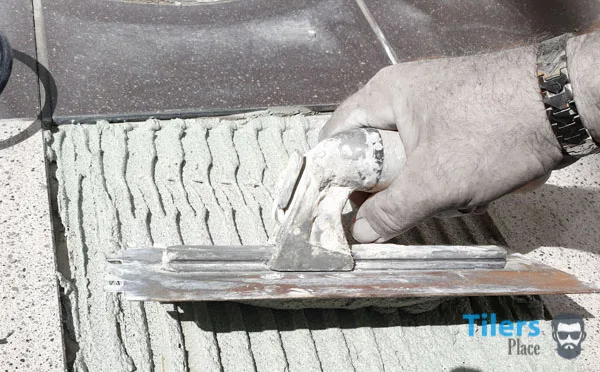
Make your lines cleaner than mine, this photo was taken before I had the notched trowel lines perfect.
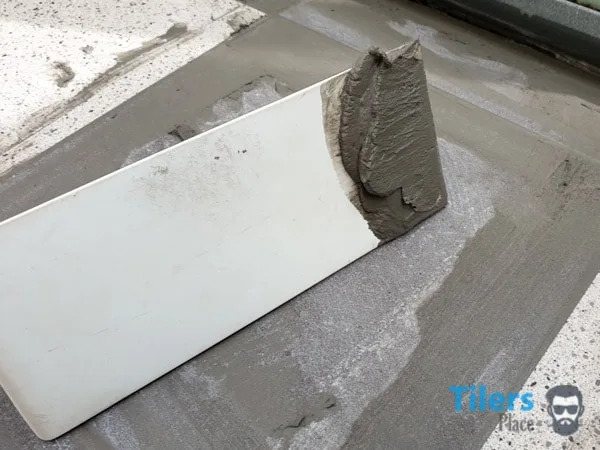
Next, repeat the process on the back of your new replacement tile. This is called back-buttering and it ensures you get 100% coverage.
Install your new tile by pressing it into the thinset. Check that there are no raised areas or dips and if necessary, add or remove thinset to give you a flat finish alongside the other tiles.
With that done, you are done for today! Pack up your tools and clean the thinset off your notched trowel before it hardens. Cordon off the area, apply “wet tile” signs all over and enjoy the rest of your day.
You are 90% done!
Wait 24 hours before grouting to allow the thinset to cure properly.
Step 5 – Grout New Tile
I hope you are ready to finish your tile replacement project! It’s time to apply some new grout.
Start off by removing any dry thinset that is lurking in the grout lines. A sharp utility knife works wonders for this.
Time to assemble your grout gear and mix up your new grout.
One bucket will need to have clean water and your grout sponge to wash up after.
In the other, mix up your grout to a peanut butter consistency. You don’t want it too thick or too soft as it’ll make the washing up process more difficult then it needs to be.
Use your grout float to apply the grout into your grout lines. Be sure to compress as much grout into the gap as you can using the float. Use the flat side of it to remove any excess grout from the tile and return it to the bucket.
Wait about 5-10 minutes for the grout to set, you’ll see the tile surface starting to get hazy.
Wring out your sponge and wash off the grout, be sure to only run the sponge in one direction. Use if to clean the tiles and form your grout lines so they are perfectly smooth. Clean your sponge in the bucket and keep going.
Do not over water the grout! You don’t want to introduce too much excess water to the wet grout as it will wash out the color pigments and it’ll end up patchy.
Once you have finished grouting, clean up your grouting equipment while you wait for the grout to set.
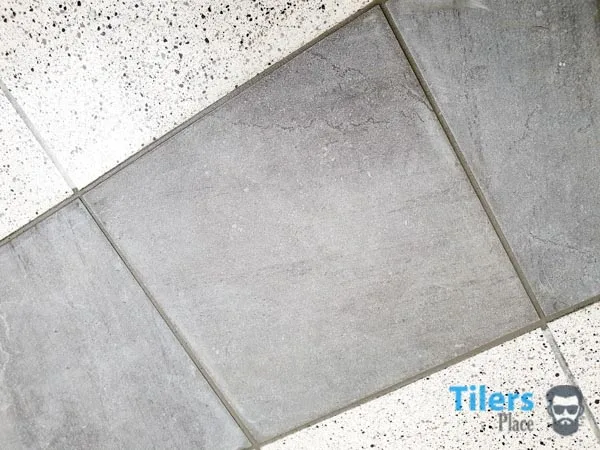
You will begin to notice that the tile will start forming a dry haze on it. This can be easily buffed off with a clean microfiber cloth.
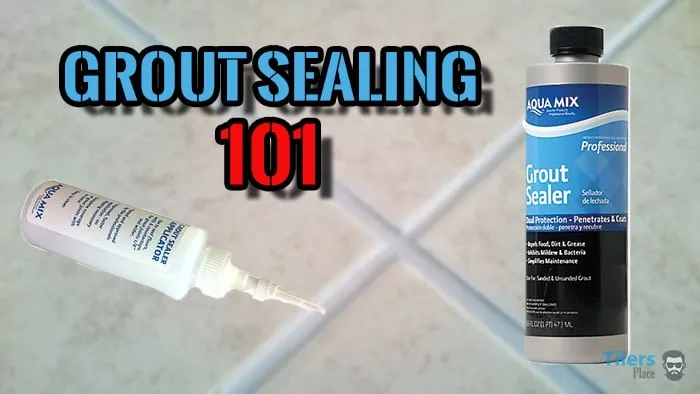
Optionally, you can also apply a grout sealer after the grout has hardened for a couple of days to get the most out of your floor tiles.
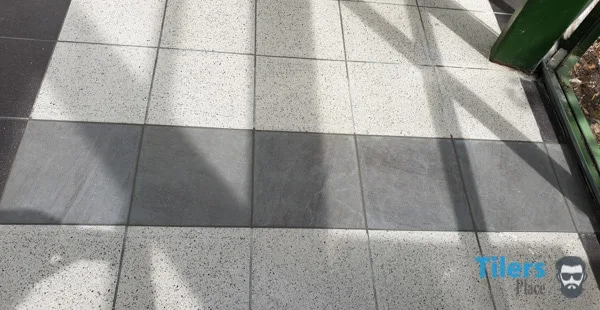
And that’s it! You are done!
Congratulations – you have successfully completed a damaged tile repair job like a professional!
Conclusion
A damaged tile is a true blight and eyesore in any tile installation. It catches attention and instantly degrades the overall finish and look of even the most amazing tiled surface. Replacing that tile with a new one is the only way to remedy this.
Learning how to repair a damaged tile is an excellent introduction to a wide raft of tiling techniques. From removing old grout to breaking up an installed tile safely. You will also learn how to apply tile adhesive (thinset mortar) and grout.
This How To Repair Broken Tile Guide aims to teach you how to replace tile like a professional would. These steps are exactly how I have been replacing broken or chipped tile for over 25 years in all locations that benefit from tile use. I also added some handy tips that I have learned over the years. (Like the oscillating multi-tool and grout saw.)
In those years, I have never broken a bordering tile or damaged something I shouldn’t have, so I am confident in providing you with this knowledge. As long as you take your time and take care, you won’t either.
I hope you enjoyed this guide and it proved helpful!
I’d love to see your successful tile repairs. Feel free to email me or tag me in your social media posts.
Thank you for reading, I’ll see you on the next one!
Words and Photos © Tilersplace 2026 All Rights Reserved.

Leave a Comment
Your email address will not be published. Required fields are marked *
Comments are currently closed for new submissions.