When you think of a successful tile installation that stands the test of time, what do you think is the key ingredient?
Is it attention to detail? Taking it slowly and making sure you follow the thinset instructions while mixing?
Or is it the selection of the thinset itself? Going with the more expensive brand to ensure it sticks properly?
What about the preparation? And the surface you prepare for the tiles to sit on?
Well, it’s all of those – but the one most homeowners get wrong is the prep work and the underlayment that the tiles will sit on. Using a tile primer is only one step in preparing a surface for tiling, selecting the right underlayment/backer board is the first big step.
Today we’ll take a look at the selection of tile backer boards available and help you choose the one that’s right for your tiles.
Be it stone, ceramic or porcelain, whatever tile material you use all requires a backer board in certain situations.
Range of Tile Backer Boards Available On The Market:
-
Foam board: These are light-weight foam boards with polystyrene are a popular choice for professional tilers, especially those in the United States. Systems like Schluter®-KERDI-BOARD or Wedi are used in lieu of sheet-rock when lining bathrooms and when properly prepared with banding, are fully waterproof. Many tilers that try foam board are converted to it, especially those that strip bathrooms to the joists and rebuild from scratch. Shower pans, niches, shelves and more can all be made in foam board and provide an excellent base for tiles. These systems are expensive however but save time and additional Sheetrock costs.
-
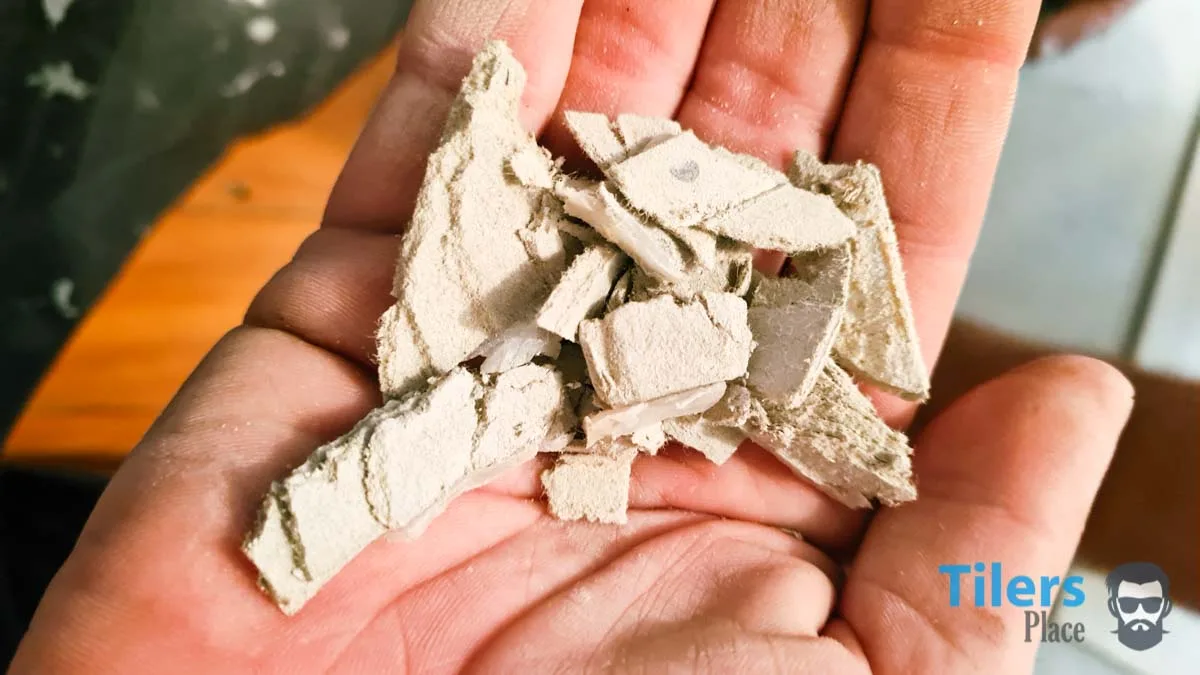
Glass-mat gypsum board: This is drywall 2.0. A modern gypsum core drywall that is moisture-resistant and fully encased in a green fiberglass. A popular brand is USG. It’s less prone to damage and is also mold & mildew resistant. Despite it’s strong characteristics against water, it still requires waterproofing.
-
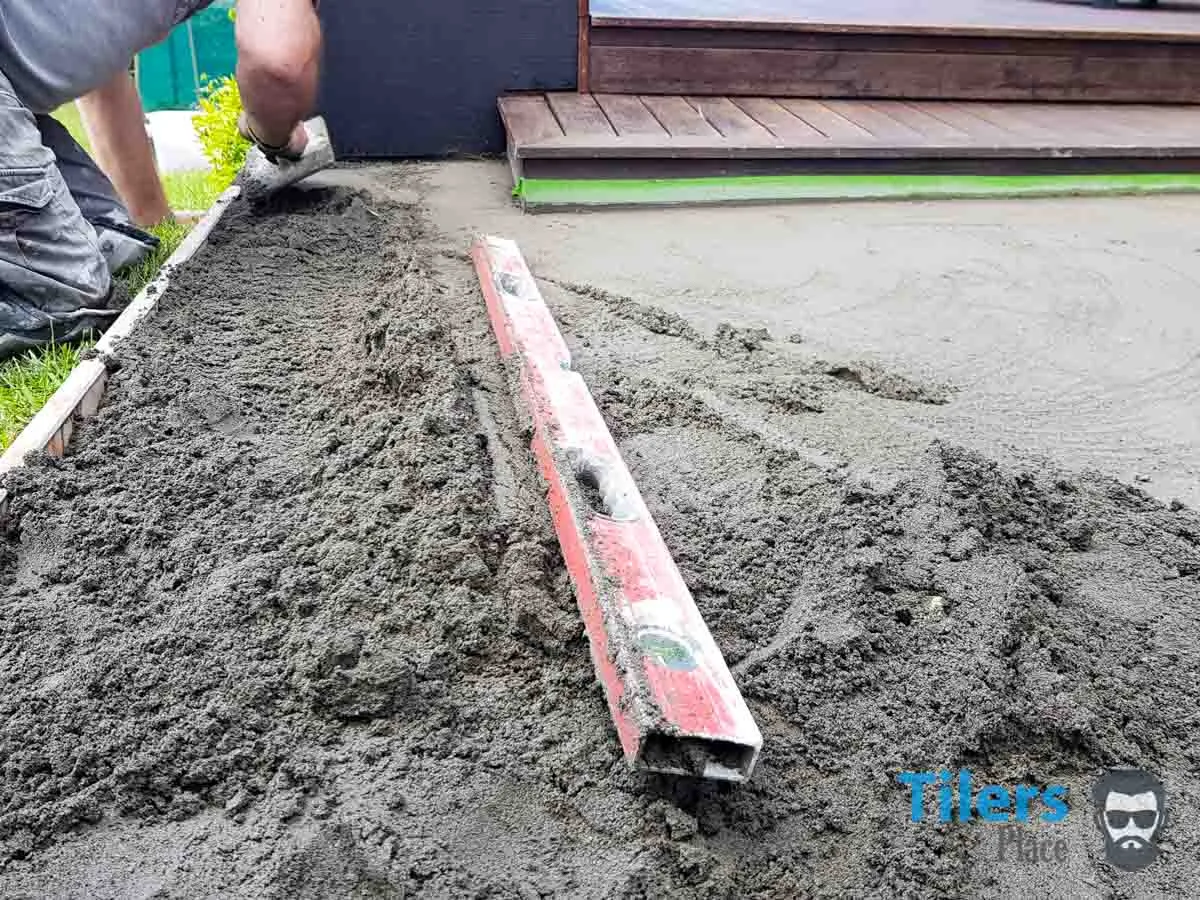
Self-leveling underlayment: Also known as leveling compound, this miracle mud gets poured over a substrate and it flows outwards in a slow deluge. Using a spirit level to smoothen out the compound will help achieve a proper flat surface. This stuff is great for leveling out problematic floors, using over the top of undertile heating systems and can even be used over old tile adhesive that is stuck down solidly. It’s quite a problem solver this stuff. Just be sure to seal up any gaps with foam backer rod or expanding foam – it can flow down to the floor below you or outside the room.
-
Uncoupling membranes: As the name suggests, these membranes are flexible plastic materials that you unroll on the floor. You apply a layer of thinset first, then glue this stuff to it. Once tiled, it can uncouple from the original substrate and provide a uniform surface for the tile. Ideal for situations where an anhydrous screed is used and the mineral ettringite forms. This mineral can cause tile thinset to completely debond from the surface! This means instant tile failure. Applying an uncoupling membrane over this helps avoid this problem. This membrane is also handy in situations where there is plenty of horizontal movement in the substrate.
-
Cement Board/Fibre-Cement Board: Also known as tile underlay in some markets. This is an older but still super common underlayment, used over wooden floors like plywood or hardwood. This tile underlay is a compressed sheet of cement fibre that gets either nailed or screwed down with over 100 nails/screws per sheet. It’s also recommended to glue the boards down with thinset. Most installations I’ve encountered only have construction adhesive “No Nails/Liquid Nails, etc” or nothing however. These sheets provide rigidity to a surface that’s prone to deflection (movement when walking on it). They help prevent lateral or horizontal movement. Perfect for wooden floors. Cheap, easy to install but time-consuming.
-
Dry-pack mortar: Good ol’ mud. Many old timers still call themselves “mud dawgs” and prepare all their surfaces with dry-pack mortar before tiling. Floors AND walls. Get em nice and level. Mud is ideal for fixing up truly out-of-whack surfaces, especially old concrete floors that were poured by a blind and hungover donkey on a Friday afternoon. Mud is still commonly used to make pre-slopes in shower pans before waterproofing and tiling. In that form it’s excellent. Foam underlayments has killed off a little of this practise as you can get pre-sloped foam pans, but they’re very expensive. Dry-pack is just cement and sand, as cheap as it gets and tough as a Mack Truck. The general practise is to apply a layer of builders paper, then a layer of of chicken mesh or expanded wire. The mud then gets worked on top and the wire adds structural strength.
The Three Flavors of Tile Backer Board Available
Cement/Cement Fiber Board
The most popular materials used as underlayments for any ceramic or porcelain tile installations on either walls or floors is cement backer board and it’s brother fiber-cement board.The two are similar but fiber-board is more brittle. What that means in reality is don’t nail or screw to close to it’s edge or it’ll flake off.
Using what’s easily available and cheaper is the common rule of thumb when selected a cement board.
Standard cement board contains a Portland cement center thats encased in layers of fiberglass mesh. Whilst its approved to be used in wet areas like bathrooms or showers, it’s not waterproof. Meaning it’ll hold its strength but water will penetrate it. Applying a topical waterproofing system like Red Guard or Hydroban is required to prevent mold growth and shower leaks. This needs to be applied over all screw holes, joints and the board itself. Usually two coats (or whatever manufacturer recommends.)
Moisture barriers also need to be applied to the inside of the wall cavity, especially if the board is installed on an exterior wall. Plastic sheeting is commonly stapled to the studs before the board is installed on top.
A common complaint with cement board is the weight and ungainly handling. Durock, a popular brand weights in at 36 pounds per 3×5 sheet. The stiffer variety, Wonderboard is even portlier at 45 pounds. Of course it does depend on thickness of the sheet and brands like Hardiebacker or Permabase offer thinner panels that are lighter.
Thicker cement board is usually only used on walls whilst thinner 1/4″ boards are used on floors. 1/2″ boards on the floors can be used to aid with transitions of various floors.
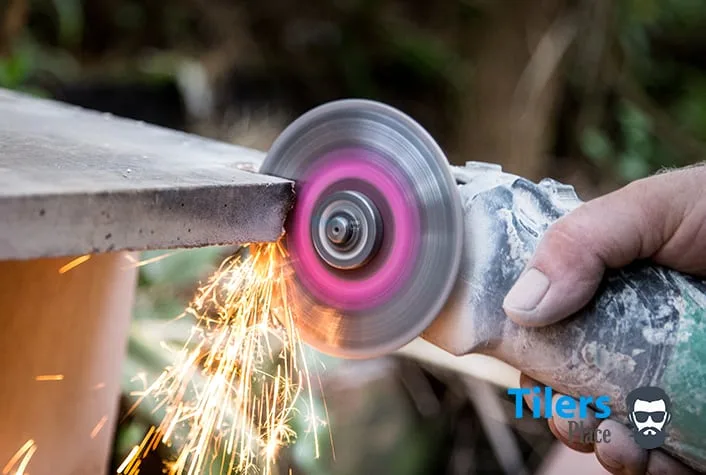
Cutting cement board or fiber-cement board can also cause problems for first-timers. The best way to cut cement board is with cement board shears. These make cutting a clean and quiet excessive. If you wish to re-enact operation desert storm in your own backyard, then you can cut cement board with an angle grinder fitted with a diamond or masonry wheel. As the name suggested, you’ll be making so much dust that they’ll see it from space. It’s insanely dusty. I’ve seen “professional” installers cut indoors and how they didn’t get slaughtered by the homeowners is beyond me.
I strongly discourage cutting cement board with an angle grinder unless you got proper breathing protection and can cut in an area that can get easily hosed down. NEVER cut indoors.
Cement board shears can be used anywhere and create little board scraps that can be sweeped up with a broom and discarded. There are also electric versions available if you install it a lot.
Foam Boards
The new kids on the block, Foam Boards are a different breed entirely and weight a fraction of what cement board does at around 10 pounds or less!
Range of Foam Boards Available:
- Schluter®Kerdi Board
- Johns Manville GoBoard
- USG Durock Foam Board
- Laticrete HYDRO BAN ® Board
A single person can easily carry foam board around and even hang it up without assistance. These boards are waterproof but seams still need to waterproofed with the system’s approved banding solutions and stuck down with thinset. The fasteners are usually system specific and need to be used in order to maintain waterproofing and the manufacturer warranty. Using common screws is a big no-no.
Most of these systems have a pluethora of additional goodies like pre-made niches, leg shaving nooks and all the supplementary products to install them. It makes sense to only use products from the board manufacturer you purchase.
Whilst these are mainly professional products, normal home improvement stores are beginning to carry various Foam Board products, all depending on the part of the country you live in.
The main problem with foam board is the price. With all the additional things you need to purchase, it’s easily double the cost of cement board. Users of foam board will argue that they can line and waterproof a shower in one day, as opposed to 2 or 3 days with cement board and topical waterproofing. So it all depends on whats more important to you. Maintaining the build budget or getting it done ASAP.
Glass-mat gypsum board
This is a wall lining option that is similar to standard drywall but enhanced with a gypsum core that is water resistant. The fiberglass mat that covers the outside makes it suitable for wet areas as it enables it to be mildew and mold resistant. Common brands are Sheetrock® Brand Glass-Mat Panels Mold Tough®, DensShield and Glasroc. Glass mat gypsum board still requires waterproofing with a ANSI A118.10 rated system in wet areas like shower walls or sauna walls. Any areas where standing water is a factor like shower niches or benches also require waterproofing.
Alternative Tile Underlayment Systems
Dry-Pack Mortar
One of the oldest and still used forms of tile underlayment for floors tiles was dry-pack mortar or commonly known as mud by those in the industry. This was a relatively dry mix of cement, sand and additive that could be packed and shaped easily. Floors that were heavily out of level, needed bringing up to a certain level or had to fall into a water grate would be prepared with dry-pack mortar. These beds needed a minimum thickness 1 inch as anything thinner would be brittle and fall apart. I wrote a guide to mixing this stuff here.
Working and creating a surface with dry-pack mortar is quite beyond the abilities of most DIY tilers as even creating the right consistency of dry-pack requires training by someone in the know. If you want a big clue, the mix needs to hold together when you press it in your fist. If it crumbles, it’s too dry.
Condensing and flattening it over a large area can be tricky as well.
Another alternative is self leveling underlayment which is pretty basic in concept. It flows out like a liquid that naturally creates a level surface thanks to gravity and mystical powers of the natural world. However leaving it to it’s own devices is not a good idea. Using a spirit level or spiked roller to make it flow out properly is required. This will allow you to create a proper level.
Uncoupling Membrane
A more modern underlayment method is usiing an uncoupling membrane method.
Range of Uncoupling Membranes
-
Mapeguard UM
-
Schluter Ditra Mat
-
Laticrete Strata Mat
These mats are a large roll of plastic and felt that is rolled out on a floor and stuck down with thinset mortar. They are suitable to be used over concrete, wood and existing flooring providing that the substrate is solid without a lot of deflection as cracked tiles and grout can still occur. This mat does not strengthen the floor against vertical movement (up and down) but helps prevent lateral movement when concrete floors crack and move out sideways.
These mats are only about 1/8 inch thick so they don’t raise the floor level too much but obviously they won’t do much towards creating a level – they follow the existing levels.
Many tilers use these systems exclusively as they feel secure in the knowledge that if the existing substrate cracks or has issues, the tiles will be uncouple from it and remain intact and damage free.
If a concrete slab is sound with no cracks, relatively clean and you are happy with the level, no underlayment is required. A new concrete slab can be a candidate for an uncoupling membrane however as it’ll help protect against any future cracking by separating the layer of tiles from it.
When tiling straight to concrete, make sure to properly prepare the surface. I always grind the concrete with a diamond cup wheel fitted to a grinder and a dust extracting shop vac. This allows me to work indoors without creating a dust storm.
Any high spots in the concrete can be easily eliminated with this method as well, helping with tiling later on.
With a fresh surface, I am secure that any oils, paints and accumulated gunk of the years won’t effect the bonding of my tile thinset. A standard acrylic primer is applied over the top to prevent the concrete sucking up the thinset moisture too quickly and it’s ready for tile.
Tile Backer Board Cost Comparison
Cement board/tile underlay comes in a variety of sizes, from 3×5 foot sheets to 4×8. The smaller size is more common and easier to handle. Sheet prices vary from about $10 for Durock to $14 for HardieBacker. Average cost for cement boards comes in at about 82 cents/square foot. (At time of writing. Prices may depend on your area.)
Schluter Ditra is about $1.30/square foot and other systems are comparable in cost.
For walls, glass-mat gypsum board averages around 65 cents/square foot with a regular 4×8 sheet costing in about $20. You can also opt to use cement board for walls but the thicker 1/2” size is required.
Foam backer boards come in 3×5 foot sheets and the average is the most expensive at $1.50/square foot. You need to factor in the specialist sealants and fasteners into the equation as well. 100 fasteners for Schluter cost around $14. Remember that you won’t need to apply additional waterproofing if the system is installed to the manufacturer directions.
Some Tips for Installing Tile Backer Board
Backer boards used on walls are installed in basically the same way with them being fastened to the wall studs using screws and adhesives. Rust-resistant screws should be used and always use the manufacturers approved fasteners for foam board. Using incorrect fasteners will deem your warranty void if a failure occurs. It’s a very strict policy, so don’t cut corners with foam board.
Cutting cement board is best done with cement board shears, a carbide tipped scoring knife (which also wakes wonders for grout removal) or a grinder equipped with a masonry or concrete blade. If using a grinder, wear breathing protection to prevent you inhaling silica dust which is evil on your lungs and health.
Foam board can be cut with a regular utility knife. Curves and holes can be drilled out with a regular wood drill and a jigsaw.
Sheet rock can be cut with a utility knife and snapped easily.
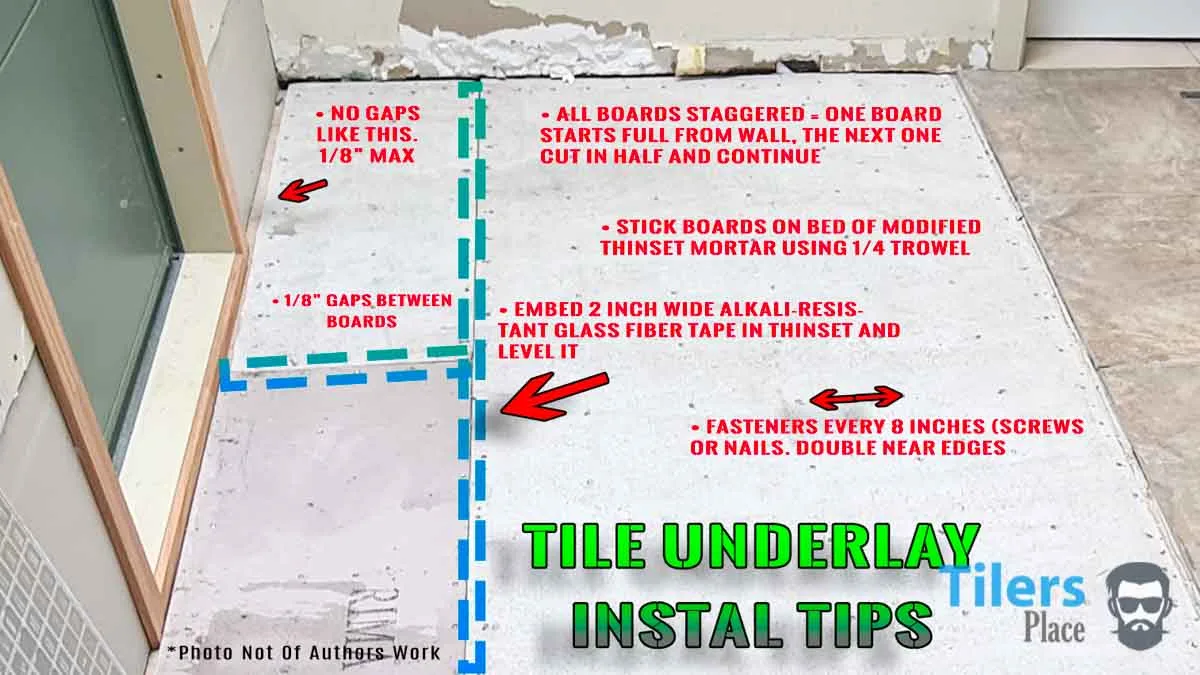
Remember that cement board and certain foam boards are the only backer boards suitable to be used on floors. Cement board is stuck down with a bed of thinset mortar, trowelled out like for tiles and the board is placed on top. Then fasten it down with screws or nails suited for cement board. All seams need to be covered with alkali resistant mesh tape and covered in thinset for proper strength.
Check out this HardieBacker Info Sheet For More Tips
So What’s Best?
The biggest factor when choosing a tile backer board for walls or floors is really the cost vs time it’ll take to install. Modern solutions like uncoupling mats or foam can be quicker to install overall. Especially foam boards used in showers as you’re saving time on waterproofing. This will eliminate at least 1-2 days.
If you want my biased opinion, here are my recommendations.
For Wooden Floors: Properly installed cement boards/tile underlay.
For Concrete Floors With Uneven Levels: mud bed on really uneven floors, self leveling underlayment on anything else.
For Concrete Floors With Solid Tile Adhesive: Pour self leveling underlayment over it and go.
For Walls: Regular dry-wall/sheet rock.
For Shower Walls/Wet Areas/Sauna Rooms: Glass-mat gypsum board or accredited green board that meets local council regulations for wet area use. Topical waterproofing like Hydroban installed on top.
What Modern Tiles Will Tell You: Use Uncoupling Mats and Foam on EVERYTHING. Double or triple your budget or don’t do it at all. (Cue the angry emails from tilers arguing why I’m wrong. Buddy, why are you even reading guides for homeowners?)


Leave a Comment
Your email address will not be published. Required fields are marked *
Comments are currently closed for new submissions.