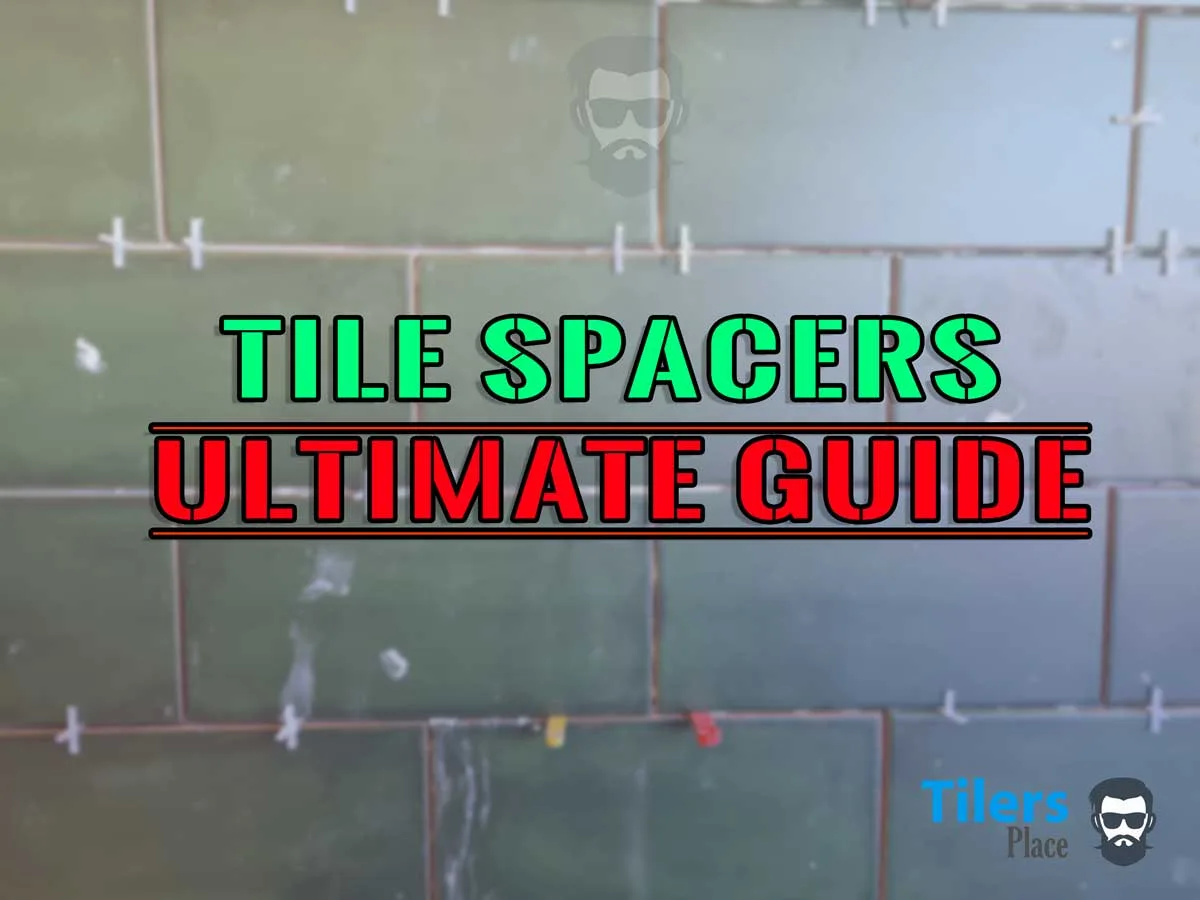
Tile spacers, if you don’t know what they’re used for in tiling, I’ll give you a hint – it’s in the name.
Tile spacers literally create the space between a tile and helps the layer create even and neat patterns. They also help prevent any lateral movement due to natural elements like gravity.
No matter the building, the location or the contractor undertaking the work, tile spacers are your best friend when laying expensive baked discs of clay (tiles) and get that uniform spacing we all desire.
Today we’ll take a deep dive into the fascinating world of these plastic fantastics and give you tips on which size to choose for your next project. Maybe we should rename the site to Tilers Space(r).
What Are Tile Spacers?
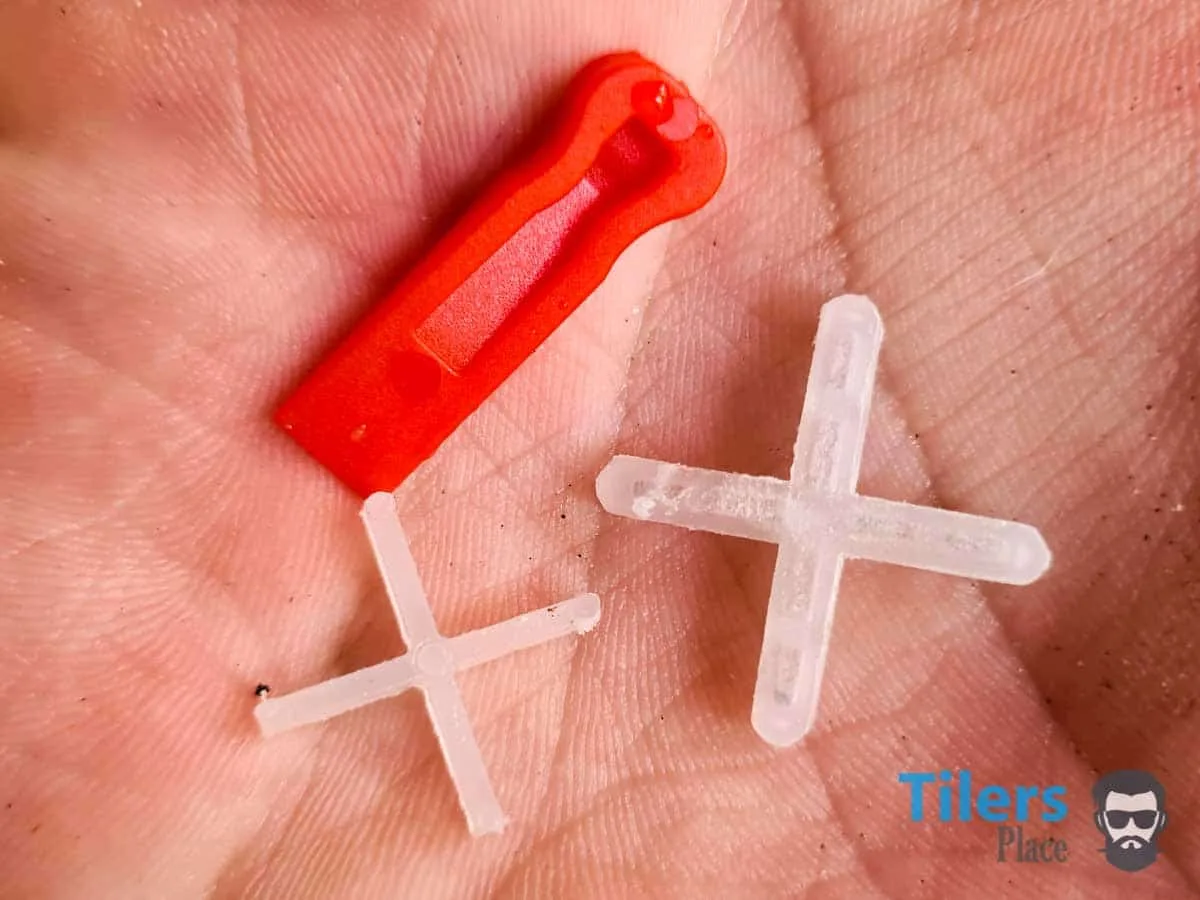
A tile spacer is a small piece of plastic, used to space tiles a uniform distance from another and give grout space to harden properly. In their simpliest form, a spacer is cross shaped to help it fit inbetween four tiles but there are different shaped spacers for different scenarios. Essentially, they hold a tile in place whilst the thinset mortar dries.
They are easily installed, just pushing them into the gap before laying another tile next to it is all that’s required. It’s dead simple but dead effective.
In terms of spacing out tiles, there are a few alternatives but not highly reccomended.
Tile Spacer Alternatives
Match Sticks – in a pinch, you can use match sticks to space out your tiles. Keep in mind that you’ll need to use at least 4 match sticks per corner and the gap provided will be tiny. Use this only with well-made rectified porcelain tile. (Better yet, don’t do this ever.)
Chalk Line – Some old timers still swear by this method and everyone else still scratches their heads. You can use a chalk line to snap all your grids and you use that line up your tiles. This works for ceramic floor tiles where you can get away with large 3/16 gaps. Rectified large format porcelain will look terrible with such chunky grout lines.
The Eye method – Forget the tools, just lay the tiles and set them out according to your eye. A wriggle here, a wriggle there and you got spaced out tiles. This method is common with first-timers and people who don’t care how it’ll look as long as it’s done. Guaranteed to lower the resale value of your home and grant you a permanent position sleeping on the couch.
How to Use Spacers

We know that spacers have a cross shape, this enables you to use them in two ways because of the four projections that can be placed differently.
The typical way is to lay four tiles to form a standard square, you then insert cross shaped spacers at the intersection where the four tiles meet (in the center.) The spacer will slide into the gap, against the ground and hide beneath the surface.
This flat method can be repeated across the entire surface of the tile installation. It’ll provide evenly spaced gaps and uniform pattern as long as you push the tiles against the spacer.
Internet gurus will claim there’s a problem with this method: the spacers are hard to remove after the thinset has dried. If we’ve learnt anything about tiling, it’s that nothing is easy but it’s all possible.
Removing spacers after thinset has dried is easy with a sharp utility knife. Just slide the blade in and pop the spacer out. If you were messy during installation and left globs of thinset in your groutlines you’ll need to cut it out first and then proceed to remove the spacer.
You’ll learn to clean your lines with a wet sponge next time. Boom = instant lesson and experience. We all gotta learn at some point, no one becomes a pro tiler over night.
So removing spacers using the lay down method is not hard.
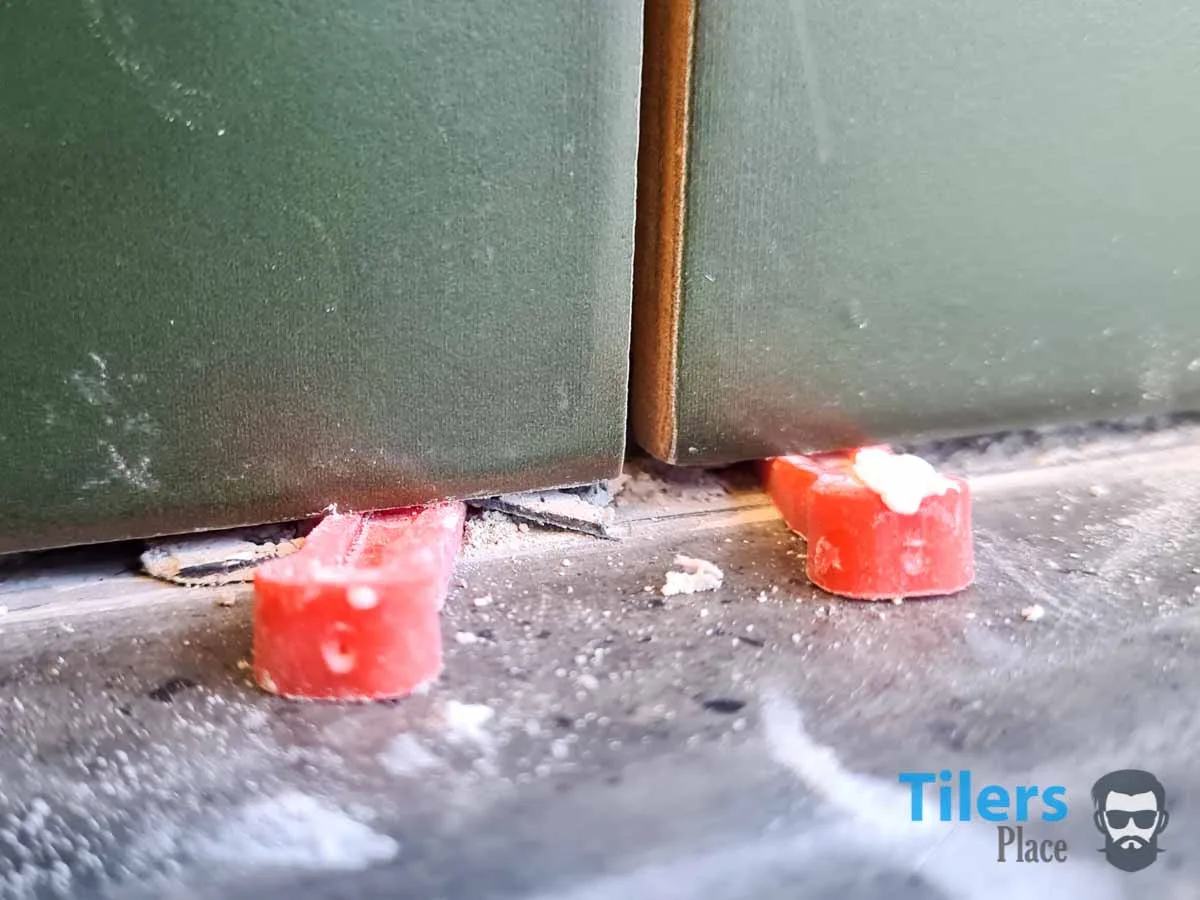
The next method is the “projection method” or tombstone style and it’s similar to using match sticks. Instead of sliding the spacer into the intersection of the tile, you just use one of the spacer protrusions and leave the rest of the spacer in the air. This method is used when you got a tile against the wall. Obviously you can’t fit the whole spacer in there as there’s no room so just use one end. It’ll still create an even gap.
This is the method used in the photo above.
This method is neccassary for laying patterns where the tiles don’t meet in an intersection. You’ll do this method when laying tiles in the brick/subway/metro pattern. Versaille pattern and herringbone pattern also require this method.
Essentially any pattern that dosne’t have four tiles meeting at the same point requires this method.
Problems with this method? You use a crap tonne of spacers! My old mentor used to call it the hedgehog as the wall had so many spikes coming off it. Small subway tiles were especially hedgehodge-esque.
The real problem is on the next day. They tend to really get stuck in the gaps and removing them by hand is difficult. Save yourself the trouble and your hands and use some pliers. Either standard combination pliers or needle nose pliers work. They’ll pop right out.
Another option is to use horsehoe spacers, they’re easier to remove and require less units as one horseshoe will do the job of two cross spacers.
What Size Spacers to Use When Installing Tile
Here’s something you may have forgotten, but spacers come in different sizes for different tiles. You got a wide variety of sizes to chose from. Essentially, a well manufactured tile will require smaller gaps as there is little to no variation in sizes.
Did you know tiles have variation in sizes? I wish my clients did.
Stuff like ceramics, hand made tiles, clay tiles and all that earthen stuff is usually uneven and have wild variation in sizes. Using a small spacer like a 1/16 will create a world of problems and make it impossible to “play with the tiles.” No, we’re not playing catch and tossing a Frisbee around.
Playing with the tiles means we adjust the gaps as we lay the tile to try make uniform gaps. When the gap is wider with a large spacer, we have more leeway and adjust-ability. Sometimes we remove the spacer entirely because one tile is so huge compared to the other.
A small 1/16” spacer wouldn’t give us that leeway as the gap would close up to a hair and it’d be visible from the moon.
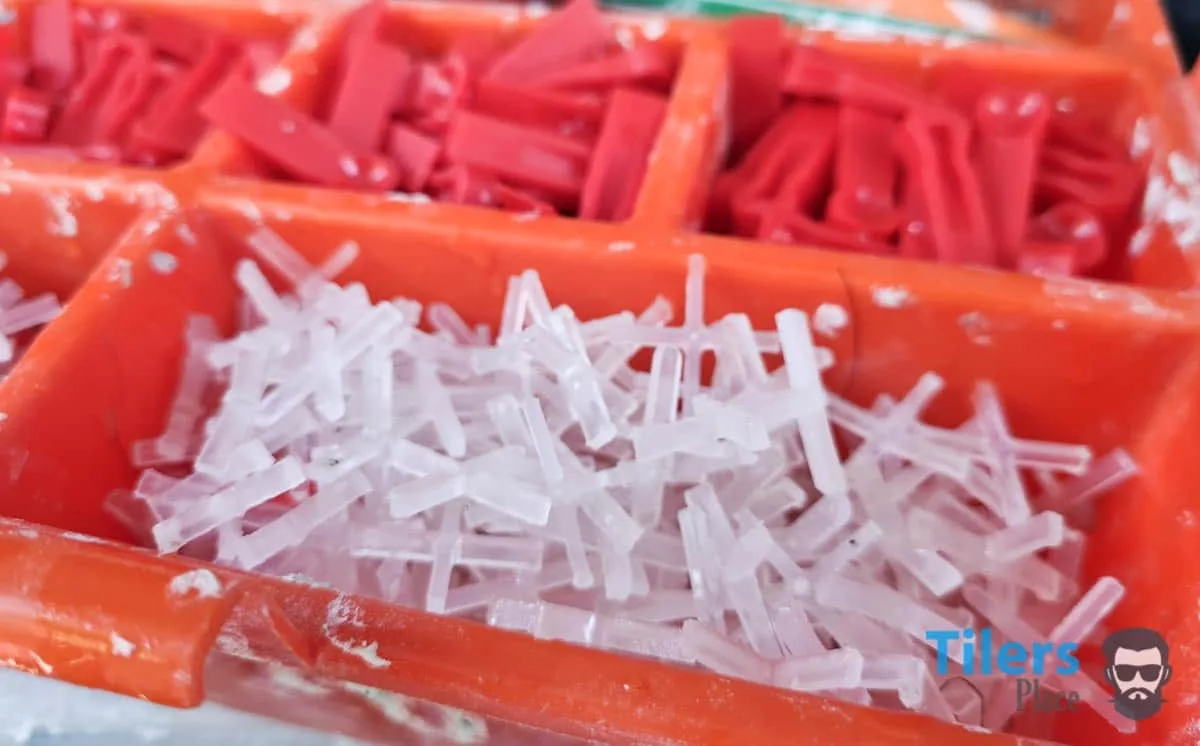
Tile spacers come in a variety of sizes: 1/16, 1/8, 3/16, 1/4 and 3/8 inches.
Smaller spacers like 1/16, 1/8 can be used for large format porcelain, subway or ceramic wall tiles. These tiles are uniform in size and look better with a tight grout line.
Bigger spacers like 3/16, 1/4 and 3/8 should be used on ceramic floor tiles, terracotta, handmade tiles and all those natural, Eco-friendly and trendy tiles that have a brown, earthy tone on the backside. Those suckers vary wildly in size and require a bigger joint to lay consistently. They also look better with a thicker grout line.
Thanks to their durability, spacers can be reused for multiple jobs. Maintenance is pretty easy but if they get dirty, I got a guide on how to clean tile spacers easily.
The general understanding is that you want as small a gap as possible. This is to help keep your grout lines clean and less susceptible to staining. Of course grout sealants have been invented for a reason and help prevent that. If you want to pick up a sealer, check out my guide to the best grout sealers.
What Spacer Size Is Best For Your Job?
To elaborate further on what we discussed, small format tiles like 8 by 8 inches and smaller, you can use 1/16 spacers and 1/8 spacers for floor tiles.
Standard size tiles around 12×12 or 16×16 inches, you can use the above measurements or go with slightly bigger at 3/16 if you’re working with ceramic tile or cheap tile that isn’t uniform.
Large format back breaking tiles like 18×18 and bigger are mostly very uniform and look best with tight grout lines. Use a 1/16 spacer. You achieve a very smooth and uniform look that emphasizes the design of your porcelain tile.
Where to Buy Tile Spacers
You can buy packs of tile spacers online or instore, the market is full of them.
Online retailers like Amazon or Aliexpress sell them at dirt cheap prices, especially Aliexpress (if you don’t mind waiting for the shipping time.)
Home Improvement stores like Home Depot also sell most sizes of spacers. Specialist tile stores will sell every size of spacer and in large quantities, if you require a big amount of a specific size, they’d be you’re first choice.
Types of Spacers
Regardless of the manufacturer, most spacers are the same and have the same structural integrity. So when buying a spacer, don’t worry about who makes it, but the type that’s suitable for your tile setting.

X-Shaped Spacers
The tried and true, unsung heroes of the tiling world. The common joe we all use on a daily basis. These guys can be used on both floor and wall installations.
They resemble a cross, hence the original name. They can be used in the standard flat lay style or the tombstone style and come in a variety of sizes from 1/16″ to 1/2″.

Tavy Tile Spacers
Probably one of the most well-known tilers, Armen Tavy invented his own tile spacer because he was fed up with traditional cross shaped and wedge type spacers.
Essentially the tavy tile spacer is a x-shape but has an added ring around it. This prevents the spacer from digging too deep into the tile and allows quick removal. The other side has only two lugs which allows it to be used with the tombstone method.
It’s a multipurpose tile spacer and many tilers swear by them.
Tavy spacers come in sizes from a monsterous 3/8″ to 1/32″. 10mm to 1mm.

T-Tile Spacers
Like the name suggests (spacers have original names), A T spacer can be used at the intersection of three tiles instead of four. Their essentially a cross shape with one lug snapped off. (Something you can make yourself and save buying more spacers.)
These are handy to use when field tile meets the metal trim or when laying brick/subway/metro/running bond patterns.
Sizes are available from 3/8’’ to 1/32’’.
For the record, I never use these.

Wedge Spacers
Wedge spacers are the kings of helping you lay wall tiles, especially the first row where you need to create your level. These are flexible plastic wedges that can be slid underneath the tile and they lift it according to your needs. The sloping angle makes them very adjustable so you can get your tile plumb.
These bad boys are essential for wall tiling so I’d grab a pack if you’re planning on doing that next.

Horseshoe Spacers
Horsehoe spacers, U-shaped spacers are shaped exactly like their named. As I said, spacers have very original names.
These are commonly used when running wall tiles in patterns where the tiles don’t met up in four corners, like the subway/metro pattern. Just slap these in underneath the tile. They’re easy to pull out due to the huge size.
They come in sizes of 1/4″, 1/16″ and 1/8″.
Some tilers love em, some don’t use em at all like me. It’s personal preference really.

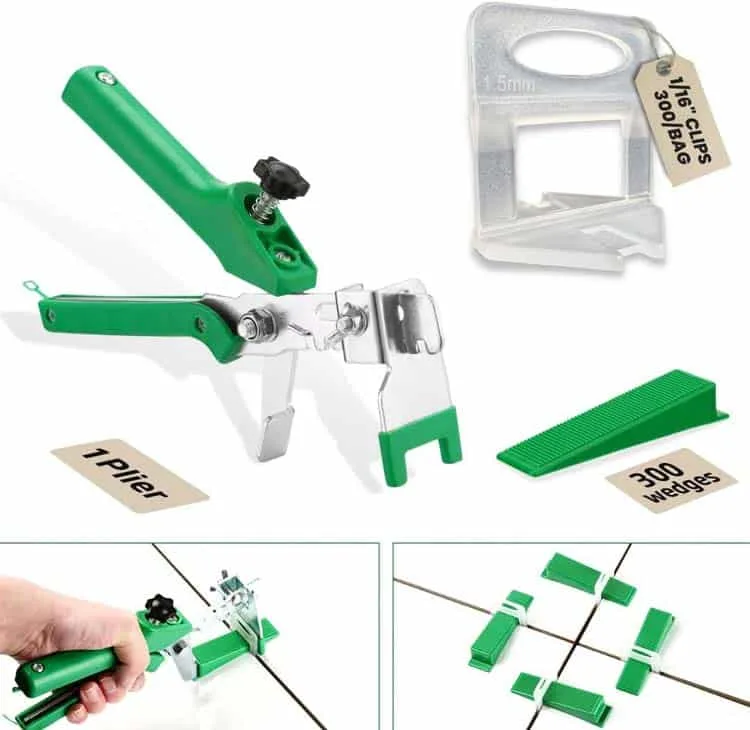
Self Leveling Tile Spacers
Whilst all other spacers keep grout lines uniform, none work to keep tile heights uniform – until these suckers came along.
Self leveling tile spacers or tile leveling systems come in two pieces. One piece slides underneath two tiles in the grout line and leaves a protusion (clip) above the surface. A wedge is then inserted into this protusion and sits flush against both tiles. This way the whole spacer is supported from below (keeps it from sagging) and it creates the tension to keep the two tiles sitting flush with eachother.
These leveling spacers solve the problem of heavy tiles sagging while the thinset dries overnight. No matter what the manufacturer states on the bag, thinset does “slump”. So you may have a beautiful flush surface, in a few hours one tile or two will slump whilst the thinset glue hardens and the next day you have tile lippage central.
No longer.
The next day, you just knock out the clip and save the wedge for future use. That’s the design, clips are single use only and the wedges can be used an infinite amount of times like a regular spacer.
The clips come in various sizes to accomodate the grout line size created by your regular spacers so be sure to buy the right size.
Be sure to check out my tile leveling system buying guide to find a kit that suits your needs. I have also a F.A.Q and instructions on using leveling systems.
Conclusion
Tile spacers are a must have for all tiling projects as they prevent misaligned tiles that ruin every tile job. From creating uniform grout lines across any surface, they also help keep tiles in position whilst the thinset dries.
Hopefully this guide gave you some needed guidance in selected the right kind for your next project, because as unassuming these little objects seem, they sure do make a big difference to every tile installation.

Leave a Comment
Your email address will not be published. Required fields are marked *
Comments are currently closed for new submissions.