Ultimate Guide How To Seal Your Grout
Learn how to seal your grout lines with this ultimate grout sealing guide – learn how to seal grout like a real tiling professional.
Sealing your tiles or grout is one of the best ways to prolong the look and performance of your grout by creating a barrier that repels dirt and water.
By using a simple applicator and a grout or tile sealer, you can take on this easy task yourself and safeguard your beautiful tiled finish for years to come.
This guide is designed for the total beginner and aims to provide the easiest way to seal grout lines with only a couple products.
I primarily focus on grout as that’s the most common form of sealing that a homeowner will undertake. Tile sealing is essentially the same thing except you have to apply sealer to the whole entire tile surface.
Please note if sealing tiles: Only natural stone tiles and some types of unglazed porcelain tiles can be sealed.
Why We Need To seal Tile Grout
UNDERSTANDING THE SCIENCE
Before we begin the guide, we will take a quick look at why we need to seal grout and tile and why it is an important step in tiling.
Grout in its essence is a fine, cement based compound that is enhanced with coloring agents and mold inhibitors.
Depending on the type of grout, some have added polymers to increase its strength while epoxy grout contains latex polymers and special liquid compounds that render it closer to plastic than actual cement.
We all know what cement looks like, its porous, has lots of gritty aggregates and sands and although it cures to one solid and strong mass, it still retains that porous structure.
Your grout, while not as gritty or rough, is still very porous and allows water, dirt, bacteria and mold to reside within it.
This all leads to dirty grout and maintenance nightmares as the grout is catching dirt and changing color in random patches across your tiles.
A sealer acts like a barrier in between the grout and the outside world, effectively stopping any water, dirt and other contaminants to enter it.
Once applied, the a grout sealant generally lasts anywhere from 3-5 years but an annual reapplication is recommended by manufacturers to ensure it is working properly and that there are not any areas where the protection has worn away.
High traffic areas or wet areas like showers that see a lot of water would definitely benefit from an annual application of a quality sealant.
That is why using the a quality grout sealant for shower tile floors is a very popular task for modern home owners as it saves time cleaning in the long run.

Its not as daunting as it initially may seem and after its done, the cleaning routine of your tile will be much easier as the need for scrubbing and heavy elbow grease will be effectively eliminated.
Do I Need To seal My Tile Grout?
Finally, before you go out and purchase a grout sealer and all the tools, let’s quickly see if your grout requires sealing.
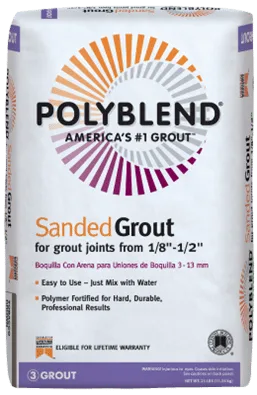
You should only need to seal your grout if it is a cement based sanded grout as others like epoxy and urethane grout have bulit-in compounds and the application of a sealer would only hinder their performance.
You would probably would have been told by your tiling professional whether you should seal your grout or not.
If you purchased grout yourself and are not sure, the packaging should mention it.
Otherwise, it is best to check back with the retailer you purchased it from to see if it is sanded or not and if it requires sealing.
You can also do a visual inspection by looking at the grout and seeing how smooth it is. If it’s fairly grainy or not 100% smooth, chances are you have sanded grout.
While the visual inspection is not the best way to be certain, it is better than nothing if you have no other way of telling what kind of grout you have.
How To seal Tile Grout Guide
Items Required For Sealing Grout:
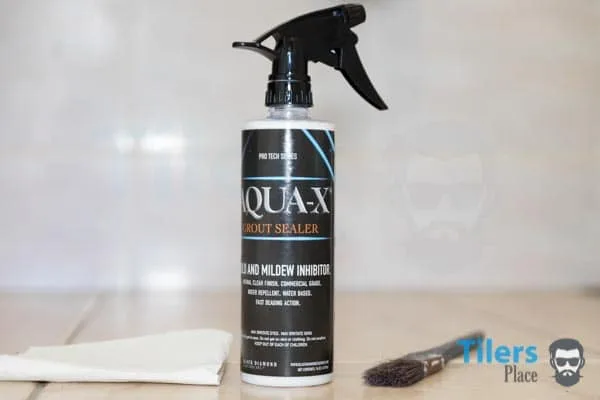
You can choose any brand that you prefer but I recommend Aqua-X Grout Sealer as it has added mold & mildew inhibitors and very easy to work with.
It penetrates the grout lines and seals, ensuring a deeper and more lasting seal, it’s one of the best tile sealants out there and highly recommended for most situations.
This is one of the latest grout sealers on the market and is quickly proving to be one of the best.
Not sure which sealant you require?
Check out my Best Sealers Guide.
There are many tools that you can use to apply a sealer, from paint brushes to foam rollers.
In an effort to make this guide easy for first timers, I am recommending a special sealer applicator.
You simply need to pour the product into it and use the brush tip to apply the sealer directly onto the grout.
A simple squeeze of the bottle will dispense the product neatly without splashing onto the tile surface.
This method makes clean-up much easier as you will be less likely to splatter sealer over the tiles which would require extra cleaning up after.
If you will be doing larger areas or thick grout gaps, a sealer applicator with a foam tip helps speed up the task. For natural tiles: Use a foam roller or paint pad.
Check Price – Aqua Mix Grout Sealer Applicator
Using Nitrile gloves will help keep you safe and protected from the chemicals found in the product.
Nitrile gloves are resistant to chemicals and recommended by Aqua Mix during the use of their product.
A couple pairs should be more than adequate for the grout sealing job.
Remember to dispose of the used gloves carefully after use as the sealant will dry on their surface, making them unsuitable for reuse.
You may also want to consider some knee pads as you will be kneeling on a hard, cold surface for lengthy periods at a time.
Check Price – AMMEX ABNPF46100 BX Medical Nitrile
- Lint Free Cloth Or Paper Towel
You will need one of these to help you remove any excess grout sealant that you leave on the tile.
Additional Tools If Sealing Old Grout
- Grout Brush – To scrub dirt from grout and prepare it to accept sealer.
- Cleaning Solution – Use together with your grout brush to quickly and effectively clean your grout and prepare it for sealing.
Step 1 – Cleaning Your Grout
If you are sealing new grout, you can skip this step.
To write this grout sealing tutorial, I decided to seal the floor grout in one of my small bathrooms at home. I laid tile in this bathroom a few years ago and this grout lines were never sealed.
I achieved a great result with these upcoming steps so if you follow along, you too should have properly sealed grout – no matter if it’s brand new or many years old and very dirty.
Time to get scrubbin’!
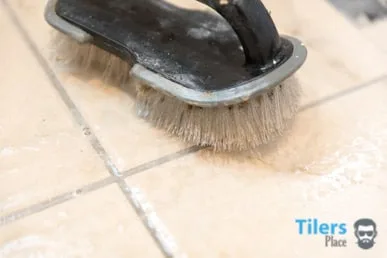
Before you can apply a sealer, its important to prep everything first. It’s time to go colonial on your tiles, grab your scrubbing brushes and cleaning solution and slap on those nitrile gloves. Listen to your bones crackle and pop as you get down on your knees and begin attacking those grout lines.
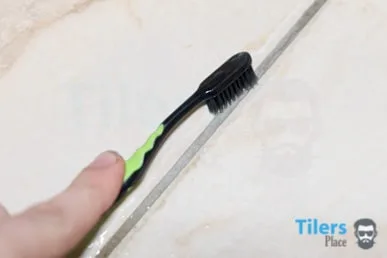
Apply your grout cleaning solution according to the instructions on the bottle and scrub one grout line at a time. Only move on after you see a noticeable improvement in the color of the grout.
I borrowed my wife’s toothbrush to get into the areas against the walls but I suggest a grout brush as the bristles are stiffer and remove dirt quicker.
If you want to speed up the process, you can use a regular old brush with stiff bristles.
Don’t Have A Grout Cleaner?
You can make a pretty effective grout cleaner with some household items!
White vinegar and baking soda work well together. Mix them into a watery paste.
Diluted hydrogen peroxide works wonders as well but handle with care!
Do note that this creates a bigger mess that you will need to remove with a sponge and clean water.
I preferred this method as it was quicker in the long run.
Once you have scrubbed all the grout that you will be sealing, rinse off and put away your scrubbing tools.
Try to get a breeze blowing into the room you are working in by opening windows, setting up fans etc – this will help the grout dry quicker. Make yourself a drink, relax and wait a few hours. The hard part is done.
Once the grout is dry, you can begin sealing!
Step 2 – Preparing The Area
If you have fresh grout, make sure to give the new grout at least 48-72 hours to cure properly before applying the sealer.
This ensures the grout has finished curing and bonded properly with the tile surface. Sealing it before this time will prevent a strong cure from occurring and thus shortening the life of your grout.
While you are waiting for the grout to cure, you can mask off any surfaces you do not want the sealer to touch like baseboards or other wooden, metal finishes.
The applicator should minimalize any excess solution from spilling out but if there are any areas you are concerned about, it is best to protect them.
If you haven’t already, open up the windows in the room. This will help the grout sealer dry as well as remove any odors from the grout sealer.
Step 3 – Sealing Grout
Now this is the part of my how to seal grout guide that you have been waiting for – actually sealing the grout!
Once the grout has fully cured and you have masked off any sensitive areas, you can begin sealing.
Make sure the grout is free of any dirt or dust and is properly dry.
Put on your nitrile gloves and pour the product into your applicator bottle. (if you are using one.)
Some grout sealers like the Aqua-X grout sealer that I was using to seal my grout come in handy trigger bottles.
You can apply the grout sealer directly onto the grout this way.
If you are using the applicator bottle: using the paintbrush point of the applicator bottle, apply an even amount of solution onto your grout.
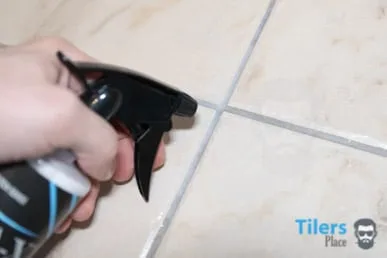
Be sure to properly cover the whole entire grout gap from tile edge to tile edge.
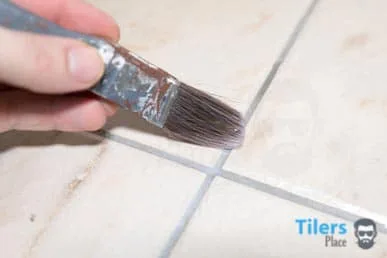
I used a soft paint brush to evenly distribute the grout sealer across the grout lines. When I needed more, I simply sprayed some again and continued like this.
It is okay to saturate the grout with the chemical as it will all be absorbed anyway and will help achieve a better seal.
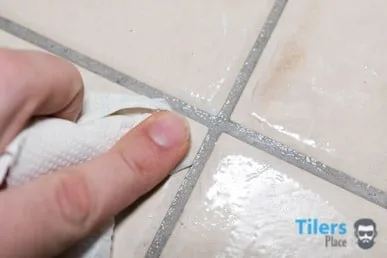
If you spill any excess grout sealer onto your tiles, simply using an absorbent paper towel or microfibre cloth to clean it off before it dries.
Follow this procedure until all your grout has a coat of sealer applied to it.
You will see the grout has turned a darker color and looks wet, this is a good sign that you have applied enough product.
Allow 30 minutes for the sealer to dry properly and then apply a second coat, following the same steps you did for the first coat.
The surface will be ready for traffic after 2 hours but keep it dry for 12 hours minimum.
A full cure will be achieved after 24 hours, making the tiled area safe for normal use once again.
That’s it!
Your grout is now properly sealed and you can enjoy an easy to maintain and healthy tiled environment that inhibits bacteria and mold growth.
Please note: Most grouts retain their original color and shade after getting sealed but it is normal for some grouts to remain a bit darker after application.
Further Notes + Tips For Sealing Grout
• To check if you have applied enough grout sealer and have achieved a proper seal, you can drop some water over the grout.
If it beads up/puddles, then that means you have applied enough to your grout and can use the surface.
If the water gets absorbed into the grout that means you will need to apply a further coat..
- If at some point you decide to deep clean or acid wash your tiles, the grout will require a new application as it got removed during the harsh cleaning.

If you would like to read more about the best grout sealants and learn more about them, I have written a guide to selecting the best product for your needs.

How To Clean Grout That Has Grout Sealer Applied?
So you sealed your grout – great!
But now comes the question that you didn’t think to ask until you’ve sealed the grout:
“How do I clean my tiles and grout without affecting the grout sealer applied to it?” or “Will cleaning my sealed grout affect the seal?”
Both are great questions and ones that you’ll need answered before you go cleaning your tiles to avoid harming the seal on your grout. If you are going to be pro-active and regular maintain your tiles then you’ll really want to hear the answer.
Luckily, my friends at Black Diamond have told me the answer to this question and I’ll pass it onto you.
To clean sealed grout safely, you need to use a cleaner that contains no harsh chemicals or solvents in it. Preferably a pH neutral tile and grout cleaner.
A quality pH neutral cleaner for tiles and grout is Stone & Tile Cleaner by Stonetech. This products is safe to use on all forms of tiles including natural stone and will not damage grout sealers.
This means that you can regularly clean and maintain your tiled surface without worrying that you are prematurely wearing out the grout sealer that has been applied.
So go on, and clean that sealed grout – you won’t damage it!
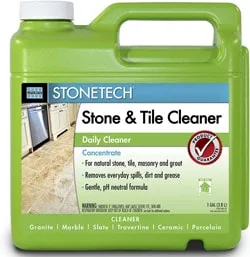
Check Price – StoneTech All Purpose Cleaner 1 Gallon
F.A.Q
What is the best method to apply grout sealer?
There are 3 main ways to apply a grout sealer; a brush, roller tip bottle or aerosol spray sealer.
Which one is better really depends on how much effort you are willing to put in. If you don’t mind excess sealer drying up on your tile and producing shiny areas on your tiles, then an aerosol spray is your choice.
A roller tip bottle is easy as it follows the grout joints and is less likely to pool over the edges. Porous grout is more tricky to properly protect and require more passes with the roller tip as it doesn’t distribute a lot during the first pass.
A brush is generally the best method as it applies a good amount of sealer on any cement-based grout and if you use a small enough brush, it won’t make such a mess. It does take more time and care however.
A foam paint brush can also be used but will make a bigger mess in exchange of fast progress. Be sure to wipe away any excess with a damp cloth immediately after sealing.
How To Clean Grout Prior To Sealing?
You should never use harsh chemicals such as ammonia or bleach to remove grout stains prior to sealing. Instead, try these basic recipes from household chemicals:
Use baking soda mixed with water to scrub away stubborn spots. Baking soda also helps neutralize acidity in the grout. Mix one part baking soda to two parts warm water. Scrub mixture into stain with a sponge or brush. Rinse thoroughly with plenty of fresh water.
For more stubborn stains, you can mix equal amounts of vinegar and hydrogen peroxide together and scrub.
What Happens If Grout Sealer Has Dried On My Tiles or Glass Shower Door?
Some manufacturers will have instructions on what to do if you accidentally let sealer dry on unwanted areas.
If you can’t find any, usually applying the product over the top of the dried up sealer will reactivate it and allow you to wipe it off with a damp cloth. Rinse and repeat until it’s fully removed.
How often should you seal your grout?
I’ve written a whole entire guide on this question but the quick and dirty is – every 6-12 months, depending on usage of the area.
A common mistake is thinking that applying grout sealer is a “one and done” sort of deal. Its not unfortunately. Grout sealer wears out over times, especially in wet areas or if harsh cleaning chemicals are used like bleach.
I’ve Used My Shower For A While Before Sealing It, Can I Still Seal The Grout?
Of course!
Grout can be sealed and resealed at any point of it’s life but you’ll have to clean it and make sure its completely dry before applying the product.
Most cleanly shower cans be cleaned with a mixture of hydrogen peroxide and baking soda. A quick scrubbing with this paste will clean any dirt.
Heavy staining where the grout has discolored can still be cleaned with this solution. It’ll just require more work from you. Scrub the lines more vigorously and for a longer time, it should come out right.
Avoid using the shower up to 24-48 hours. If you have one, setup a dehumidifier to speed up the process and extract as much moisture from the grout as possible.
Is It Difficult To Apply Grout Sealer?
No at all.
If anything, it’s just a slow and tedious task if you have a large area. Most bathrooms can be sealed in 15-20 minutes, depending on the tile size.
You are literally painting on some watery fluid onto your grout lines. The tedious part is wiping off any over spill that gets on the tiles – that’s it.
Which Grout Sealer Should I Choose?
I have a whole guide that you can read to help you decide which one is right for you. In most instances, a water-based penetrating sealer is the right choice for grout sealing.
The main thing with these products is you get what you pay for. Cheaper products have less “solids” in them that actually do the work. Professional grade products are more expensive but have more “solids” and do the work in less coats.
If your budget allows it, go for a more expensive sealer like Sealer’s Choice Gold.
Do You Always Need Grout Sealer?
Yes – if you have cement-based grout/unsanded grout.
If you have epoxy grout then there’s no need to apply it. Epoxy is water-proof and won’t absorb any sealer. It also has added benefits that those the job of a sealant. Drops of water simply sit on top of the grout, never enter it.
You can learn more about this grout in my guide.
Is There A Grout That Doesn’t Need Sealing?
Epoxy-based grout does not need sealing at any point. It’s a two-part grout that is impervious to water. This helps it inhibit mold & mildew growth. It also has higher stain resistance over regular grouts as the stain cannot enter the grout.
Spectralock is a common and popular epoxy grout.
Do I Seal The Tiles As Well?
Most tiles are glazed porcelain or ceramic. This glaze is similar to glass and thus makes it resistant to water or dirt penetrating it. This keeps the tile safe from mold, mildew, stains, etc.
If you have unglazed tiles, like terra cotta, saltillo or natural stone, then yes – you need to seal them as well. This porous material absorbs liquid and dirt and needs protection.
Depending on the look you are going for, you can apply the same sealer to your tile as well. Most water-based sealers will slightly darken the tile but will mostly be invisible.
There is a type of grout sealer that is solvent based and forms a film over the tile. These membrane-forming sealers are commonly called wet look sealers. They enhance the tiles look and really gives it a pop (especially in natural stone.) Whilst this can also be applied to grout, some people don’t like their grout looking shiny. These products also need reapplication more often, especially if the tile floor is in a high foot traffic area.
Membrane-forming sealers are also known as non-penetrating grout sealers.
9 Comments
Jules – December 20, 2018
Thank you for this easy to follow and highly detailed guide. I did exactly what you said, ( I literally had my phone next to me with your guide open, and followed it step by step) and water is beading up on my grout! So glad it works!
Emily – March 31, 2019
What shall I do if some of the sealer dried on a tile? It doesn’t appear to want to come off.
Carl Anders – March 31, 2019
Hi Emily, You can try hit it with a mild vinegar solution and give it a good scrub with a scouring pad or similar. If it doesn’t come off you’ll need to step it up with some professional tile cleaning products like “NanoScrub” produced by Aquamix. Alternatively, if it’s a porcelain or ceramic tile, you can just leave it – it’ll wear off in time. Hope that helps! Let me know if you require further help.
L. Sy – December 31, 2020
is there a good brand of colored water base sealant you can recommend?
Carl Anders – January 4, 2021
Hi, Mapei makes a pretty decent grout colorant and sealer. It’s more suitable over generic brand grout pens and the like. It will color the existing grout and provide a seal as well. Be sure to thoroughly clean the grout first. Applying it should be similar to regular grout sealer, just be more careful with wiping off excess so it doesn’t color your tiles.
Donald Theisen – March 17, 2021
I want to seal only my tile floor. The tile is very small, about the size of a nickel so I will have a very hard time keeping the sealer off the hundreds of actual tile. Attempting to sealing only the grout with the correct tool will be very time consuming. Any suggestions? Thanking you in advance of your comments!
Carl Anders – March 18, 2021
Hi Donald, Definitely a tricky situation indeed! I totally understand the predicament. Do you know what kind of material the tiles are? Are they stone or a standard tile like ceramic or porcelain?
Estus Whitfield – June 19, 2024
Does the method you describe work on outside deck tile? My 20-year-old deck is 18′ x 14′ with 8″ x 4″-inch red tile. Water soaks through the grout and wets the underneath plywood.
Carl Anders – July 1, 2024
Hi Etus, I wouldn’t rely on a grout sealer to make your outdoor tiles fully waterproof. This sounds like a installer error and an outdoor waterproofing system that is approved to your local building code should have been installed prior to installing tiles. No grout or tile is waterproof as condensation can still form underneath the tile from changes in temperature. This condensation can sit and/or soak through the thinset and into the substrate (your plywood).
Sadly, I do not see a simple fix to your problem. Either installing some sort of roof or removing the tiles and getting them properly installed with a waterproofing system are the only long term solutions.


Leave a Comment
Your email address will not be published. Required fields are marked *
Comments are currently closed for new submissions.