Tilers Place is reader-supported. When you buy through links on this site, I may earn an affiliate commission on qualifying purchases.
Welcome to my guide showing you how to change the brushes in a hand held tile saw.
This is a simple task that anyone can do and this guide you walk you through the process of repairing your tile saw. By the end of it you will have all the tools and knowledge needed to repair your the saw yourself.
Be it at home or on the job at a work site.
Is your tile saw coughing, running low on power or sparking?
These are all signs your motor brushes need replacing.
This is a very simple process requiring only a few simple tools so you should be able to do this anywhere without any difficulty.
Since brushes are a disposable part that is expected to wear down in time, they are readily available and cost a minor fraction in comparison to buying a new tile saw.
Before we begin the guide let’s diagnose the problem and see if it’s actually the brushes that need replacing.
How To Tell If your Brushes Need Replacing?
Here are some symptoms of bad motor brushes that indicate your brushes may need replacing.
- The tile saw turns off and on during use.
This is usually the first indicator that your brushes are on their way out. If you have your tile saw is cutting out during a cut that means the brushes are making sporadic contact with the armature causing it to stop producing power. This can either be caused by burrs on the carbon surface of the brush creating uneven contact with the armature or, the carbon has worn down so much that it cannot contact the armature anymore.
Either of these scenarios causes the circuit to be broken hence the tile saw cutting out.
• The tile saw is coughing/ sounds raspy.
You will undoubtedly hear this while using the tile saw. I can usually tell my tile saw will need new brushes soon as this is the symptom that shows up first. The tile saw will be running fine but I will hear a faint rasp emit from it every time I start it up for the first time.
If you are hearing this noise your saw is indicating it will need new brushes soon. I take this sound as an indicator to purchase new brushes and have them ready for when more serious problems develop.
- Banging or Tapping the tile saw helps
If you find tapping the tile saw helps stop the cutting out that means your brushes are burred or not making proper contact with the armature. Every time you give it a smack it helps seat the brushes and enables you to cut for a while longer. This is only a temporary solution as your brushes will continue to give you grief until you replace them.
If you have any of these symptoms you will need to replace the brushes in your tile saw.
Ignoring the problem will not make it go away. It will continue to happen until your tile saw stops altogether.
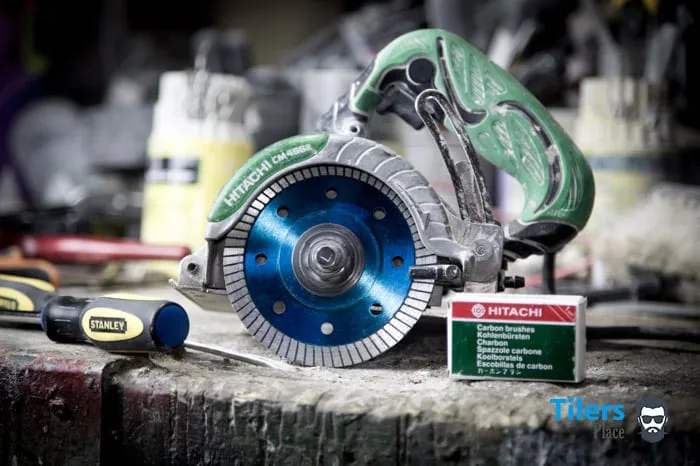
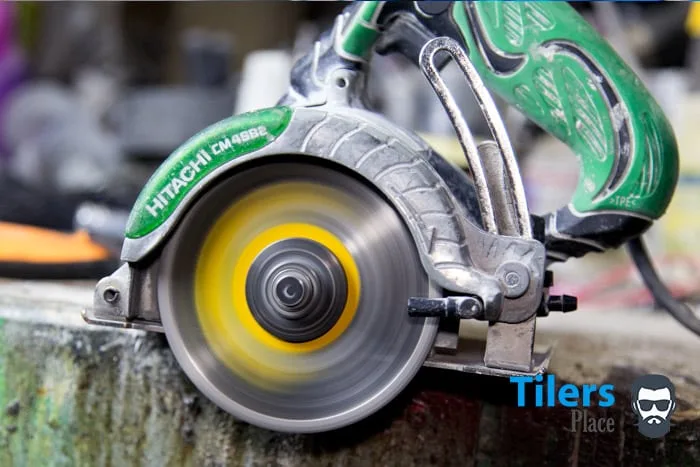
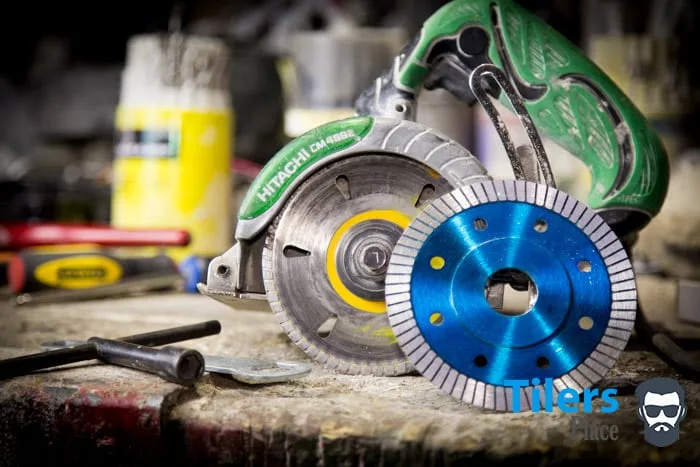
Please note: In this guide, I will use a Hitachi CM4SB2 professional tile saw as an example but these steps will apply to ANY handheld Tile Saw.
Now that we know about the problem, let’s fix it!
How To Replace Brushes In A Tile Saw – THE Guide
Time Required: 5-15 Minutes (Max)
Tools You Will Need:
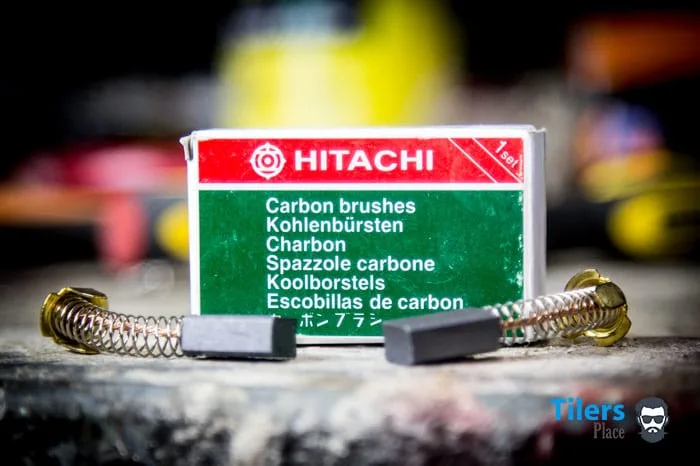
•A new set of brushes
Click here if you want to find a set for your tile saw.
Click here if you want a set for the Hitachi CM4SB2.
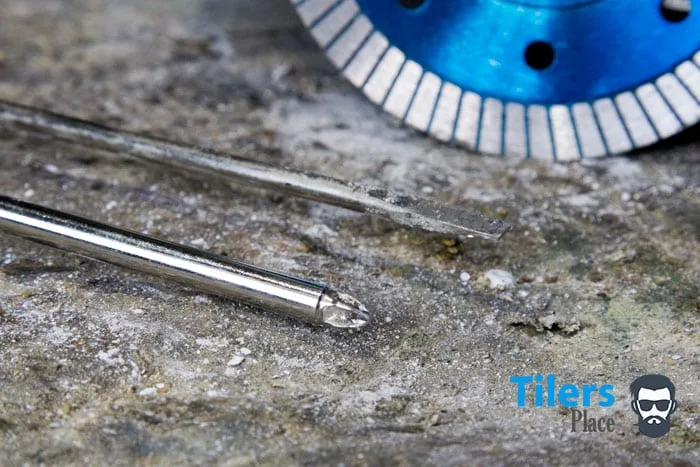
•Two Screwdrivers
Got Everything you need? Good!
Told you it’s a simple job!
Most anyone should have a set of screwdrivers around the house or work truck or can borrow one at a pinch. The screwdriver size is standard however try to use the widest flat head you have when undoing the brush cap.
If you do not have the brushes then I highly recommend you click the link above and order your set from Amazon. They will have a very wide selection of brushes needed for your tile saw and will dispatch them out to you quickly.
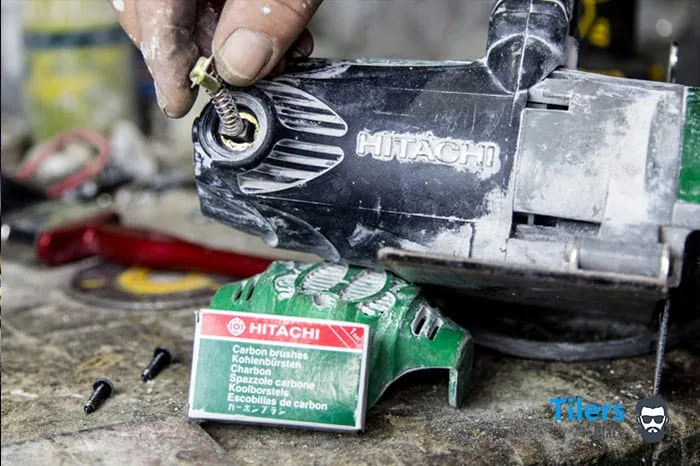
Now that we have everything let’s begin the disassembly of the saw. As mentioned before I will be working on my Hitachi CM4SB2 that I reviewed in depth here.
From what I have learned it is the only saw with a plastic cap protecting the armature core and other reasons I have covered in the review. If you do not have the Hitachi chances are your brush caps will be mounted on the external case so just skip step 1 where I remove this cap.
Find a nice flat surface to work on and one that you can store all the parts of the tile saw when it is disassembled.
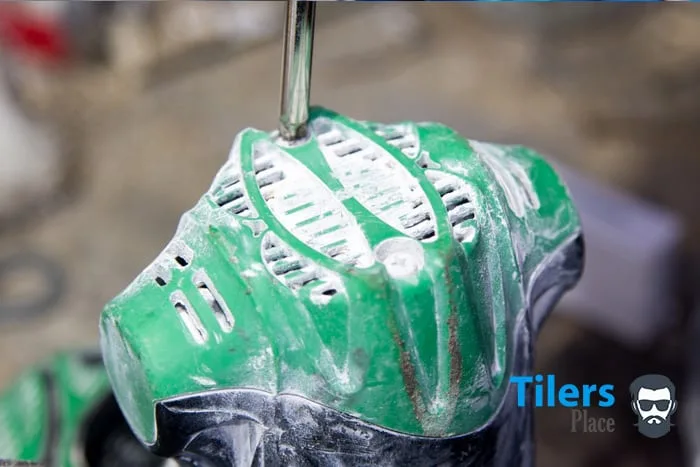
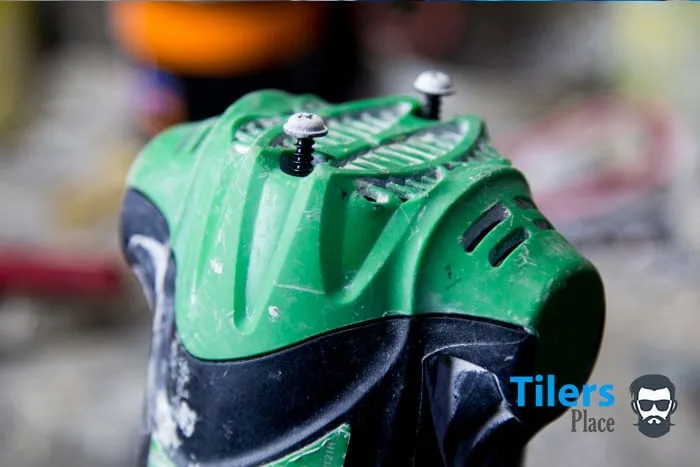
Step 1 – Removing The Outer Cap
(only if your saw has one)
Using your Philips head screwdriver undo the two screws on the bottom of the saw.
Place it flat on a secure surface and use one hand to hold the saw steady while you use your dominant hand to remove the two screws.
The screws will need to be turned in the standard anti-clockwise manner you use for removing screws.
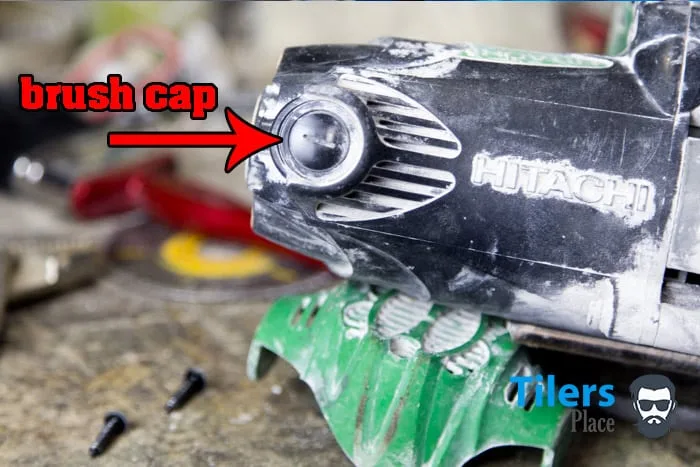
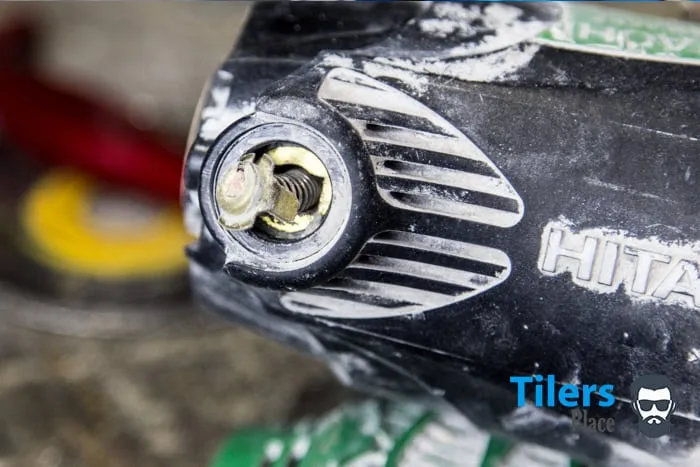
You should now have access to the brush caps.
It is the large flat round dial you see with the arrow pointing at it.
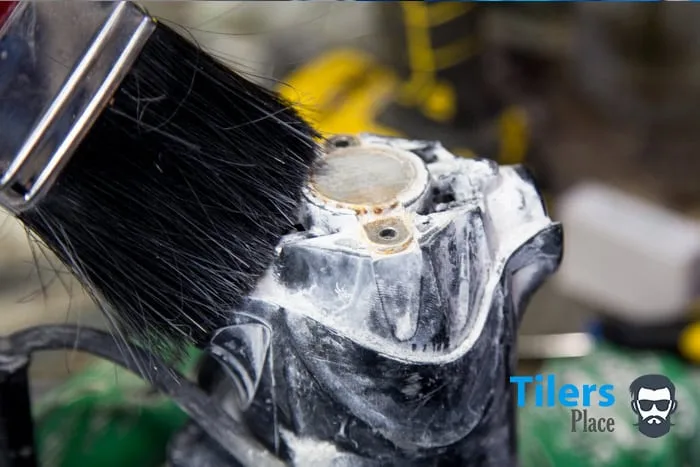
Optional Step
Using a stiff brush you can dust off any accumulated dust and debris.
Over time dust will settle in the tile saw and it is good practice to clean this off before reassembly.
It is also wise to do this before removing the caps to prevent any of it falling into the armature core.
For stubborn staining, you can use a lightly damp cloth and wipe the dust away.
Be very careful not to get any water near the electrical connections.
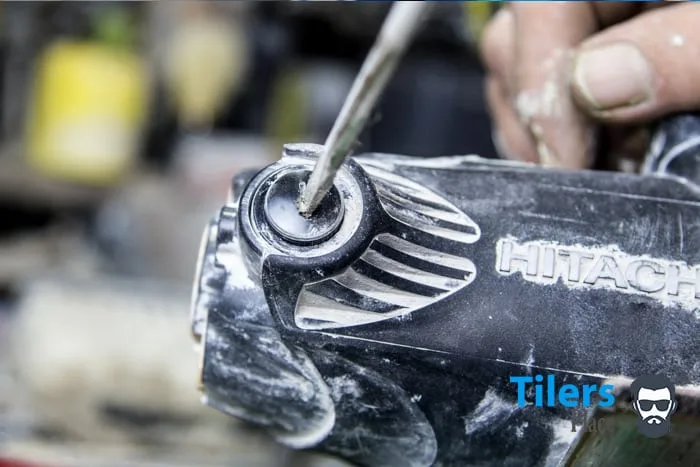
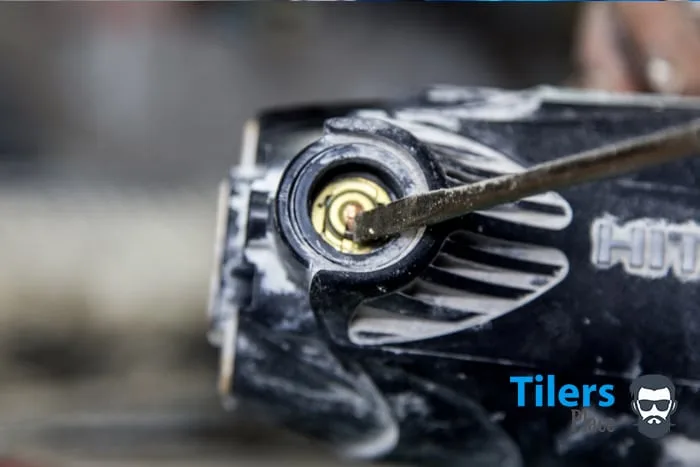
Step 2 – Unscrew The brush cap
Now using your flathead screwdriver insert it into the notch in the brush cap.
Carefully unscrew the cap using a standard anticlockwise twist.
Use your other hand to steadily hold the tile saw so it doesn’t move around during the turn.
With the brush cap removed it should look like this.
Set it aside somewhere safe and repeat the process on the other side of the saw.
Remember there are TWO brushes that need replacing.
Flip the saw over and repeat the same steps as mentioned above and unscrew the brush cap.
With the caps off you can gently remove the old brush from the saw.
It should slide out of the brush seat with a slight amount of effort.
STEP 3 – Installing New Brushes
Remove your new set of brushes out of their packaging.
There should be TWO in the set.
They can go into any side of the tile saw so do not worry about that.
Insert One new brush into the brush seat with the carbon side going into the saw itself.
The carbon side is the dark block material at one end of the new brush.
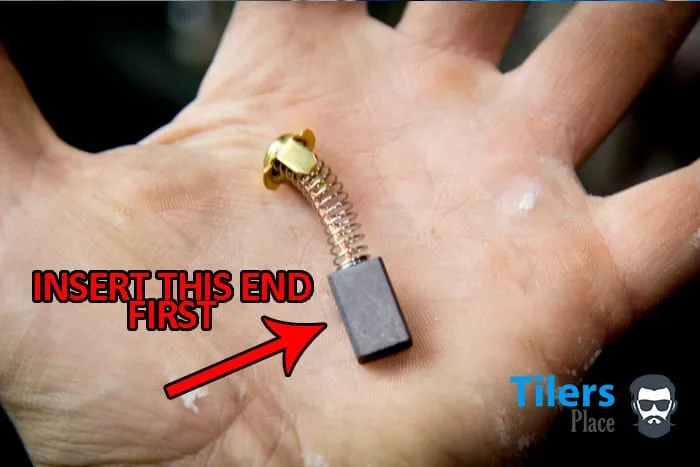
When the new brush is seated inside you need to compress the spring so it sits flush against the golden area of the brush seat.
Also, you need to ensure the long wing area of the top part of the brush goes into the tile saw as well.
The picture shows you the correct alignment needed.
When you have it aligned as shown the wings should hide fully inside the saw.

If you new brush sits inside its seat like this you have it inserted correctly.
If it sticks out then decompress the spring and shift the cap until it aligns correctly.
The spring is fairly fluid so leave the carbon block inside the saw while you make your adjustments.
Step 4 – Screw The Brush Cap Back In
Are you still following me?
Good because now comes the most difficult part of the whole install.
With your flathead screwdriver holding the new brush in its seat, quickly insert the brush cap back over the slot.
As you insert it move your screwdriver away.
With your brush cap lightly placed over the hole use your screwdriver to first turn anti clockwise.
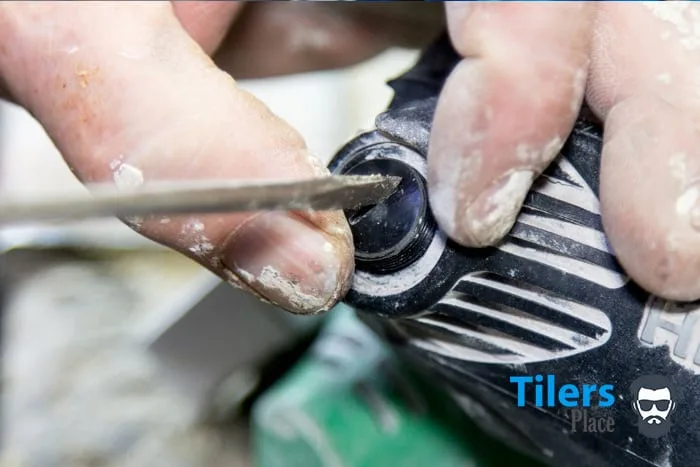
By doing this you can check the brush cap is seated properly in the thread.
With this completed, you can begin to tighten the brush cap back into its slot.
If your new brush has seated correctly there should be no resistance as you tighten the cap back into place. If it is difficult going or your brush cap does not go back into its slot and sit flush that means the brush has not seated properly.
Untighten the seat cap and repeat the seating process and reinsert the cap if this happens to you.
Step 5 – Repeat the whole process on the other side
Now that you have one brush properly inserted and installed you can flip the saw over and install the other brush.
Remember to insert the wings into their appointed slots and screw the brush cap in gently.
If all goes well the second brush should be easier to install than the first as you now have experience and know what to look out for.
Step 6 – Reinstall the back cap and Wrap Up
Now that you have both brushes installed and your brush caps sit flush you are done!
Place your tile saws back cap onto the back of the saw.
Make sure it aligns correctly and sits flush against the main body.
Grab your Phillips head screwdriver and tighten the screws.
With your tile saw all put back together again you are almost done!
Plug in your tile saw and give her a quick pull.
It should run like new with no barking or coughing.
SUCCESS!
You have just learned how to change the brushes in a tile saw!
Congratulations you have just learned a new skill and also learned how to take care of your professional tile saw.
Tile saws are great in that there isn’t that much maintenance required to keep them running in optimal condition.
For me replacing the tile blade and the brushes are the main parts of the maintenance I do on my tile saw. Apart from the occasional cleaning up of dust, it’s basically all you need to do to look after your saw.
Need Parts for your saw?
Be sure to check out Amazon as you will find a whole array of tile saw spare parts available to be shipped to your door. Just type in the model of your saw in the search bar and you’ll be all set.
I have purchased a whole host of replacement parts for my Hitachi CM4SB2 tile saw from there including a new trigger and brush caps.
You can check out a whole parts like list here.
If you want to read more about tile saws then be sure to check out best tile saw review. It is the longest and most comprehensive review of any tile saw you will ever read on the internet.
If it’s not, let me know.
I hope this guide was of service to you and your tile saw now is running like it should. Don’t forget to check out my guide to replacing the blade as well.. Don’t forget to check out my guide to replacing the blade as well.. Be sure to share it amongst your friends if you feel it will help them out!
Thanks for reading and happy cutting!
Carl.
3 Comments
Luke – September 13, 2017
great guide! i followed the steps and managed to replce the brushes in about 20 mins. never done somethin like this b4 so took longa than expected lol. My tile saw works like new again. I fink my trigger is stickin or somethin so i ordered one off amazon. Really cool you provided those links as i found da part i needed in a sec.
Adam – September 17, 2017
Damn, this must be why my makita tile saw is coughing every time I fire her up. I’m gonna give this a go and order some new brushes and see what happens. Thanks for the interesting guide, even though its for a dif saw i can still follow the steps, my brush caps are mounted directly on the saw so should be fairly straight forward.
DanIEL Friedeck – August 22, 2019
The wire spring on both brushed broke when I tried removing them from my MK 470 tile saw. How do I get them out?
Carl Anders – August 24, 2019
Hi Daniel,
I’m not personally acquainted with the MK 470 saw but I imagine it being similar to every other saw. If the spring broke while removing the brushes, I’d get some needle nosed pliers and pull on what reminds of the spring to pull the brushes out. If the spring is completely gone, you will need to disassemble the motor housing and remove them from the other end. Hopefully it goes easy for you.

Leave a Comment
Your email address will not be published. Required fields are marked *
Comments are currently closed for new submissions.