
Most Common Questions Answered about Tile Grout
Tile grout is easily one of the most misunderstood parts of a home/office.
This misunderstanding commonly leads to negativity towards it and casts a bad light on tiling in general.
I want to change that by providing you with some education on what grout is and it’s maintanence.
This Grout FAQ aims to answer some of the most common tile grout questions and provide solutions to easy problems you may encounter with your grout and caulk (silicone).
Covering subjects like the best grout removal tools, how to remove caulk, best ways to clean grout and many inbetween, this Grout FAQ aims to be your one-stop resource for everything grout related.

Hello there fellow homeowner and welcome to my Grout FAQ
For the past 25 years, I have been tiling professionally and I have played with more grout than a child has with their Play-Dough.
In that time I have applied, repaired and cleaned every type of grout known to man and there isn’t anything grout related that surprises me anymore.
I want to pass that knowledge onto you so that your grout will always be looking it’s best, no matter what.
Commonly Asked Questions About Tile Grout

Question:
can i touch up grout the next day?
Answer:
Generally, you should be okay to mix up some grout and touch up any trouble spots in your new grout.
Stuff like pin holes, scratches or low spots can be touched up with fresh grout the next day. The trick is to blend in the new grout with the old so make sure you mix it the same way that you mixed it the day before.

Question:
Can you put new grout on top of old grout?
Answer:
Short Answer, no way!
Well, there is nothing stopping you from slapping some fresh grout over your dirty old grout, and I am sure people have tried this numerous times.
However, I wish you well in making that new grout stick to the old grout and stopping it from not crumbling away within a few days.
You see tile grout is a solid cementitious substance, in order for it to retain structural integrity, (my wife loves it when I use big words) it requires a minimum thickness for it to cure properly and attain proper strength.
There is a reason why your driveway is made out of thick slabs of concrete, if it was just an inch coating on top of dirt it’d crack and fail the first time you drove your car over it.
The same thing applies to tile grout, which is in it’s simplest form is a fine form of cement with added colors and polymers.
When you grout over the top of old grout, first of all, you’ll find you’ll be washing away most of it with your sponge during the wash-up phase.
This will result in you having to reapply the grout and try again. You’ll be repeating this process ad nauseum until you tear up the sponge in anger and declare war on anything tile related.
The solution?
Remove the old grout to at least half the thickness of the tile. That is the general rule of thumb recommended by most tile professionals and grout manufacturers.
I have written extensively about the best grout removal tools and grout removal tips. You can find more related articles on the subject if you wish to read more. Just do a search in the search bar above.
For this example, I suggest using a grout saw or an oscillating multi-tool with a grout removal blade attached. Scratch out either the entirety of the grout or at least half the tile thickness.
Make sure to remove all of the old grout from around the edges of the tile as it’ll be visible when you apply the new grout as dark colored patches of dirt. This will ruin the look of your new grout.
If you are unsure about grouting or the tools needed, I have you covered.
Click here to read my complete and highly detailed guide to grouting and repairing grout. It covers all the tools needed and techniques on how to work with tile grout.
Question:
What is the best tool to use to remove grout?
Answer:
There are plenty of great tools for removing grout available to purchase, which tool you use all depends on your time and the size of the job.
(Click the images for more details plus prices)
If you are only doing a small grout repair job or regrouting a bathroom floor for instance, then a grout saw should be adequate for the grout removing task.
Using a special carbide encrusting blade, it tears it’s way through the tough old grout and effectively grinds it into a fine dust.
It does require a lot of effort from you but it’s still a great grout removal tool on a budget.
If you have a Saturday free then dedicate the time to removing your old grout with this little grout removing tool.
For a quick repair of your shower grout, then this will work great.

Check Price – Goldblatt G02738 Pro Tile Grout
If you require the very best in grout removing tools, then a DeWalt Oscillating Multi-Tool fitted with a grout removal blade is your answer.
Being a cordless power tool, it can be used in any environment or situation without problems and with a couple batteries handy, you’ll power through any job – no matter how big or small.
The best part is that the multi-tool does the hard work for you, all you need to do is press the trigger and guide it where it needs to go.

Check Price – DEWALT DCS355D1 Lithium Ion Oscillating
With a pressure sensitive switch, you can start slow and gradually increase power as you bite deeper into the grout line and get more comfortable with the grout removal tool.
Before I discovered these wonders, I used a grout saw extensively and it made any grout removal job a nightmare as a whole kitchen or dining area would take me all day.
Now I don’t leave home without my DeWalt multi-tool and always make sure to have a few new grout removal blades handy.
If you decide to purchase one for yourself, I suggest you purchase a few different shaped blades to ensure you reach every inch of grout and in terms of large areas, you’ll want a spare blade in case your first one burns out.
If you want to know more about the best grout removal blades for multi-tools, you can read my guide here.
Question:
What Dremel bit to use to remove grout?/Which Dremel bit can I use to remove grout?
Answer:
Questionable English aside, if you really want to use a Dremel to remove grout, I would suggest you go with their dedicated grout removal bit.
It is made of solid carbide and specifically designed to cut through all types of tile grout.
Dremel makes the grout removal bits in two different sizes to suit various grout line gaps.
A 1/8 Inch and a smaller 1/16 Inch grout removal bit.
I recommend you look at your grout lines first before making a purchase so that you buy the correct sized one for the job.
Got one in your cart? Good. Now add another one to your total as chances are you will break the first tip from either too much pressure or wearing the carbide out from over-heating.
While the 1/8 Inch grout removal bit holds up fairly well, the 1/16 Inch bit has a tendency to break quickly due to being so thin.
With delicate, precision tools like these, you need to take your time and go slowly. Remember to allow the tool to go at its own pace and not push the Dremel grout removing tool into the grout.
Too much pressure will only result in either burning out the carbide resulting in a drastic reduction in cutting speed or breaking the tip off completely.
Even with the utmost care, you may still find yourself prematurely breaking a bit before all the grout has been removed from the area.
Grab two bits to ensure you complete the grout removal job the first time.
Check Price – Aqua Mix Sealers Choice Quart
Check Price – Dremel 569D 16” Diameter Removal
Question:
What tool do I use to get rid of caulking?/How do I remove old caulk?
Answer:
I have seen all sorts of nonsense answers on the internet about how to remove old caulk and it drives me crazy.
Most are ineffective or a waste of time, so I want to point you towards the easiest solution THAT WORKS!
Be it silicone or the traditional painters caulk that some cowboys still use to seal wet areas with, (seriously guys, you’re ruining homes by doing that..stop it) there are special tools designed to make removing old caulk a snap!
Not only that, but you also have a large variety of caulk removing chemicals that you can apply over the caulk to soften it up and ease the removal process.
Generally, the manufacturers recommend you apply the caulk removing solution and leave it overnight for it to properly bite into the old caulk and release its bond from the surface. Read the label thoroughly in any case.
Apply some of that caulk remover and then use a caulk removal tool to do the rest.
Most are shaped to fit in a corner junction like you would find between a bathtub and tiled wall for example. Slide it onto the caulk, and push it along.
You can then clean up the residue with either a sharp scraper or blade or more of the caulk removing solution.
I will link a great set of caulk removers that work wonders for this sort of thing alongside a trusted caulk removing formula I use myself.
Removing old caulk and silicone is not rocket science.
Like with many tasks, the right knowledge and tools will make the most daunting of home renovation jobs a walk in the park.
Grab these products and get rid of that old silicone and caulk like a true DIY-Home Expert that you are.


Question:
Can you apply caulk over old caulk?
Answer:
This is a similar question to the one about applying grout over old grout but I want to clarify a few things.
The answer is no and applying new caulk over old caulk is generally a bad idea.
It’s like sweeping up and hiding the dirt under a rug. Just because you hid it, doesn’t mean you made the problem go away.
Ask yourself; why are you wanting to apply the new caulk in the first place?
The usual answer will be either that the old caulk is dirty, is coming off in places or you don’t like the color.
You got to remember that caulk is not only decorative but a moisture barrier and is applied in expansion joints.
Simply slapping some new caulk over the old will not solve your problem, it will only delay the effects for a while before it’ll need redoing or touching up again.
Besides that, with a new bead of caulk over the old one, you’ll have a big ugly slug of a caulk line that will look terrible.
I highly recommend you follow the instructions on the question above “what tool do I use to get rid of caulking” and get rid of all the nasty old caulk.
With a fresh and clean surface you can apply a new bead of caulk and be safe in the knowledge that you have done it correctly and it will last much longer than if you simply covered up the problem.
Question:
What is the best caulk to use around a bathtub?
Answer:
The best caulk to use around a bathtub, shower or any wet area would be one consisting of 100% Silicone rubber.
Silicone is designed to stick to most surfaces and most importantly: keep water out and resist mould.
I would stay away from non-silicone caulks for wet areas (I stay from them period) as they are not designed for that purpose. Besides that, they don’t ensure a waterproof seal.
In a wet area, the last thing you want is water getting behind the bathtub, between the tiles etc and causing damage where you can’t see it.
Lastly, bathtubs are not solid. They tend to move when filled with water or when you get in them. When they shift downwards, you need a flexible material that can tolerate that movement without fraying or ripping.
Silicone caulk is flexible enough to withstand general movement throughout its entire lifetime.
Standard caulks dry up to a solid mass and crack when put under the same strain.
That is why I always use pure silicone caulk for any wet areas and all my tile jobs in general, it’s a fool-proof way of getting a lasting and safe joint.
In terms of mould resistance, while most silicones boast abilities of no bacterial growth and the like, I still highly recommend you clean your silicone every week to avoid any build-up of dirt.
Soap scum and body residue can stick to your silicone which allows bacteria and other nasties to grow.
Here is an ideal silicone caulk to use around a bathtub and in wet areas.
It is made from 100% silicone so it will contain all the qualities I have described above.
Make sure you take note of the color you need so you order the correct one.
This one is white however silicones come in a range of colors to suit every application.
Just do a search on Amazon to find the color you need!
Don’t forget to grab a caulk gun if you don’t already have one as well!

Question:
What will dissolve grout?/Can I Dissolve tile grout?
Answer:
This is a very broad question as it does not define how thick the tile grout is but I am fairly certain I know what this misinformed soul is asking.
Someone is asking what product can be used to dissolve old grout from between tiles. As in, the fully cured cement-hard substance that is between tiles.
In my mind, this is nothing short of alchemy, because turning lead into gold is about as impossible as turning cement into a liquid with the aid of some product.
So the answer to whether or not you can dissolve grout is a firm no.
There is no compound, product or anything of the like that can liquify grout for ease of removal.
Grout is an enhanced version of cement that once cured, is a solid mass and the curing process cannot be reversed back with the application of component-X.
Believe me, if there was such a product all tilers world-wide would be buying it by the barrel load as it would make our lives a dream.
There are chemicals and acids that help remove grout haze but nothing that can dissolve fully formed grout out of grout lines.
You can technically dissolve grout with a grout removal tool. Like a multi-tool with a grout removal blade attached can reduce the grout to dust but that’s just a play on words.
To this date, you cannot dissolve grout from tiles.
Question:
What Is The Best Grout Sealer?
Answer:
The best grout sealer is Aquamix Sealer’s Choice Gold.
While saying anything is the best is very generalist and subjective, especially in a field as diverse as tiling and grout, I feel that Aquamix has created a sealer that covers the widest spectrum.
It is suitable for all forms of sanded grout and all types of natural stone like marble and granite – to name only a few.
With a non-sheen and natural finish, its a popular choice with homeowners that want a unobtrusive sealer.
I go in detail about all sorts of grout and tile sealers in my best grout sealer buyer’s guide. If you are wanting to learn everything you need about grout sealers, be sure to check it out before you purchase one.
Question:
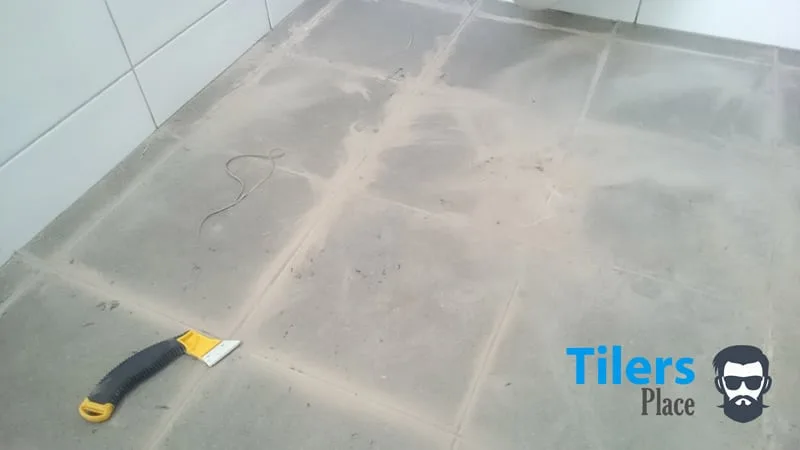
How do you remove grout haze from tile?
Answer:
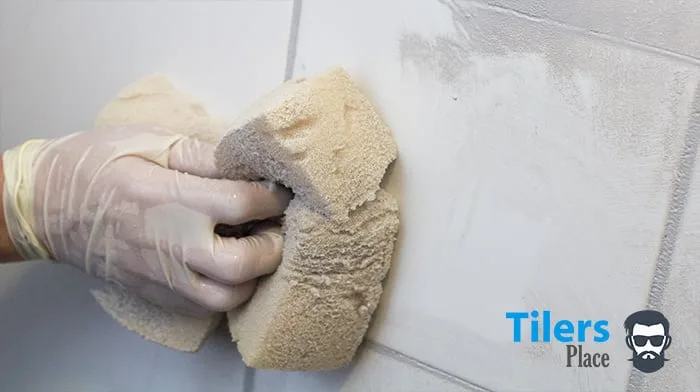
Grout haze forms on tiles when it has been allowed to dry onto the surface of the tile during the washing up phase of grouting.
This usually happens when the washing up with a sponge has been rushed and the tiles were not fully cleansed of the excess grout applied during grouting.
Epoxy grout is a notorious candidate for grout haze forming on tiles as it’s a real tough one to clean up properly.
Anyone that has worked with epoxy is nodding their heads right about now and are thinking back to the first time they worked with epoxy.
It was great, wasn’t it? Definitely a learning experience.
Porous tiles with a textured surface are also very prone to grout haze build-up as there is literally no way of cleaning them up properly even with copious washing and buffing after.
Okay, so we know the problem.
Here’s the solution!
You can buy specially formulated grout haze removers that will lift all the haze off of your tiles.
Follow the instructions on the packaging and scrub the tiles with the solution, in most cases it should remove any grout hazing left over from the install.
Please note that the longer you leave the grout haze, the harder it will be to remove.
Ideally, grout haze should be removed the next day after grouting or as soon as the grout has cured properly.

You can step up the game with hydrochloric acid.
This is a wonder on grout hazing and other mortar hazing as it effectively removes the residue from the tiles.
This is a powerful acid so if you are going to be using it safety clothing is a must!
Safety goggles and long-sleeved clothing are essential to reduce any burns.
While this is not as potent as pure hydrochloric acid/spirits of salts, I urge you to be very careful with this grout haze remover.
Apply with a scouring pad or brush and give it a good scrub before rinsing with copious amounts of water.
If you want to learn how to prevent grout haze, you can read my guide.

For a full tutorial on how to remove grout haze from tile, you can read my guide here.
12 Comments
Roland Bachmann – March 21, 2018
Thanks for the tips on those Dremel grout removal tips! I was having difficulty deciding which ones to get, after reading this i just got the two you suggested. Easy peasy.
Sammy T – March 22, 2018
I admit I was skeptical about that grout haze remover you suggested. I read your article after working my butt off getting grout haze off my tiles and nothing worked! 🙁 Well, I’m sure glad I listened to you mr.carl! I applied the grout haze remover exactly like the bottle said and omg it worked!!!! 😀 😀 I finally have the bathroom of my dreams and the tiles look beautiful! 🙂
Kevin – December 3, 2018
I recently had new backsplash tile and floor tile installed. Both areas have grout that is discolored. The installer Mixed sealer in with the grout for both areas. Can you put new grout on top of old and have The color of the new grout bleedthrough into the old route to fix the discoloring? Can you apply a grout stain to grout that has the sealer mixed in with it?
Carl Anders – December 4, 2018
Hi Kevin, thanks getting in touch.
Okay, I admit I’m scratching my beard and thinking here. Your tiler did what? Mix sealer with the grout? Like actual liquid sealer…poured into the soft grout while mixing the grout? I hope I’m understanding that correctly. If he truly did that then I’m gobsmacked. Never have I heard anyone do that before. Grout sealer is meant to be applied after the grouting is completed and the grout has been dry for over 48hrs.
Yes, you could try staining the grout with a grout stain but I do not believe the grout stain will properly penetrate your grout – it will likely just pool up on top as you have sealer applied (if it’s been applied properly.)
Since this is a very peculiar situation, I will use tiling logic to provide you with a straight answer.
Grout sealer is a substance created to make grout hydrophobic, meaning it will repel water and not allow liquids to penetrate it’s surface. Since a grout stain is usually a liquid with a colored pigment mixed in, I believe that staining the grout will not work as the grout won’t allow the stain to penetrate it.
Please note that I am assuming the grout has been sealed properly. If your tiler truly mixed grout sealer into the grout while applying it in the grouting stage, then I don’t believe it’s been properly sealed.
You can try use some grout stain and see what happens – If it enters the grout then I guess you can continue the job and fix up all the grout but you will need to do all of it with the new color to get a uniform result.
My professional course of action would be to simply remove all of the grout, and regrout the entire area with new grout. That way I know the discoloring has been fixed and the color will be uniform across the whole surface. Once the grout has dried properly (atleast 48hrs) I would return and apply atleast two coats of grout sealer.
I hope that answers your question somewhat. It’s a tricky question to answer without seeing the problem with my own eyes but I believe the safest course of action would be to just regrout everything. You will then have total piece of mind that it’s been done properly and won’t cause problems in the future.
Let me know if you need any further advice.
Regards,
Carl.
AJ – October 9, 2019
Awesome site!
Gotta question, I have tiles that are not fully butted-up to the Schluter trim. Will grout caulk help to cover the gaps if I tape between the trim and tile lengthwise and caulk it?
Bill – April 27, 2019
Hi Carl,
Thanks for taking the time to write such an informative article. What are the risks of placing silicone caulking material over existing clean grout between the tiles of a shower?
Would you say it’s a good idea? or bad idea?
Thank you in advance.
Carl Anders – April 28, 2019
Hi Bill,
No problem! I’m happy to hear they are useful to you.
If you are placing the silicone in the corners of the shower, like where one wall meets the other in the corner or where the wall tiles meet the floor tiles – then yes – placing silicone there is a great and honestly necessary step in all tiled installations. Silicone needs to be in the corners as it is flexible enough to resist any movement and provide some first level waterproofing. Grout will just crack in the corners and look terrible as well.
If you are thinking of applying silicone on top of the grout that is in-between the tiles however – I wouldn’t do it for many reasons.
1 – It’ll take an incredibly long time to apply properly and smoothing it.
2 – The silicone won’t be thick enough to create a proper bond with the grout and it will wear away in patches. Especially once you start walking over it during use.
3 – It’ll most likely develop mold and dirt and get messy very quick. This is due to a layer of soap scum and body fat forming on top of the silicone, allowing those nasties to grow. The silicone itself inhibits such growth but the dirt that accumulate on top of it will allow this. (Unless of course you are very very diligent with cleaning.
4 – It won’t last a long time.
I have seen silicone placed inbetween tiles instead of silicone and it’s always more of a temporary, stop gap measure. Usually it’s done when tiles are loose and the grout flakes away, so the repairer takes the easy way out and uses silicone.
I strongly advise against it and prefer to fix the problem, rather than put a band-aid on it.
What’s the reason you ask? If you let me know your motivations behind this question, maybe I can help come up with a better solution for you.
Thanks,
Carl.
Tasia – May 23, 2019
Your article is very informative. However, I do have a question you didn’t answer…
We have been remodeling our bathroom and after applying the grout to the new tiles in the tub surround some of the tiles have a thicker grout line than other because as I went along the grout didn’t need to sit as long as long as it did when I started. Is there a good way to remove that extra grout in between the tile without damaging the tile, screwing up the grout, or messing with the integrity of the grout?
A sealer has not been applied yet.
Carl Anders – May 23, 2019
Hi Tasia,
Okay, if I understand this correctly: You were grouting tiles and let the wet grout sit for too long before you started cleaning and shaping the grout.
It has now gone hard and can’t be shaped to a smooth finish.
If I’m correct in my thinking then all I can suggest is you try remove some of the grout with a grout saw. It’s the gentlest way to remove grout and it’s the safest grout removal tool to use around tiles. You still need to be careful, some tile glazes are quite sensitive. It’s best to start off slowly and test what you can get away with before going at the grout harder.
The grout saw shouldn’t damage the integrity of your grout but it may alter the final look of it.
Give the grout saw a go and see how you get along.
If that fails then all that’s really left to do is remove the grout and regrout the tiles.
All the best and thank you for visiting.
Mila Maxey – July 16, 2019
Okay so I had my tile done in the bathroom about two weeks ago but I noticed that there are some gaps in the grout in certain areas of the floor. can I mix a bit of grout and apply it to those areas to fill in the gaps/ holes
Carl Anders – July 17, 2019
Hi Mila,
Thanks for dropping by,
Yes, you should be able to just mix up some grout and fill in any holes you have. The grout will still be clean and should bond well with your new touch-up grout.
Let me know if you need any further help. This grout repair guide should give you all the pointers you need for the task.
Thanks,
Carl.
Jessica – September 7, 2019
We used a colored caulk to match our grout around the tub. It is now becoming mushy in the wettest areas. I am not sure why. It was purchased in the tile department and is the same brand as the grout we bought (labeled to go with it.) We let it dry longer than it specified. It was solid. Now after a couple weeks it is mushy.
Carl Anders – September 8, 2019
Hi Jessica,
Hmm, that’s definitely not something you want to see happening!
It sounds like you were sold colored caulk which is essentially useless in a tiling application. It’s not really designed to put up with moisture or movement – to be honest I don’t see why it’s even being sold at all as it’s useless in my eyes.
What you want to use in wet areas or any movement joint that involves tiles is 100% silicone sealant like this one for example. This product is designed to withstand movement, is much stronger and will never go mushy like caulk does. You can shop around to find the colour you want or just use a white color if that’s the color of your tub. It should perform for years without displaying any of the symptoms your caulk is.
I suggest you cut out all the caulk and replace it with silicone, that’ll solve all your problems and also seal up the joint between your tiles and the tub.
Hope that helps!
Teri – September 30, 2019
Hi! I have a question about cleaners that are safe to use on the grout that won’t strip away the seal. And how often should I be cleaning my grout if it’s not moldy/ Mildewy .
Carl Anders – October 1, 2019
Hi Teri,
Thanks for the great question!
I reached out to Black Diamond, the makers of Aqua-X Grout Sealer and asked them what they recommend as manufacturers of grout sealers. They recommended cleaning products that are not solvent based and low pH. I have found two products for you that fit the bill. StoneTech All-Purpose Daily Cleaner and Oxyblaster Low pH Tile and Grout Acid Cleaner. Either one of these should work great, Stonetech would be my first choice as I know they make great products for tile.
As for cleaning, I personally recommend cleaning atleast once a week. Just a wet mop or wet rag to remove the build up of dirt and debris that occurs from every day living. By removing that you don’t give the mildew and mold a base to grow from. Regular maintenance of tiles is the quickest and easiest way to promote a beautiful finish for years. If you do that, you should never see mold or mildew appear.
I hope that helps!
Carl.
Mike – October 21, 2019
I ran out of the brand of grout I started with and the place I got it doesnt have it anymore. Can I get the same color grout but a different brand and be ok? Or will the different brand be a different color or shade?
Carl Anders – October 21, 2019
Hi Mike,
That’s an unfortunate situation.
I cannot say for certain that the colors will match up 100% but try use a brand of grout that is manufactured in the same country as the brand you used originally. I’ve found that the colors are generally the same across different brands when they have the same country of origin (weird but true.) I’d also recommend spot testing in an area where it’s less visible. Wait for the grout to fully dry and see if there is a noticeable difference. If it’s not noticeable, continue doing the rest of the grouting.
Hope that helps and thank you for visiting my site,
Carl.
Jim Walsh – February 5, 2020
I’m going to put 48 tile on an interior wall behind a gas pot belly stove on a concrete floor. Do I need grout at all in this situation? Can I just butt them together vertically and cement them to the wall?
Carl Anders – February 6, 2020
Hi Jim,
I wouldn’t recommend doing that as grout is not only decorative but also allows the tile to be flexible. If the tiles get butted up against each other, they can begin to rub with the seasonal changes causing your home to shift. You may not realize it, but the structure is moving very slowly over time and that movement could cause your tiles to pop off at some point. There’s also the visual aspect, tiles are not designed to sit against each other and will never perfectly align neatly or look good.
Of course beauty is in the eye of the beholder so if you like that look then I won’t argue against it. Just keep in mind that tiles were not designed for this nor do they perform as they should when their butted up against each other.
Hope that helps and all the best for your install.
Linda M Brinson – March 9, 2020
I’ve been doing some remodeling in my living room. I’ve replaced all the moldings and noticed that dirt keeps sticking to the grout which can’t be removed. I will have to remove the old grout and wanted to know what type of grout can resist dirt and dust and at least be cleaned if it gets on the grout.
Carl Anders – March 10, 2020
Hi Linda, thanks for the question.
It sounds like your grout is either very old or a sanded type grout that is very gritty and porous. This porosity makes it more susceptible to dirt sticking to it and getting stained. You can remove it and regrout the tiles with a more modern “unsanded grout” that is less gritty and more resistant to stains. One excellent grout I can recommend is Mapei Ultracolor. Otherwise, you can head to your local home improvement shop and ask for an unsanded grout. You can also choose to apply a grout sealer, that will greatly help to keep your grout clean and resistant to dirt.
Hope that helps, good luck with the rest of your remodeling!
Diane – May 7, 2023
I recently removed some cracking grout along the base of my shower. There was cracking in a small and larger section on different walls along the base and curb section. Do I need to remove the entire length on one wall even though the grout looks good. I am concerned about the corner section that needs to blend in with old grout. I am using Prism cement grout that claims no sealer is required. My tiled shower and floor is only a yr old.
Carl Anders – May 24, 2023
Hi Diane,
I’m concerned that the grout is cracking after only a year old. That could indicate potential bonding issues or movement. If the house is brand new then it might just be settling and that’s understandable. In any case, whenever I replace grout, I redo the whole length of the tile. You will notice the color variation for a few months until the new grout discolors slightly from use.
Any corner sections should not be grouted as it’s a change of plane. These areas require a 100% silicone that is flexible and waterproof. You can buy these online or in tile specialty stores in a variety of colors that complement the grout color. After re-reading your message, I believe all your corners are grouted and that explains the cracking. Remove all the grout and replace with silicone. You wont have cracking issues again as silicone is flexible and moves with the surfaces unlike grout.


Leave a Comment
Your email address will not be published. Required fields are marked *
Comments are currently closed for new submissions.