Despite tile leveling clips and anti-tile lippage systems being on the market for nearly a decade or more, they are still plenty of tilers that haven’t used them.
While using the self leveling tile spacers is by no means rocket science, I’ll try outline some basic guidelines on how to use your kit for tile leveling.
Remember, whichever kit you go with will have it’s own particular means of use but the basics remain the same, it’s just the manner of how you couple the two pieces that’ll be different.
For that – the manufacturer includes instructions that’ll teach you everything you need to know on how to use their system. Make sure to give em a read to avoid anger and frustration when you’re knee deep in thinset and nothings going right.
Pro Tip: You Still Need To Use Tile Spacers With Your Tile Leveling System!
How To Use A Tile Leveling System
-
Spread thinset, paying attention to keep trowel lines going in one direction only and lay a tile as usual.
-
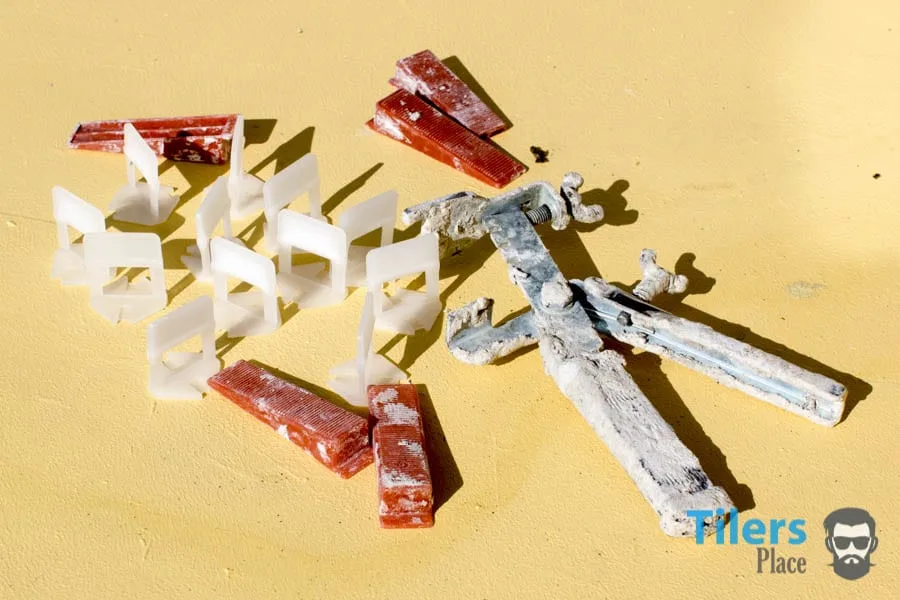
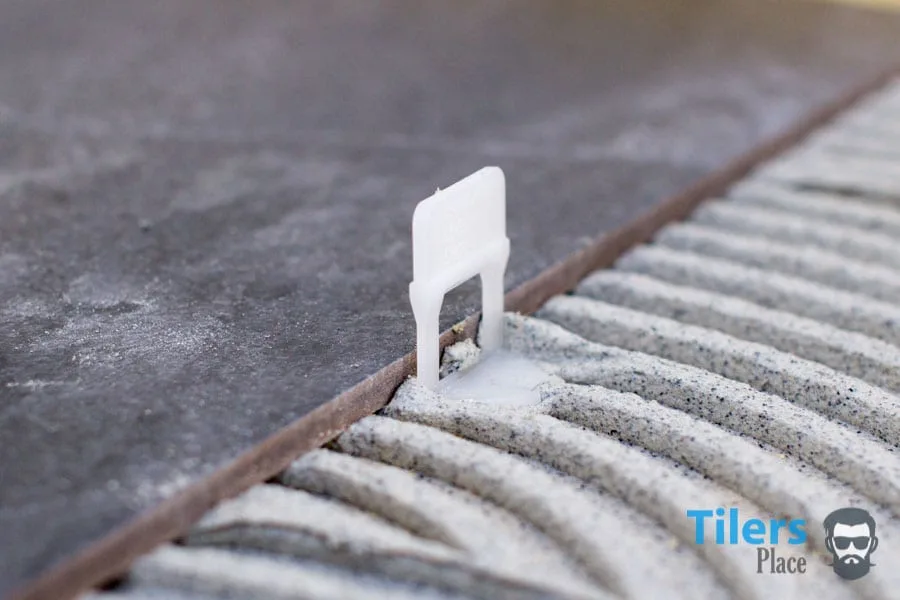
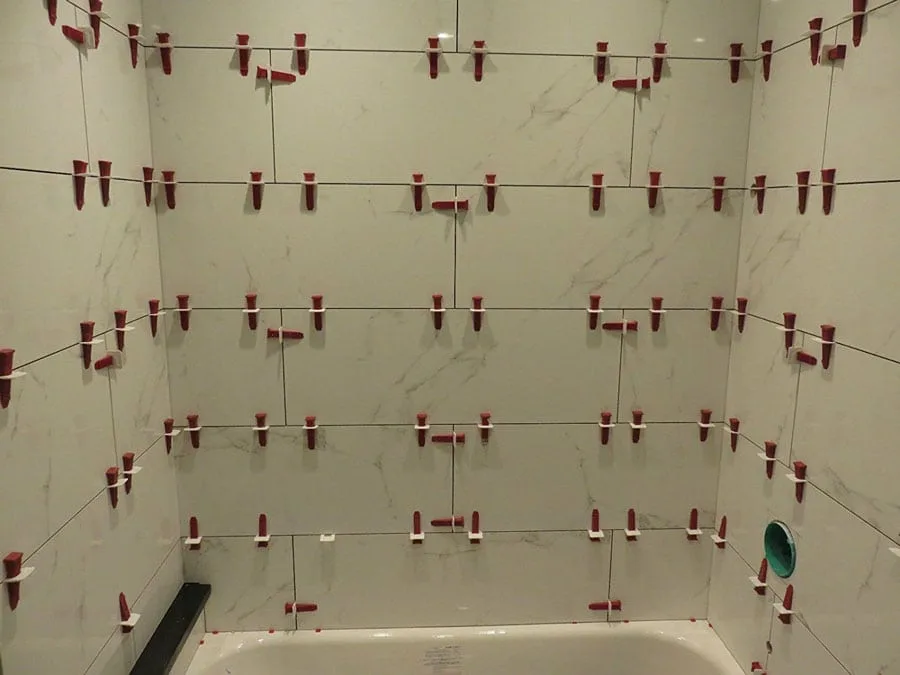
Slide a tile leveling clip/base underneath the tile until the base is sitting flush with the tile. Generally, four clips are recommended per tile. This is to ensure all four corners are flush with the neighboring tile. You may position the clips near the edges of the tile or in the centers.
For longer tiles like wooden plank tiles, you may use up to six tile leveling system clips per tile if needed.
- With another tile laid next to the tile with the clip, you can slide a wedge into the clip and use the adjustable pliers to crimp the wedge tight into the base. If you are using the Spin Doctor, just rotate your base until it’s flush with the two tiles.
The general idea is that your wedge/base pushes any high edges down and makes a flat surface across the tiles. The tile leveling system also helps keeps the tile flush and smooth while the thinset cures overnight, effectively eliminating any slump caused by large format or plank tiles.
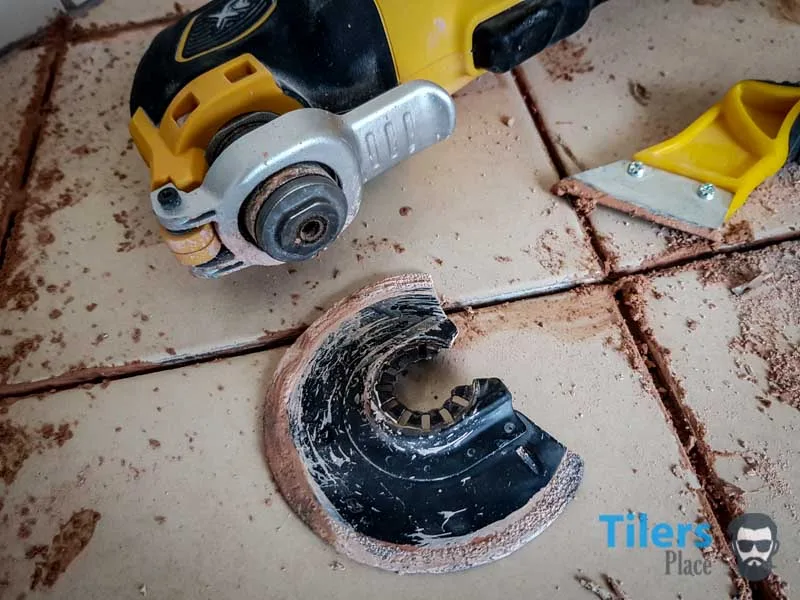
- When you are ready to grout, you can use a mallet to knock the disposable clips away, thus creating a clean grout joint without any protrusions. The wedges/spin doctor bases can be stored away in a container for the next job.
Be careful to clean up any excessive mortar/thinset from the tile levelling clips and leveling wedges as this will make removal more difficult. Keep your grout joints between the two tiles clean as well. A wet sponge can clean everything up easily. The cleaner you are on setting day, the easier grouting will be.
Oh and keep your pliers and wedges cleaner than I do! 😉 A simple wash in clean water is enough to clean any thinset off.
Tile Leveling System – Limitations
Tile levelling systems are a much-needed addition to any tiler’s toolkit as provide a way to make every tile job into a masterpiece – but they’re not magical. Even the best tile leveling system.
They will not perfectly level out any uneven and crooked floor, they will only tune tiles to be perfectly flush and hold them level while the mortar sets. This is especially important on a tile floor where lippage is very easy to see and notice.
In order for a good leveling system to create a perfectly smooth surface without any tile lippage, you need to remember a few things.
A tile levelling system is not going to do much if your floor or wall is greatly uneven or has irregularities in it.
Preparation Is King
A quality preparation job using SLU (self-leveling underlayment), backer-board or a mud bed is still required before using tile leveling system wedges and clips as they can only correct minor lippage, not level out tiles that are inches out of plumb. Problematic walls may need to be fixed with mud or notched properly by removing the backing board.
While this may sound detrimental and make self-leveling tile clips useless, it’s actually good that the clips won’t pull tiles inches above the substrate.
Why?
Because if they did that, they would create hollow points in the tiles where there would be zero thinset/mortar and we all know that is bad.
Got coverage? Nope!
If you are new to tile leveling systems and are now scratching your head wondering, “well what’s the point of using them then?”, you are not seeing the power of this great tiling innovation.
One of the trickiest parts of tiling is getting your tiles to be perfectly level.
On some substrates and with certain tiles, it’s not a problem.
You just trowel out your tile glue and your on your way.
But on others, you can spend precious time levering up tiles, adding or removing glue and hammering with your mallet, to get them perfect – only to come back the next day to see they have slumped down and caused lips.
Tile Leveling Systems Work Great On Large Format Tiles
This is especially the case now that we use large format tiles, plank tiles and tiles with straight edges and not rounded ones like they used to be.
Tiles with straight edges show lippage like nothing else, especially when they have a polished finish and laid on a floor.
A blind man with six layers of duct tape over his eyes could enter a room and pick out all the lippages, let alone your average homeowner (or spouse), expecting nothing but the best from their tiler.
Now factor in your new tile anti-lippage kit (leveling system).
You prep your surface just like you would if you weren’t using the tiling system and start tiling. You set your tile, then add wedges.
Upon crimping the wedges, the spacer/clip will even out the tiniest of imperfections for you and create a uniform level across your tile and it’s neighbor.
Boom.
Keep going and keep adding those tile leveling clips and what do you have upon completion?
A perfectly flat tiled surface without lippage. All done without endless fine-tuning by you.
And the best part is, when you return the next day to grout, your tiles will still be perfectly flat and uniform with perfect grout joints.
Are you starting to see the possibilities of including tile leveling system wedges and clips in your bag of tricks?
Think back to the last time you laid large format porcelain tile or long wooden plank tiles that were not perfectly straight, how you battled to get them nice and flat, using all your skill and experience to render a crazy tile into a flat surface without lippage.
Now imagine how that job would have gone – and how much easier it would have been – if you had used one of the best tile leveling system.
Check Out The Best Tile Leveling Systems
Raimondi Leveling System


Spin Doctor Leveling System


Perfect Level Master Tile Levelers


Check Price – Raimondi Leveling System Starter Kit
Check Price – Spin Doctor Lippage Control Leveling
Check Price – T Lock TM Complete Lippage Leveling
Shop Related Products At Amazon.com

Leave a Comment
Your email address will not be published. Required fields are marked *
Comments are currently closed for new submissions.