Tilers Place is reader-supported. When you buy through links on this page, I may earn an affiliate commission on qualifying purchases.
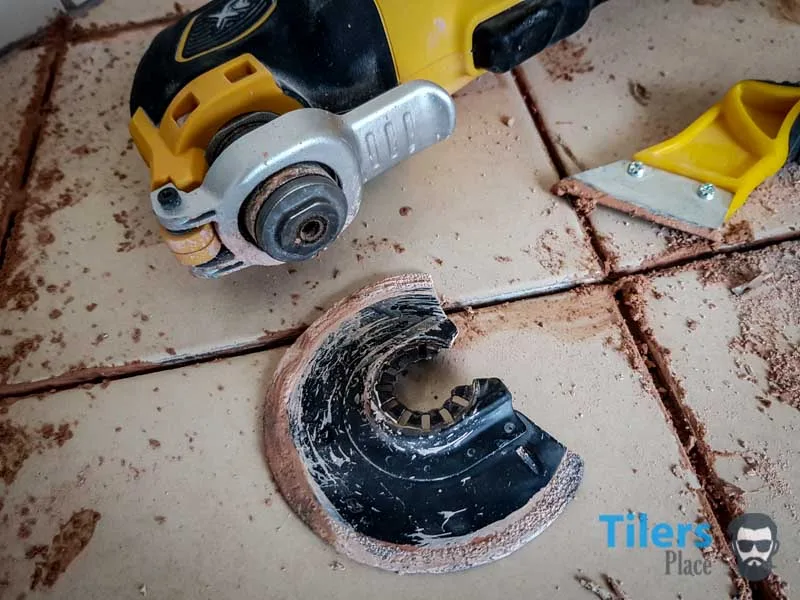
Remove grout with an oscillating tool and discover how easy it truly is.
This complete guide combines every grout removal guide from this Tilersplace and combines the knowledge into one complete guide.
From Pro Tiler tips to a full list of tools required, this guide will teach you everything you need to know to remove tile grout the easiest way possible.

Hi there and welcome to my Complete Guide To Removing Grout with An Oscillating Multi-Tool.
I have been removing grout for tile and grout replacement for over 20 years as part of my profession as a tile setter.
Over those years I have discovered that the oscillating multi-tool with a grout removal blade is by far the easiest and safest way to remove grout.
I want to pass that knowledge onto you so that your next grout project goes flawlessly.
Reasons To Remove Grout
Before we jump into the guide, let’s take a quick look into why you’d want to remove your tile grout and what advantages you gain from removing old grout.
-
Remove grout in order to safely extract a tile – Replacing a cracked or broken tile always starts with removing the grout that borders the tile. This is done so that you do not damage any neighboring tiles while hammering out the damaged one.
-
Dramatically changing the look of a room without spending a lot – You can really change the look of a tiled room simply by changing the grout color. Even when you count in the cost of the grout removal tools and new grout, the whole procedure is much cheaper than removing the tiles and laying new ones.
-
Changing the grout color – Similar to the last tip. A lot of people find they tire of their grout color or discover a color that works better with their decor.
-
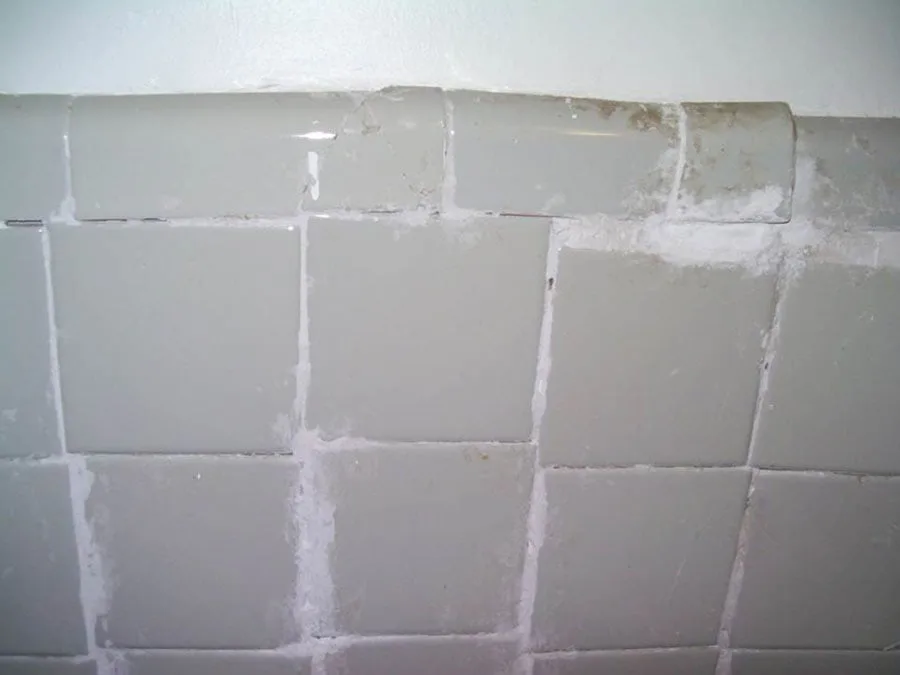
Fixing cracked or damaged grout – A common reason for removing grout is because it’s either damaged, flaking or heavily contaminated with dirt. This is especially the case in shower floors where the grout is heavily damaged and washed out. Removing the old grout and applying a fresh batch is the best way to remedy these problems.
-
Removing odor near pet areas – You love your pet and they love you. Unfortunately, they do leave signs of that love indoors that can start to smell over time.
No matter how hard you scrub or steam clean, urine can penetrate deep into your grout and be impossible to remove.
The best way to remove pet odor from grout is by removing it completely and replacing it with a new grout or even epoxy grout.
Epoxy is fully water resistant and won’t allow any messes to penetrate it.
This last tip also applies for other smells and odors, especially in wet areas like showers or around toilet areas. Smelly liquids can penetrate grout and sit beneath it, leaving an unpleasant smell that you can’t get to. Replacing it is your best option.
Now that we have the reasons behind wanting to remove tile grout, let’s look at the list of gear you need to remove grout effectively.
Gear List – Tools Needed

Check Price – Vacmaster VJH1211PF 0201 Professional
Check Price – 125M Resistant Dexterity Stretchable

Check Price – DEWALT DPG15 Digital Hearing Protector

Check Price – RUBI TOOLS Duplex Knee Pads

Check Price – 3M 8511PB1 Particulate Respirator 10

Check Price – Goldblatt G02738 Pro Tile Grout


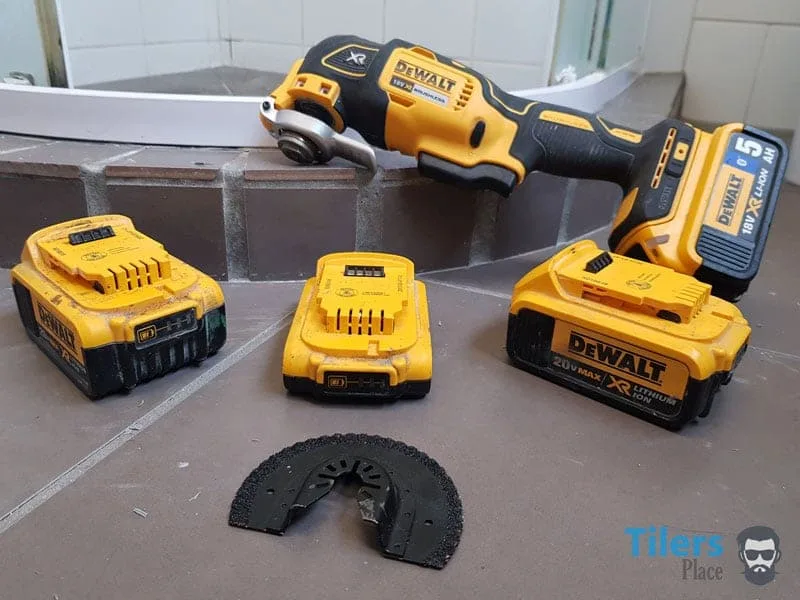
Check Price – DEWALT DWA4220 Oscillating Fastcut
A Note On Grout Removal Blades
The grout removal blades that I list here are not limited to just DeWalt Oscillating Tools.
They are designed to be a universal fit and support other companies like Fein, Bosch, Dremel, Rockwell, Porter-Cable and other leading brands.
So if you own another brand of oscillating multi-tool, chances are that these blades will fit them. You may loose the quick change functionality but the blades will still work properly with your multi-tool.
Guide To Removing Grout
We have our tools and specialist grout removal tools, so let’s get going!
It’s time to remove grout like a boss!
Step 1 – Preparation
We start work on out grout removal project by preparing the job site.
Correct preparation is the key to every successful renovation project and removing grout is no different.
1.1 Begin by removing any loose objects from the room you will be working on so that you have a clutter-free work environment.
If you’ll be working in the bathroom, for example, remove any:
• Loose shampoo/lotion bottles
• Pot plants or decorations
• Toilet brush holders
• Floor mats/rugs.
If there’s a lot of debris or dirt, give it a good sweep or vacuum.
1.2 If possible, open any windows in the room you will be removing grout in so that you have ventilation and fresh air coming in.
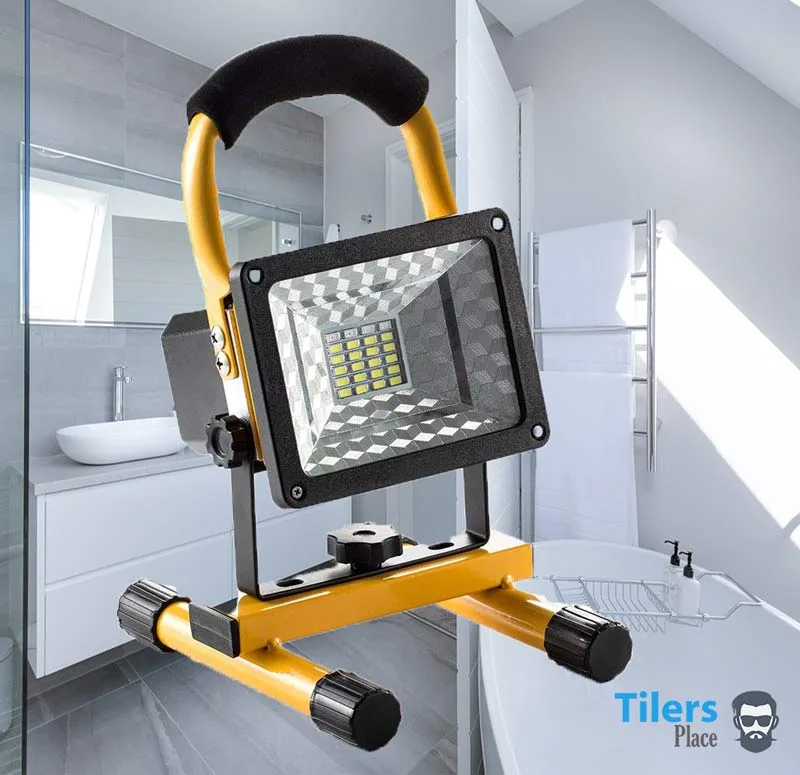
1.3 Turn on the lights and if it’s a dark room or there’s not enough light falling on the ground, a portable work lamp would be ideal to further illuminate the work area.
Grout removal with an oscillating multi-tool requires care and precision and so a properly illuminated workspace is essential**.**
A cheap portable work lamp like this is ideal for the task, it’s rechargeable lithium batteries last for hours and the COB LEDs provide plenty of light for the task.
You can set it on the floor and move it around as you make your way around the room removing grout.
I love these little guys and always carry two in my truck for such tasks.
1.4 If you have any curious pets or children in the home you will be working in, be sure to have someone keeping them away from the work area.
While the oscillating multi-tool is a friendly and unobtrusive tool, it does create a loud buzz that could be distressing to animals and young ones.
If it’s possible, shut the door to the room you will be working in.
1.5 With all the distractions safely taken care of and your workspace ready, you can start putting on your safety gear.
Knee pads, dust mask, ear muffs and of course work gloves.
Select a grout removal blade and fit it into your oscillating multi-tool.
If you are using a DeWalt multi-tool, simply squeeze the silver tab underneath the tool and slide the grout blade in and give it a slight twist till it clicks into place.
Extra Tips
Here are a few extra tips for preparation that could help in your circumstances.
Step 2 – Removing The Grout
We have our tools for removing grout and we have a safe environment to work in, now let’s get busy removing some grout!
Ready?
1.1 If it is your first time using an oscillating multi-tool to remove grout, start in an area that is less conspicuous – behind a door or in a far corner are two good spots for this.
1.2 (If You Are Using A DeWalt Multi-tool)
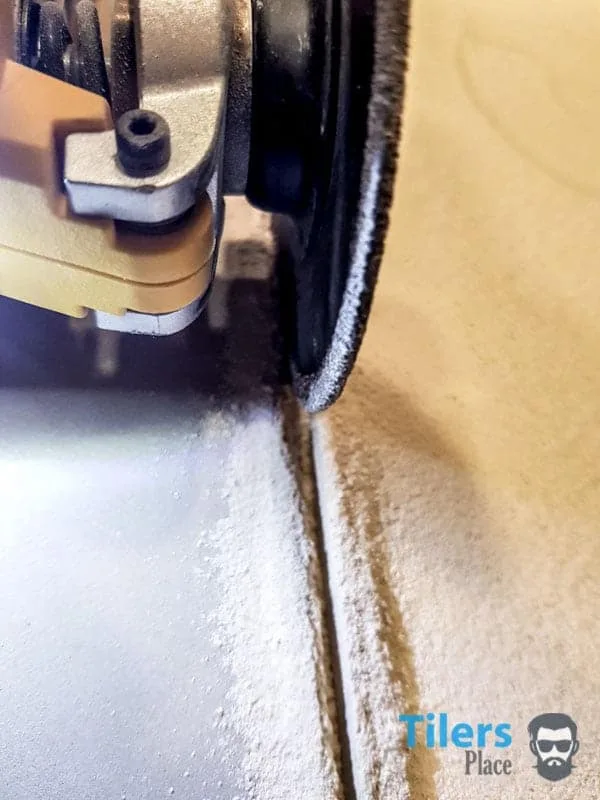
Get a comfortable grip on the multi-tool and place it on the grout line you will start with.
Once it is resting on the surface, you can slowly squeeze the trigger and do a low speed pass of a few inches.
The DeWalt’s have a pressure sensitive trigger, this means you control the speed and power simply by squeezing the trigger.
Now that you have a guiding groove; it will help guide the blade as you increase the speed (by squeezing harder on the trigger) and prevent the blade from accidentally scoring the tile.
The deeper your blade gets, the faster you can go.
1.2 (If you are using a Multi-tool with a speed setting dial)
Turn the dial to the lowest setting and turn the oscillating multi-tool on.
Using two hands to hold the tool, slowly place it on a grout line and score a light line for a few inches.
This score will be your guiding line and it will help the blade stay in the grout line and prevent it from slipping and scoring your tile.
1.3 With a nice guiding groove created, increase the speed on your multi-tools, either by squeezing harder (DeWalt) or turning up the speed on the dials (Other Multi-Tools.)
Press the multi-tool down on the grout until you feel it bite, you don’t want to press too hard as it will only burn out the blade and not increase the rate of grout removal.
Start moving the oscillating multi-tool up and down along the grout line for an inch or two and with every pass, you’ll see more grout being removed.
1.4 Once all the grout has been removed from the gap, you can slightly angle the tool from side to side to remove any excess grout on the edges of the tile.
Be very careful not to touch the edges of the tile glaze as you could chip some off.
1.5 With enough grout removed, you’ll see a large dark gap appear in the grout line, you can now proceed to the next section of grout and repeat steps: 1.3 – 1.4 until all the grout is removed.
You do not want to go any deeper than the grout line as then your grout removal blade will start removing the substrate underneath the tile.
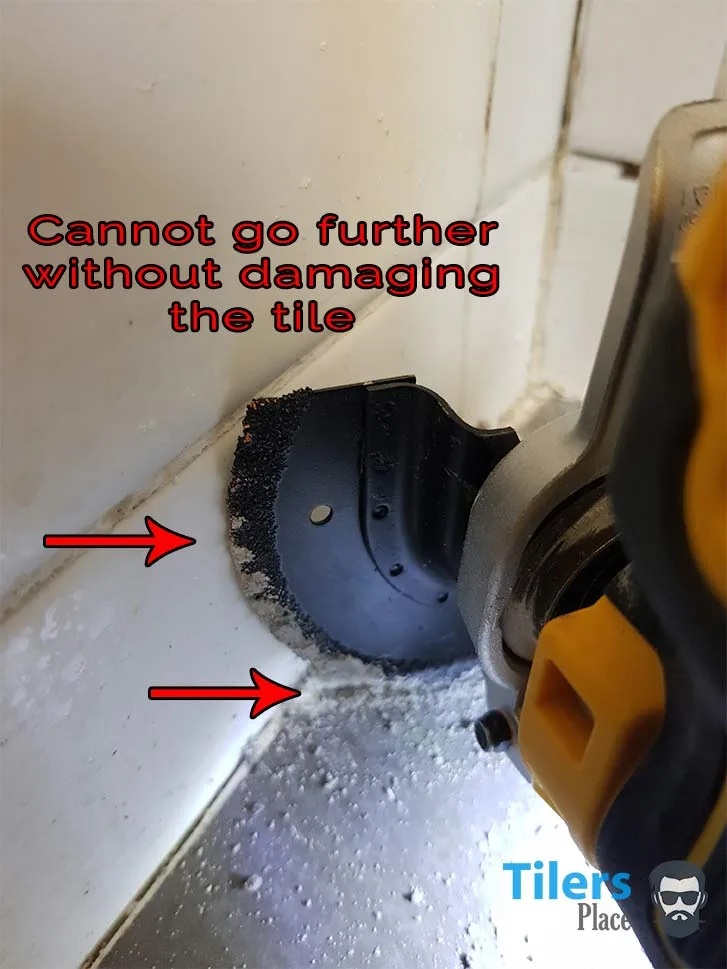
1.6 You will eventually get to a corner in which your standard half-round grout removal blade will not be able to reach.
You do not want to touch the surface of the vertical tile or any other surface as the grout blade can damage it.
In order to remove grout in corners, simply switch to your flush-cut grout removal blade.
It will enable you to place the multi-tool right up against the wall and remove all the grout safely.
You can also opt to use your grout saw to remove grout in tight spaces like this.
Simply begin sawing at the grout with a backwards and forwards motion.
Once you have removed the grout, angle the grout saw slightly and remove the grout from the edges of the tile.
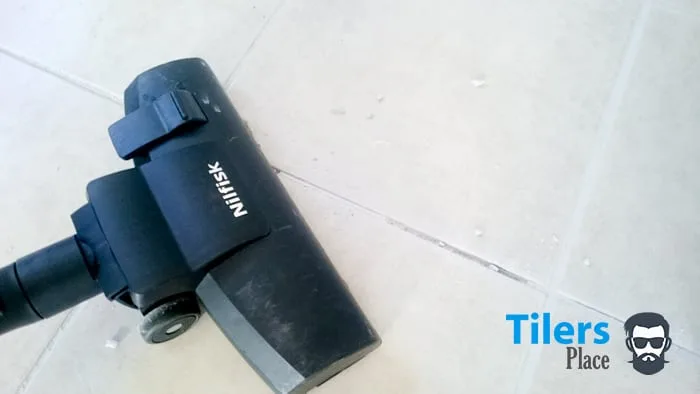
1.7 As you make process on your grout removal project, you’ll want to stop or have someone vacuum up the dust and debris you have left behind.
This helps in two ways:
-
It will reveal any grout you may have left in the grout line.
-
Prevent you kneeling on the debris and getting it into your clothes and skin.
Keeping your work area tidy and orderly always helps in achieving a great result and provides a safer work environment.
1.8 Remember to use all of the grout removal blade as you carry on with the grout removal.
Be sure to rotate the blade or position it so that you are using all the areas of the grinding surface throughout your project.
This will ensure you use up all the grit on the blade and not just one area, this ensures you get the most mileage out of your grout removal blade.
1.9 As you get more confident with the oscillating multi-tool and your skill increases, you can turn up the speed to full and progress through the grout faster.
Remember to always maintain a firm grip on the oscillating multi-tool and take breaks every 15-30 minutes to allow the tool to cool off and prevent fatigue to your eyesight and body.
2.0 Once you have removed all the grout, get the vacuum cleaner out and suck up all the dirt and debris you have created.
Pay particular attention to the grout lines as a lot of grout dust will be remaining in the gaps and you’ll want to get it all out before applying new grout or extracting the tile.
2.1 With that you are done! Congratulations, pat yourself on the back and heave a sigh of relief. It may have been time-consuming but trust me, what you just did was the best and easiest way to remove grout from any tiled surface.
Take a moment to clean up your tools and equipment before putting them away.
You can wipe down your oscillating multi-tool with a microfibre cloth to prevent dust caking on it and to keep the internal components free of dust build up.
Your grout removal blade can be cleaned under a stream of clean water and some gentle rubbing with a cloth.
If you are going to continue on and grout your floor, I have a full guide on how to grout tiles here.
Conclusion & Project Wrap-Up
Grout removal from tiles can seem like a scary and tedious project.
It’s a specialist field that most every-day homeowners and DIYers do not have experience with and unfortunately, this can lead to mistakes and expensive damage caused to tiles and furnishings.
Of course, there are many guides to grout removal on the internet but I found them to be sorely lacking in detail or proper value.
A guide on removing grout cannot be summarized to a few vague bullet points and pretty photos and so I created this guide to fill in the blanks that those guides created.
This guide to removing grout with an oscillating multi-tool aims to teach a complete beginner how to use the best removing grout tool in the business and enable them to remove grout like a professional tile setter.
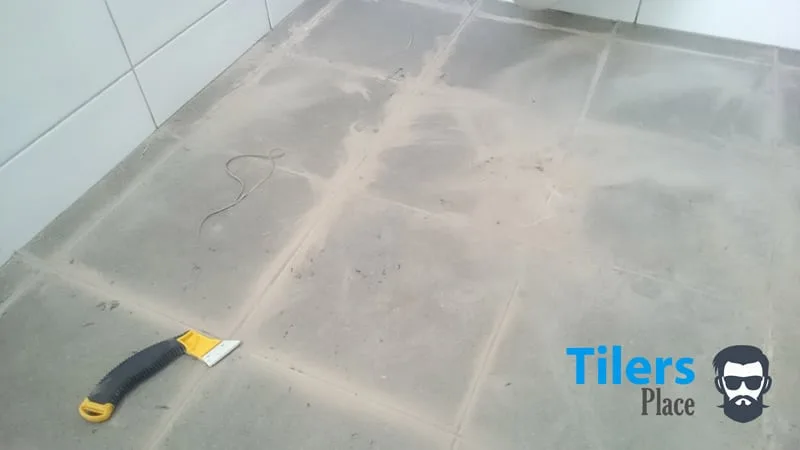
With the right equipment and surface preparation, we were able to remove grout from any tile surface in a clean and effective manner without putting our property or health at risk.
Once all the grout has been removed, the tiled surface is ready for it’s next stage, whether that is tile replacement or complete regrouting of the tile.
I hope this guide has been of use to you and that it taught you how to remove grout properly and to your satisfaction.
If you found it useful, please share it amongst your social networks!
Further Reading
Click on the links if you would like to learn more about:
Help keep this guide free for everyone!
If you would like to support the website and help it remain online for everyone, a quick share on social networks will go a long way.
Thank You!
![]()
3 Comments
Blair – January 27, 2019
Easy to follow and simply beautiful guide. Appreciate the amazon links, stuff is cheaper there than my home depot store! keep it up 😀
Phil – February 8, 2019
Thanks for your very helpful guide.
I have a small area of cracked grout on the wall near the bottom of my shower cubicle. Can I just remove and replace the cracked grout and join on to the existing grout or do I need to remove and replace the grout in the whole shower cubicle??
Carl Anders – February 9, 2019
Hi Phil,
No problem at all, I’m very happy to hear it is of use to you.
Yes of course, if the other grout surrounding the trouble area is sound, then all you need to do is clean out the cracked grout and apply some new grout. If you need some help with regrouting, I have a full regrouting guide you can read here.
You will probably have a lot of leftover grout powder from your repair so I suggest you store it for any future repairs. Keep it sealed in a zip-lock bag in a dry area and it should keep for a couple years.
I hope that answers your question, thanks for the valuable comment and visiting my site.
– Carl.
Joey – March 18, 2019
Wonderful Article
Carl Anders – March 18, 2019
Thank you Joey!
Happy to hear you appreciate the article.

Leave a Comment
Your email address will not be published. Required fields are marked *
Comments are currently closed for new submissions.