Table Of Contents
Tilers Place is reader-supported. When you buy through links on this site, I may earn an affiliate commission on qualifying purchases.
Ask A Tiler – Your Questions Answered
Part 1
What Is Ask A Tiler?
Since starting this website early this year I have received many emails, comments and messages about various topics relating to tiling.
Whether it was
Overtime I realized that these questions and my answers could prove useful to others and might even answer any burning questions you might have about tiling.
This first edition of Ask A Tiler is a culmination of all those questions I have been asked over time and my replies to them as a professional in the industry.
If this is your first time visiting the site then please allow me to introduce myself. My name is Carl Anders and I have been tiling professional for over 25 years.
Over that time I have completed thousands of projects and witnessed a lot of renovation miracles, disasters and survived tougher deadlines than anything you’ve seen on HGTV.
Of course, all this resulted in a vast amount of knowledge I would like to pass on to anyone willing to receive it. The questions below are from good folk just like you that are wanting to learn more about tiles, it’s procedures and anything else related to it.
The aim is for you to learn and avoid any common pitfalls other home and business owners fall into when undertaking a tile project.
For some questions, I have since written extensive articles about the subject which I will link out to if you want further reading about the subject.
So without further ado let us begin the first Ask a tiler question and answer session!
Check Out Part 2 For More Tiling Questions Answered
Want your questions answered on Ask a Tiler? Simply get in touch or drop a comment below! ?

Question 1: Any advice on finding a quality tiler for my bathroom project?
– Candice P
Carl’s Answer:
This is a question I know a fair bit about.
As a business owner, I have to be aware of current advertising trends, word of mouth and social media.

I have been fortunate enough to grow my business mainly from word of mouth alone however nowadays social media is the way forward. My advice to you would be first to ask your friends and family if they have had any tiling work done at their homes or businesses.
If they have, take a look at the job, get their opinions on the tiler who undertook the job. If the verdict is generally good you can be assured that the tiler will perform great on your project as well.
Another great way of receiving word of mouth feedback is from community groups on Facebook. Nearly every town and city, even suburb have open groups for locals to join.
Find a group closest to your area and ask the question there. You might come up lucky with a local recommendation of a great tiler.
If they are indeed local then you will save on transport cost and the tiler will have a much easier time filling you into their schedule.
Another method of finding your tiler is to head to your nearest tiling store.
Most stores keep a bunch of business cards from tilers they know well and know they do a quality job.They will happily pass on a number of business cards for you to follow up on.
Instagram is another powerful tool for finding a tiler.
When I joined Instagram I was not expecting there to be many tilers or tile orientated profiles out there, oh boy was I wrong!
Instagram is filled to the rafters with tilers proudly displaying their work for all the world to see. Do some searches for tiler and you should find some tilers show up. Check out their work and if you like what you see, get in touch!
It may take a few minutes of digging to find someone in your area but it can be well worth the effort.
Another way Instagram is useful is if you found your tiler by other means, I.e via a Google Search or online business directories.
Usually, the tilers will have links to their social media profiles and Instagram pages, if they do feel free to explore their previous works and get in touch!
When searching for a tiler try to avoid handymen or business people that tout they can do everything.
I have heard
You know the saying: “A jack of all trades but a master of none.”
Your project might have a tricky detail or rare material that these people never even seen before, don’t risk a bad job or replacing expensive tile (or even tearing everything out) because one of these people offered you the lowest quote.
Stick with a real professional and you should be golden and worry free.

Question 2: “I am looking to regrout my shower area, what is the easiest way to remove grout?”
– Tom C
Carl’s Answer:
This question makes me rub my hands together in glee, it’s like asking a fish how to swim.
I could rant and rave on for days about grout removal as I’ve done so much of it in my time, it’s safe to say I know what I’m talking about.
I won’t bore you with the raving and will leave in only the facts.
The easiest way to remove grout is with a grout removal tool, preferably an electric one as it makes the job go a whole lot quicker.

With a powered grout removal tool your grout removal project should take a day instead of three if you used a grout saw or Lord forbid; a hammer and screwdriver.
I saw this method listed as one of the best ways to remove grout and I dry wretched so loudly my wife ran into the room asking if I was alright.
Whatever joker thought chipping away grout with a screwdriver is a good idea needs a serious head adjustment or they never actually removed grout and were just making up filth. Tiles are not bricks, you can’t go in with a heavy hand as all you’ll end up doing is chipping the tiles or cracking them.
Now your grout removal job has turned into a full retiling project.
I won’t even mention that grout lines differ in size with some being so small you won’t fit a screwdriver into them without chipping the tile’s glaze…
Okay, that is enough on that, if you ran across that idea I urge you to never try it and instead, doing it properly.
For a shower regrouting job I would highly recommend you invest in a multi-tool with a grout removal blade.
If you already own a multi-tool then you’ll simply need to purchase a grout removal blade.
If you don’t know
You will need a multi-tool and grout removal blade to attach to it. These links will take you to the lowest prices on the grout removal tools.
If you want to learn about the best grout removal tools and a load of grout removal tips, check out these articles!
I feel the multi-tool with grout removal blade to be the best grout removal tools for regrouting a shower or any area in fact.
It will power through your wall and floor grout no matter how old it is or what type of grout it is.
The mutli tool with grout removal blade is my tool of choice when I am replacing grout in client’s job and I find it to be the quickest and safest way to remove grout from showers (or anything else.)
You can easily avoid chipping the tiles surface along with avoiding cutting into the delicate substrate beneath.
The last thing you want is to cut so deep you damage the waterproofing or underfloor heating placed beneath the tile. With the best grout removal tool, you will avoid those potential problems entirely.
The article I linked about the best grout removal tools also covers other tools for removing grout that you can use if
I discuss the pros and cons of hand tools for removing grout and cheaper alternatives to the grout removing multi-tool.
I would avoid the grout blade you can attach to a reciprocating saw if you were thinking of going along that route.
Since space in your shower will be constricting and you need a lot of control, a grout removing reciprocating saw will make the job much tougher and dangerous than it needs to be.
Plus a trigger on one of those can be fairly drastic will little control between 0-100% power. It also takes a while to bite into the grout making it easy to trace along your tiled surface.
I hope that answers your question and you know more about how to remove grout from a shower.
It really is a simple job if you have the right tools, just take your time with a good grout removal tool and you’ll be done in no time. If you want more reasons to remove tile grout and the advantages, check out my top 4 reasons to remove grout article.

Question 3: “My tiler finished my kitchen floor last week but left an ugly haze on the surface of the tile. It wasn’t there when I got the tiles In-store. Have you got any idea what it is?”
– Hayden G
Carl’s Answer:
It sounds like you have grout haze on your tiles.
It occurs when the grout isn’t cleaned off properly during grouting or not buffed after it had set.

It also could show up if the tiles are very porous and the tiler simply couldn’t remove the grout haze no matter how well they cleaned the tiles.
No matter what happened, you have grout haze and I have the solution to removing grout haze!
Thankfully the magic of modern technology has supplied us with companies that produce grout haze removers.
They are a special liquid or cream you can use that dissolve the grout haze and can leave you with the
Here is a link to a common grout haze remover I use a lot at work, it is easy to work with and safe to use on most tiled surfaces including stone.
I have written a guide to removing grout haze that will tell you how to use your grout haze remover.
Simply scroll to the bottom of the article to find the section you want.
The grout haze remover can be applied by you and it should clear up any contaminants you have on the surface of the tile.
Try to avoid the product drying up on the surface as it could make clean up a bit more difficult, other than that it’s smooth sailing.
Since you have porous tiles in the kitchen I would recommend you clean up any spills or messes quickly after they happen.
That way the spill doesn’t have time to settle into the surface of your tiles and make clean up more difficult.

Question 4: “I have A Small Bathroom Floor I Want Tiled In 24x24inch (60cm) Tiles. My Tiler Says They Will Make The Room Look Small While The TIle Store Says They Will Look Great. Please Help!”
– Courtney T
Carl’s Answer:
I am so pleased you asked for a second opinion before taking the plunge and buying a tile!
Big thumbs up to you Courtney and I am pleased you asked.

In this situation both the tile shop and your tiler are right, however, I am leaning more towards your tiler as the right opinion.
I have laid countless square feet of large format tiles with the most popular size being the 24x24inch (60cm) tile and understand how they work and make a room feel.
A small bathroom with such tiles will look small, no matter what way your tiler sets up the tile. If you are very lucky you will get one full-size tile in the whole entire room whilst everything else will be cut.
Either in half, a quarter or cut around numerous objects like the toilet, cabinet (vanity), shower, bathtub etc.
Since you won’t have many or any full-size tiles in the bathroom it firstly makes getting such big tiles obsolete and a waste. The point of such tiles is to enjoy the effect of their size and get a clean look with minimal grout lines.
Why get them at all if their effect is ruined by getting cut to fit the room?
Not only that but since the bathroom will be about 1 or 2 tiles wide (plus any cut tiles) your eyes will immediately pick up on this upon entering the room.
With only a few tiles on the floor, it will make the room look even smaller than it is and this is the last thing you want, especially if this is your master bathroom.
Another trait of these tiles is the ultra-modern and, dare I say, sterile look they give to a room. If you enjoy modern architecture with big blocks of unobstructed
(I am describing skyscrapers not tiles) then they’re for you otherwise I would avoid them.
Of course, looks are subjective and everyone has different taste so take this as you will, however, this is the general aesthetic these tiles give off.
If you have an older home then I would definitely avoid going for such large format tiles as they will stick out like a sore thumb and detract from the features found in the rest of the home.
You can get these tiles in warmer tones and with some patterns but even that won’t help them fit into every situation.
Large format tiles work great in large open spaces, where you can enjoy their esthetic properly and enhance the visual size.
Large spaces benefit greatly from large tiles as they declutter the sightlines and add the additional benefit of easy maintenance due to lesser grout lines over traditional tiles.
It’s when you mix these large tiles in small areas where the benefits turn into issues.
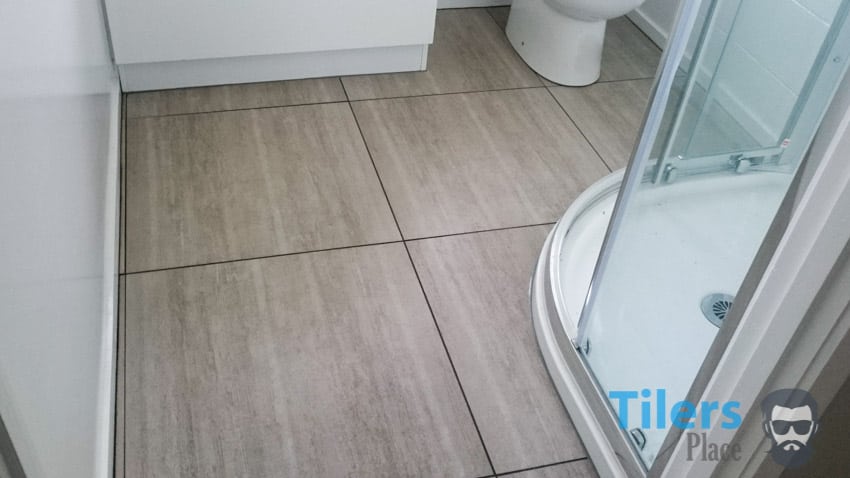
Here are some examples of situations where the large format tiles were a poor choice.
I have had many instances like this where I warned the homeowner that the results will be much worse than expected yet they listened to the store’s advice instead.
Without surprise, the common response after the tiles were set was that of surprise and disappointment.
“Oh…I thought the bathroom would look bigger…”
“I should have listened to you.”
“There isn’t one full tile on the floor? Why?”
No, this isn’t dramatization for my benefit but real instances I remember. Our minds have a bleak tendency to remember bad things better over good ones, so I remember most of the jobs in which my clients were ultimately disappointed.
During the design process, I explicitly stated to avoid large format tiles and explained to them why this is.
Most of them agreed and said they’d go for tiles smaller than 24inches and head out to find a tile.
You know what most of them did?
They ordered 24x24inch tiles….
Just try to imagine my frustration when I come to the job site and see a stack of those things waiting.
It’s like that whole talk never happened and my professional opinion and experience means nothing. Of course, I question the homeowner about it and 99% of the time they say the tile store said: “24’s would look great and modern…”
My feelings are irrelevant in all of this as I am just hired help but I need to mention one thing in this situation.
So there’s more trust in someone that sells an item in a store over a trained and qualified professional who works with the things they sell on a daily basis.
Someone who has seen countless jobs and situations in which the salesperson can only imagine yet their opinion of a sight unseen bathroom is taken with more gravity.
This is just an example into why the tile choice could have been wrong for the space it was chosen for.
I am not saying all salespeople are wrong or that all tilers are right as no one is perfect and everyone can make mistakes.
What I want you to take from this is that if you are unsure, or getting conflicting advice like a homeowner will commonly get, do as Courtney did and ask for other peoples opinions.
Post a photo of your area to be tiled on a home renovation blog or social media, ask the community what they suggest or better yet just asked another contractor.
They see as many bathrooms and homes as a tiler does and they might offer an informed opinion on the matter.
At the end of the day, it’s your tiles and your home so go with whatever makes you happy and that you will enjoy.
Get the advice, get the opinions and make an informed decision based on that.
Now that’s out of the way I want to help offer some suggestions as to what kinda of tiles could be suited for a small bathroom.
You could go with the usual square tile in a size like 12inches (30cm) or a rectangular tile in 12x24inches.
It is a modern look tile if
Whichever way you lay them should be decided on you as they are not any strict rules as to what you should or shouldn’t do.
For an older
The abundance of tiles will make the room appear to be bigger and any cut tiles near the edges will be much less visible.
Lastly, you can hire the help of an interior decorator/designer who can work alongside your tiler to come up with the best tile for your space.
Not only will the tile be of right spec and suitable to do the task thanks to the tilers advice, the interior decorator will make sure it suits the style of you and your home.

Question 5: “Do you know of any tool or method to remove 12 x 12 porcelain floor tile WITHOUT DAMAGING THEM?
I have 6 cracked tiles in my kitchen. The tile is obsolete and I can
– Joe G
Carl’s Answer:
You have a classic scenario many homeowners run into with tiles, I actually have something similar going on in my own kitchen.
How to remove tiles without damage is an
In theory, there is no way of removing tiles cleanly without damaging them due to the thinset (tile glue) covering the whole entire surface area of the tile.

It suctions the tile down making removing the tile impossible without the tile breaking.
However, there are instances where you can actually remove a tile without damaging it but this all depends on how poorly the tiler installed the tiles.
If the surface was badly prepared or the thinset used was of the wrong type, the tiles will actually lose their adhesion to the floor making them easy to pull up. Usually with the thinset stuck to their undersides.
In that case, a simple angle grinder with grinding disk can be used to remove the thinset and allow the tile to be installed again.
You can do a quick check if your tiles can be pulled up without damage. Give them a tap with your knuckle, if they sound hollow that means they are losing adhesion and could be removed if enough surface area has lifted.
If you get a sound similar to tapping a solid surface that means the tile is holding very well and the only way to remove it is by chipping it away bit by bit.
All I can recommend for you to do is try to remove all the grout from one of the cupboard tiles down to the thinset.
I believe you would have seen the articles I have written about this so that shouldn’t be too hard for you.
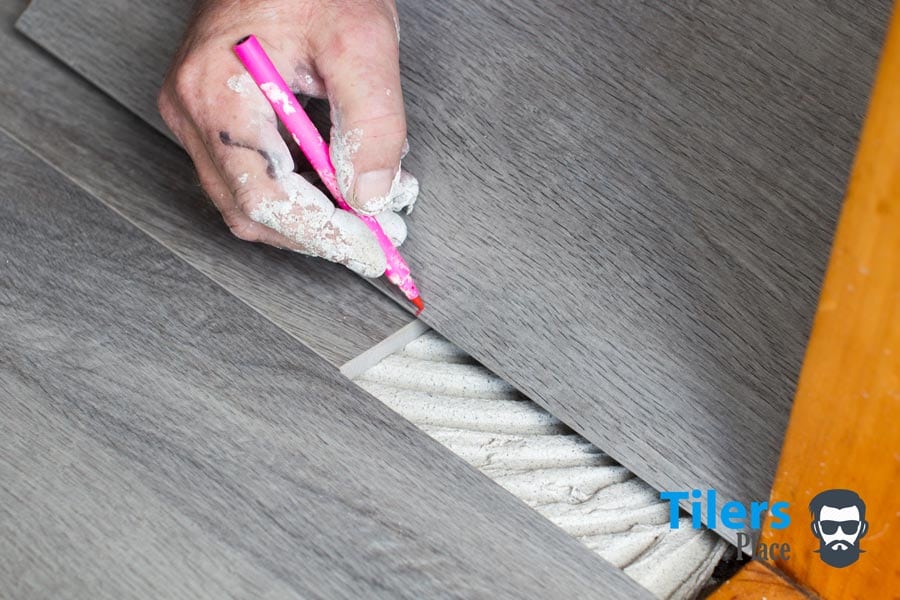
Once the grout has been removed you can attempt to lift the tile. You can use a paint spatula or similar tool like the one here.
Flat trowels that are stiffer also work well as they are thicker and offer more leverage.
Slide the spatula underneath the tile and try prying it upwards, you will instantly tell if the tile can be removed or not.
If you are lucky you can slowly work the tile out and lift it free from the thinset.
Unfortunately, there isn’t an actual proven method of removing properly installed tiles without damage as it’s the nature of tile and it makes scenarios like you are facing very frustrating.
If your tiles are held down properly and do not want to lift free from the mortar all I recommend is a quick remodel of your kitchen tiles.
This meaning you can remove the central tiles and leave the existing tiles all around the borders to create a frame.
Then tile the removed area with a tile completely different to the existing one, that way it will look like a design feature and look very natural in comparison to finding similar tiles and doing a patch job of the damaged tiles.
Just remember to find tiles that are of similar thickness to the old tiles so you have a flat surface area between old and new tiles.
I have done this plenty of times and it looked great, it’s not an ideal solution to what seems an easy job but its much easier than retiling the whole entire kitchen area.
I hope that gives you something to go on, sorry I can’t be the bearer of better news for you.
Sadly even professionals do not have a solution to this if the tiles are properly installed. If you need to go the traditional route, my article on how to replace a cracked tile will walk you through the whole process!
That concludes the first ask a tiler question and answer session!
I hope you enjoyed learning more about tiles and seeing what other questions fellow homeowners and tile enthusiasts have about tiles and grout removal.
I would like to thank the featured guests for their questions and happy faces that helped brighten up my website.
If you would like to have your own question answered or want to know more about what I covered here today feel free to dropping me an email or a comment below!
It might even get featured in the next Ask a Tiler segment!
Thanks for reading and remember to share this article





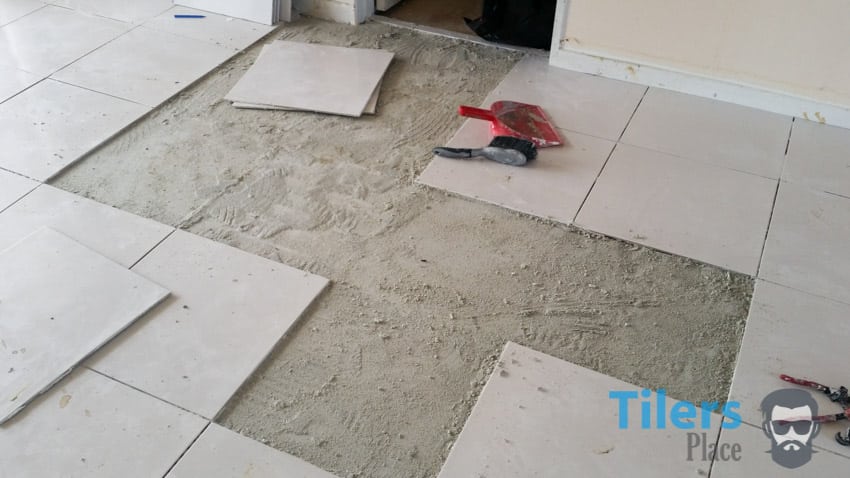


What is the best way to remove shower tile (4×4) from shower without breaking them, to possibly reuse. Thank you
Hi Lisa,
Oh boy, that is a very tricky one and my first instincts tell me it’s impossible. However, I have had experience where whole tiles have been removed from showers before, so I will share what I know.
I can give you a few ideas on what to try but if the tile installer used proper methods and materials, the tile might be impossible to remove without damage to it and the waterproofing substrate underneath.
Firstly, since it is a wet area, try standing on the center of the tile and see if any water escapes from around the grout lines or making a sucking/wet noise.
If you hear that it means the tile has lost full adhesion or at least part adhesion and could be lifted without damage if enough of it is loose.
You can also try knocking on it with your knuckle. If it sounds hollow, that is also an indicator the tile is loose. If it sounds like you are knocking on solid concrete then the tile is sitting firmly.
Lastly, the only other thing is to actually try lifting the tile.
To do this you will firstly need to remove all the grout from around the tile. I have written a lot about grout removal tools that you can read here if you wish.
Since you’ll be only removing one tile then a cheap grout saw like this one will be adequate for the job.
With the grout removed, try sliding a paint spatula underneath the tile and gently prying upwards. (Be careful not to chip the tiles around the one you are working on. You can put some masking tape on the surrounding tiles to prevent the spatula from damaging them.)
Try doing this at all points of the tile to see if it’s loose. Sometimes you will get lucky and it will pop right off since it’s lost adhesion to either the glue or the glue has lost adhesion with the substrate.
If it won’t budge then sadly there isn’t anything else you can do without risking damaging the waterproofing underneath and the tile.
In bathrooms and especially showers I am always extremely hesitant to remove any tiles as most of the time the waterproofing will come right off along with the tile and if that happens it’s game over. The waterproofing has been compromised and we can never guarantee the waterproofing will be 100% watertight after a patch-up job has been done.
So my advice is to gently test the tile as I suggested and see what happens. If it is sitting solidly then consider not touching the tile at all as it can open up a whole can of worms that you won’t be budgeted for. (Think full redo of the shower.)
I’m sorry I can’t be of more help but that is just the nature of tiles. Once installed they generally can’t be removed cleanly again. Joe G asked a similar question and you can read my reply in the article above.
Thanks for reading and all the best.
My tiler used thick grout as a top edge to the bathroom tiling. He did not leave a smooth finish and my husband has since painted over it in a bid to improve the finish. Needless to say it looks a mess. How can I remedy this.
Hi Anne, thanks for the question.
I have thought quite a bit about your problem and firstly, your tiler deserves a slap on the wrist for doing that. Finishing the top edge with grout is something that pretty much died away in the 90’s. Nowadays we finish off tiles with a chrome strip, thus hiding the ugly raw edge of the tile from being seen.
Unfortunately, any remedy for this issue isn’t easy. At least from my limited understanding of the particular problem.
Obviously the best option would be to remove the ugly grout and apply a new coat that is much smoother and to your liking. You’d have to be careful not to damage the drywall and tiles though.
With the tiles already dry, adding a chrome strip at this point would be very difficult as it needs to slide in the gap between the wall and tile – so this option is not viable for you.
Sadly I can’t give any serviceable advice for this situation as the damage that has been done is now hard to remedy without extreme action. You can try send some photos to another tiler in your area and ask his opinion on it, he would have a better understanding of it and might suggest a cheaper solution for you.
Sorry I couldn’t have been of more help, thanks for writing in and I hope you get your problem resolved soon!
Hey! Love your in-depth tutorials! I really wish the people who we bought our place from would have followed them when they redone the bathroom (haha!)! However, that wasn’t the case and now we’re stuck with cracked grout that is falling out, clogging up our bathtub now. My first thought is they failed to seal the grout in the tub/shower. My second thought was why in the world did they grout the corners?? As a carpenters daughter and having helped build 3 personal homes while growing up you can safely assume I’ve helped in all aspects of the building process. There’s where the problem lies, I helped. I did what I was instructed to do. I didn’t ask “what’s this stuff I’m filling the cracks up with”, or “why should I have a wet finger” LOLOL!! I guess that’s what you’re here for today 😉 Beings the previous DIY’ers didn’t properly seal the grout and put grout in the corners causing it to fall out, should I remove all the remaining grout around the edge of tub and just silicone/caulk it up? Or what are your suggestions?
Hi Amanda!
Thanks for dropping in and brightening up my corner of the web with your great attitude! Love the recollections about you building past, really great to hear you pitched in and learned how our homes are put together!
I gotta say, you nailed down the problem already!
You are 100% correct about using silicone around the joints of the tub. Tubs, tiled shower walls and any corners are known to move and since grout is a solid compound – the moment it feels movement, it cracks, crumbles and ultimately falls out. Even if it was sealed, it’d still happen. Why the previous installers used grout in those corners is beyond me, but luckily you will now fix the problem and it won’t happen again! 🙂
So yes, remove any remaining grout you have in any gaps that are crumbling. Like the gap between the tiles and your tub and if your tub walls are tiled, remove the grout in the corners as well. Then use a 100% silicone to seal those gaps up. Make sure to use silicone – not caulk. Caulk is known to deteriorate much faster, it shrinks and it’s flexible properties are laughable at best.
A nice silicone will seal up those joints, make them waterproof and also withstand any movement.
Here’s a pro tip:
Can you feel your bath move when you get into it? Do you feel any movement at all?
If you do, that means the tub isn’t seated properly and can make your silicone job a failure. You see, you’ll be applying the silicone while the tub is empty of water so the bead won’t be as thick – but what happens when you fill it up with water, add the rubber ducky and yourself into it? It’ll shift down with the weight, possibly tearing the new bead of silicone as the movement will be too great.
So what do you do?
Simply fill the tub with water and THEN apply your bead of silicone. Leave the water in and give it a few days to cure properly. That should prevent any movement damage. The silicone will be able to move with the bathtub, it can compress as well as flex.
I hope that helps, lemme know if you have any queries!
All the best with the silicone job, I know you’ll nail it!
P.S Don’t forget to get your finger wet ;-P
Carl
Hi Carl,
I am towards the end of a floor tiling effort in a small complex of rooms in my master bedroom’s bathroom. The bathroom “area” that;s getting a tile floor has a small entry hall, a toilet room, a smallish closet, and a walk-in closet. I decided to lay the tiles (12×24) at a diagonal that matches the angled entryways into the toilet and walk-in closet. So far, everything except the walk-in is done. The problem is that the set tile runs up to the threshold and it is not clear whether I should work my way back from that hard edge into the closet, or start from the far corner of the closet and work back to the door. Working from the hard edge at the door would more or less ensure that I get consistent grout lines but it will back me into the corner with no way to get out! Working from the corner back to the door will be better in that regard, but it runs the risk of “missing” when I get to the hard edge. This said, my plan is to do the latter: work back to the door from the far corner. I have cut and laid out the all the tiles, with spacers, the marked the floor around each tile so I know where each tile is to go. In principle, this should work, as long as I get every course correct as I go. But with a 1/16″ grout line, I don’t have much room for error.
Can you comment?
Many Thanks,
Barry
P.S. Very nice and informative website!
Hi Barry,
You don’t really need my advice here, it sounds like you got it all figured out already! 🙂
I believe you have the right idea with your second option. Work back from the corner and just take care and ensure you are following those guides you drew yourself. I’m not sure if you will have enough room, but sometimes I leave myself a single row of tiles that aren’t glued down. I place them dry and glue in all the others, this gives me a path I can walk on and access tricky spots. Once I have done everything, I go back and glue them in.
Good luck with your project, from reading your comment I am confident you got this!
Thank you for dropping by my site and leaving a comment!
I have had a leak in the bathroom and 3 tiles needed putting back down. I have cleaned them got as much of the old tile adhesive is up as possible 2 of the tiles have gone back down great the 3rd unfortunately has not. I have used the same adhesive for all 3. Any suggestions would be grateful please.
Hi Anne,
How thoroughly did you clean the old adhesive and grout from the reused tile and from the floor?
In order to get the best fit, the two surfaces need to be completely clean of any bits of adhesive. That means the floor and the tile. Usually old grout is stuck to the sides of the tile and can cause problems fitting back in. Did you clean that off as well?
If you are having problems getting the third one in, I’d concentrate on cleaning off any of the old adhesive and see if that works. For jobs like this, I use a masonry grinding wheel on an angle grinder. You can also use a diamond scraper attachment on a multi-tool. It’s slower but safer to use.
It may also be that your wooden floor has swelled up from the leakage and is warped, causing the tile to not fit right. I sincerely hope that’s not the case as it’s a major job.
I hope that gives you some ideas, please let me know if you have any further questions.
Carl.
I just finished installing tile on a bathroom wall over the top of hardie board that had been waterproofed with red guard using Mapei Type 1. After finishing I noticed that Mapei recommends that their product not be used over waterproof membranes. Any suggestions? Do I need to rip it out and start over?
Hi Brent,
Unfortunately you used a pre-mixed Mastic type glue that is not recommended in wet areas. This is due to mastic being susceptible to dissolving when water is introduced to it. If your bathroom wall isn’t in the shower, then it should be okay. Maybe as a precaution you can seal the grout to help prevent any water getting behind there. If you want to retile it, I’d do it as soon as possible before the Mastic hardens fully. You should be able to scrape it off and reuse the tiles.
Hope that helps.
My contractor added bullnose to the top of the shower and it’s sticking out because he added the bullnose over the top row of tiles. It looks wrong to me and he said it’s a “cap” – i think he’s playing me because it’s a mistake. The bullnose is slightly angled because of the fact that the top row of tile didn’t go all the way to the ceiling. If i had known that it would look like this I would have ended the tile about 12 inches from the ceiling. He said it was also because my ceiling was crooked. Idk. I don’t like the way it looks but it’s too late and will cost me $ to change it.
Hi Lynn,
Sorry to hear you are not happy with the tiling you had paid for. What exactly is your question? Maybe I can be of assistance.
We had the bathroom refitting over 2 years ago. We have been experiencing a recurring issue with water leaking through the gap between the bath tub and the tiles. Next to the bathroom is a bedroom, and we have seen the water leak through the wall and the flooring in the next room. We have just been resealing the gap with silicone, however, it’s got to the point where we want to have a permanent or at least a long term solution as after a while the silicone doesn’t hold and starts peeling a bit.
We would love to be able to use the tub for a bath and not just a shower, however because of this issue we worry the weight will make the gap bigger.
We have had a half moon acrylic seals placed where the gap is, but we still have issues with the sealant peeling.
Are there any permanent/long term solutions to this?
Thanks in advance Carl!
Hi Vanessa,
This is definitely a concern! There shouldn’t be any water coming through the wall, especially after refitting the bathroom only 2 years ago. Was any waterproofing done before tiling was started?
Ideally, the best solution would be to redo the whole entire tub area, strip it all back, waterproof and retile. Obviously that’s very expensive and I doubt you’ll be willing to do everything again after only 2 years.
One solution that may help is with silicone. Fill the tub up with water so it sits as low as it would when someone would use it. Then silicone the gaps as usual. That way the silicone will properly fill the gaps and flex with the tub when it’s emptied and filled. I’ve done it in the past and it’s worked well. Hopefully you’re tub doesn’t have a huge amount of movement when it’s filled. (It shouldn’t, but you never know!)
Hope that helps and give you something to go on. It’s the only thing I can recommend that could work in this situation apart from a full redo.
Thanks for visiting!
We recently purchased a new home and had to have the kids bathroom shower re-tiled about 6 months ago. We chose glass tile. The tile has now all started cracking and some look like bubbles under the tile. Should the tiler have warned us about using glass tile prior to completing the job? We wanted to put a shower door in as well only to find out after the job was complete that you can’t put a door on glass tile. If we would have know this we would have chose a different tile. Very upsetting as we were on a budget and know stuck with a new home with a horrible tile job.
Hi Tania,
Sorry to hear about the situation you are in.
I’m loath to provide an opinion against someone if I don’t know the full story. This is a tricky situation. The cracking and bubbling of the tile may be from inferior quality tile or from movement from the wall itself. It’s a strange situation as I’ve never heard of glass tile doing that in a shower. Have you had another professional tiler have a look at it?
My house was built in the 60s so there’s wood paneling everywhere (3/4 in wood paneling). I want to tile my kitchen backsplash, so what do I have to do so the tile doesn’t break off when the wood keeps expanding and contracting? The cabinets are built in place so removing them to take the wood paneling down is not an option.
Your three options are: get a multi-tool with wood cutting blade and cut around all the cabinets to remove the wood panelling.
Install cement board on top of the panelling. Be aware that the added thickness will mean the screws for the electrical sockets won’t be long enough amongst other things.
It’s not recommended to tile directly over wood due to flex and tile adhesives not being made for it.
Your best option would be to hire a professional to inspect it and go on their advice. I can only state general advice without seeing it personally.
I redid my shower with Starlike EVO grout. It’s a corner stall shower with tile on two walls, a shower enclosure on the other two, and a fiberglass pan with two weep holes.
The shower is leaking on only one side, through the floor into the room below. I’ve tried using silicone along the bottom edge of the tile, where it meets the pan – plugging and un plugging the weep hole. Nothing seems to solve the problem.
Can you help?
HI Caroline,
Was the shower leaking before you did the job? Or did you use the Evo grout to try repair the problem?
LOVE your site and that you’re willing to share your tiling knowledge with the rest of us! My hubby decided he could replace our shower/tub combo and tile. Cut out the old wall with the tile on it and hung schluter boards. The tub I bought has a lip so he used shims to push the board over the lip. Now with the schluter board and tile, the edge sticks out almost an inch beyond the old drywall. I’m sure something could have been done differently, but do you have any suggestions on how to cover this huge edge? Thanks again for your help!